![]()
As I received the car, the interior was a little shabby. The interior panels were a cheap, home-done replacement, the seats were tired, and the dashboard was completely wrong. Since the interior is a focal point of the car, all this had to be fixed.
Click on any picture to see a larger version in a new window.
The seats actually weren't too bad, possibly restorable, but some of the wood in them needed help. The interior panels, however, were not acceptable and the top and sidecurtains had reached the limit of their lifetimes. The dashboard was a home-made mess, and the carpets were just dirty pieces of carpet material.
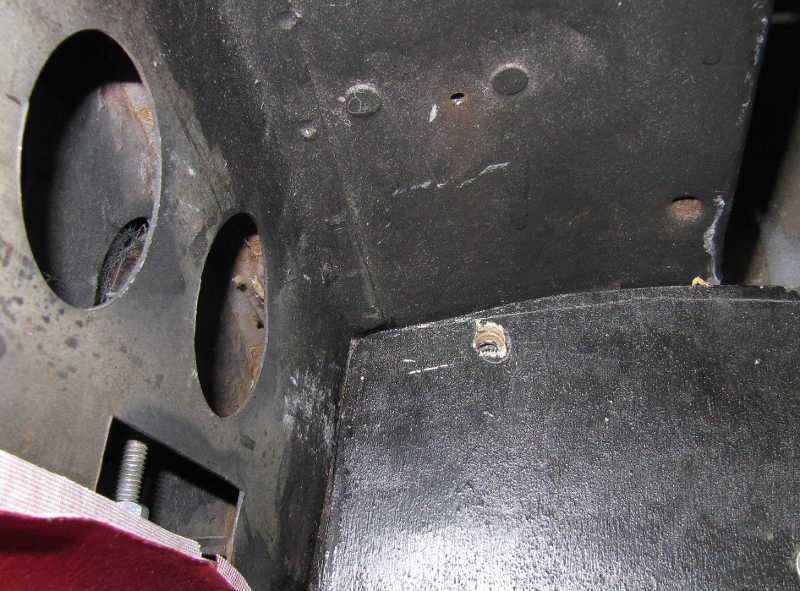
The footwell was disturbing, to say the least. The wood floors were not in good shape and were not bolted down.

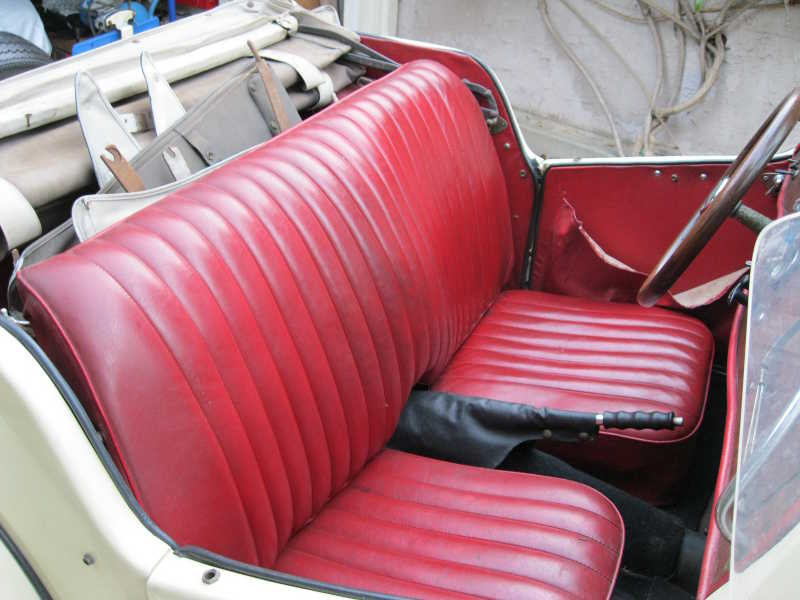
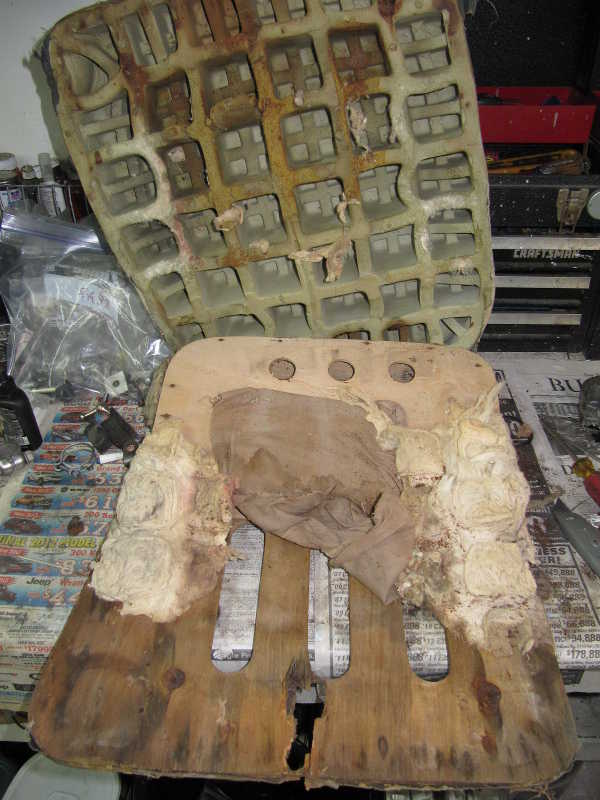
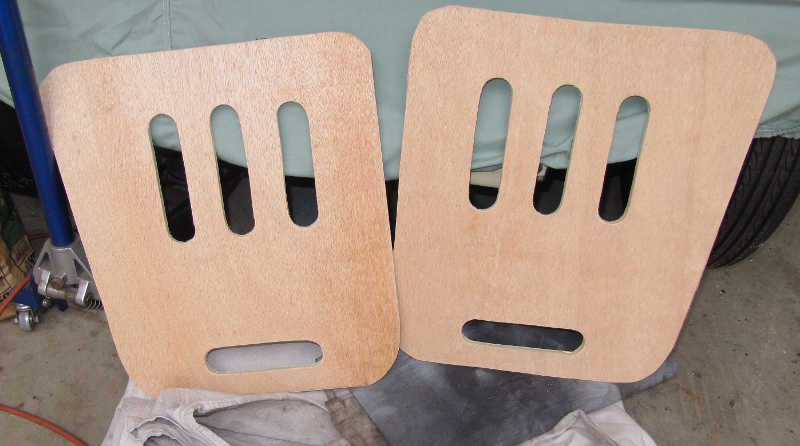
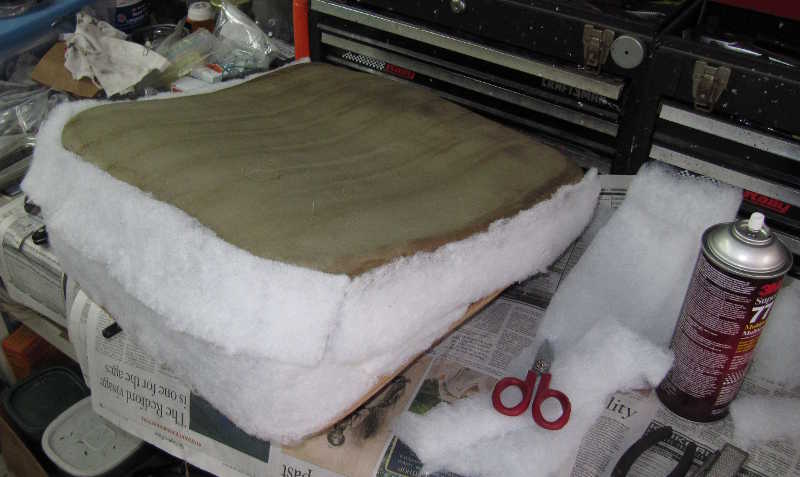
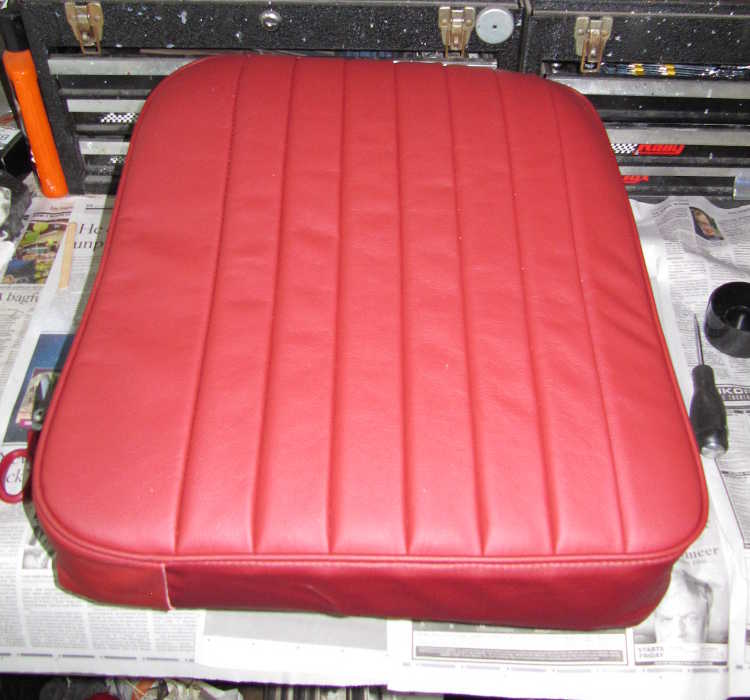
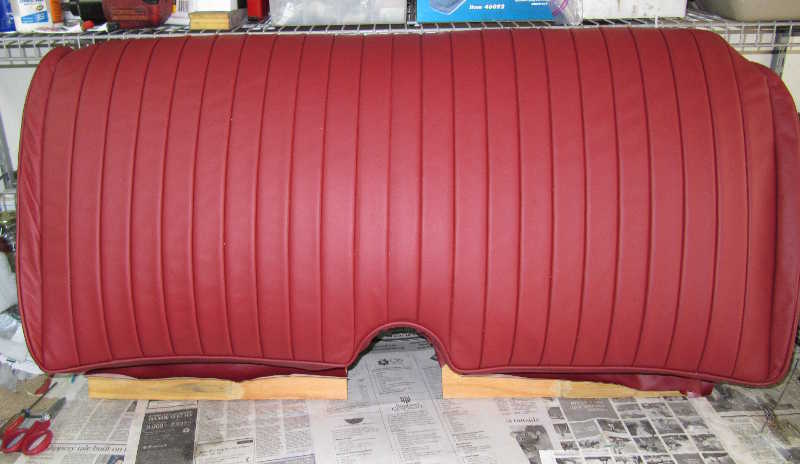
The seats didn't look too bad, externally, and for a while I considered just cleaning them and giving them a coat of vinyl paint. I'm glad I didn't, because they had some serious internal problems, primarily wood rot. The new seat covers are leather. They are a muted shade of red; I think they look much better than the more commonly used bright red.
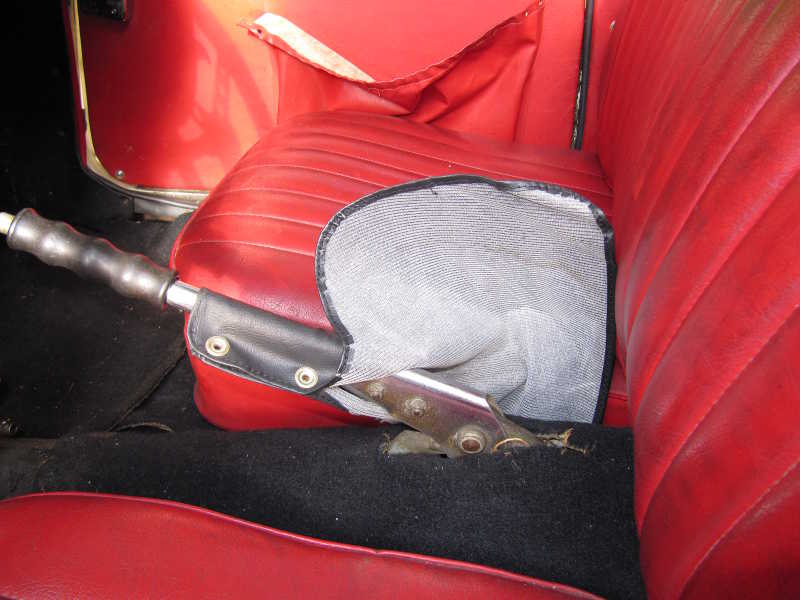
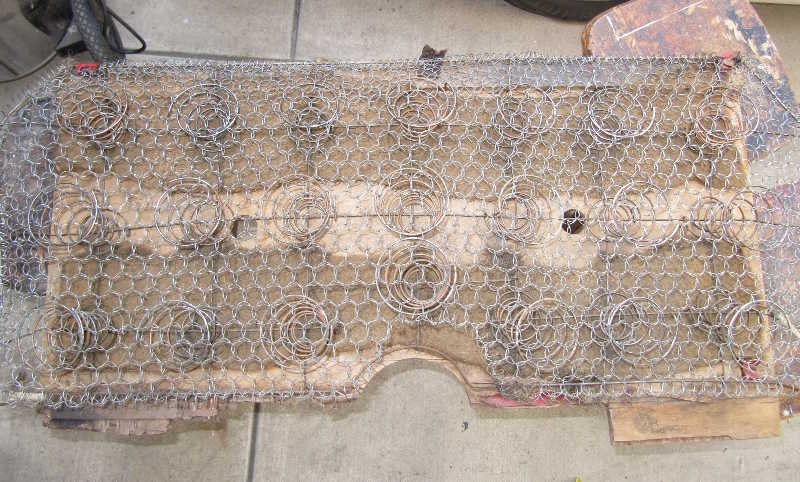
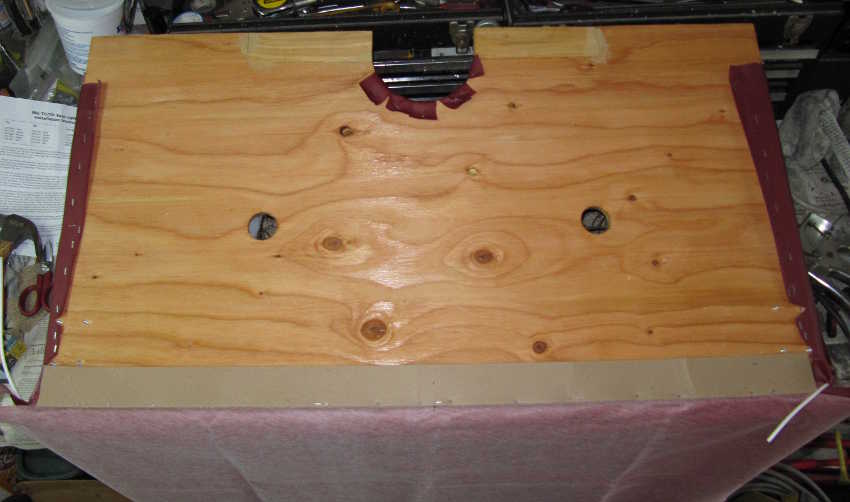
Taking the covers off the seat bases, I found the remains of some black seat covers underneath. The foam pads were not in bad shape, so I was able to reuse them. The wooden frame consists of a base and what I'll call the ramp. The bases were badly rotted in places, but the ramps were OK.
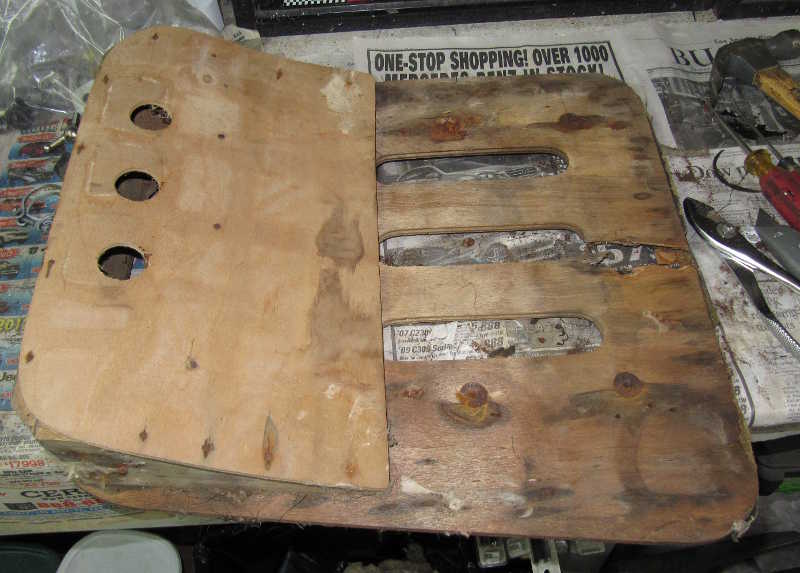
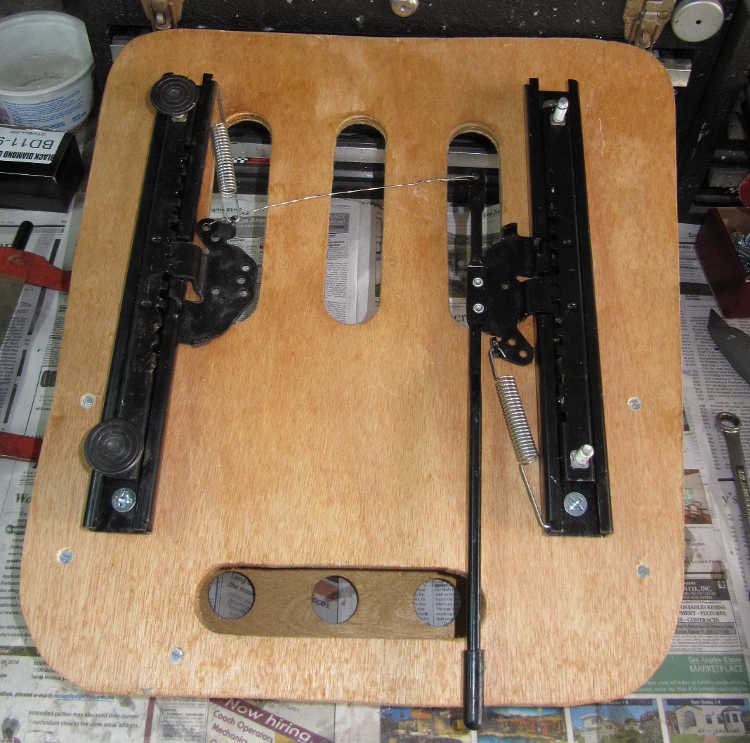
The ramps were held together mostly by nails, but they also had screws in the corners. I didn't try to remove the old screws and nails, as it would have damaged the wood, so I just left them in place. I added some screws to give it a little more strength (the thing is sat on, after all), and I glued some parts where needed.
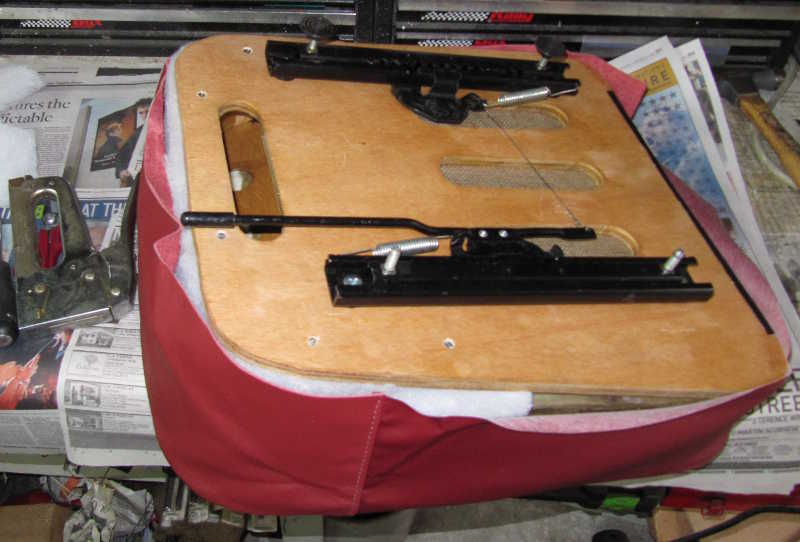
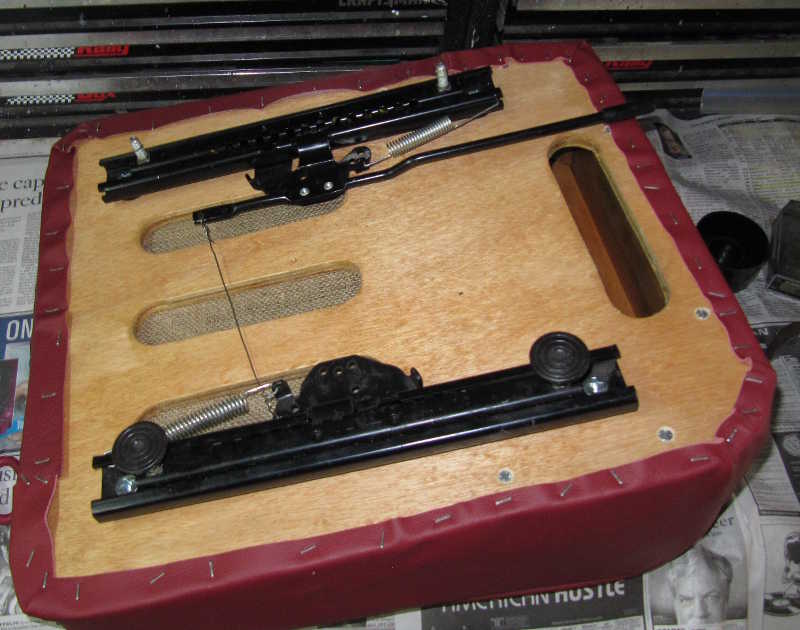
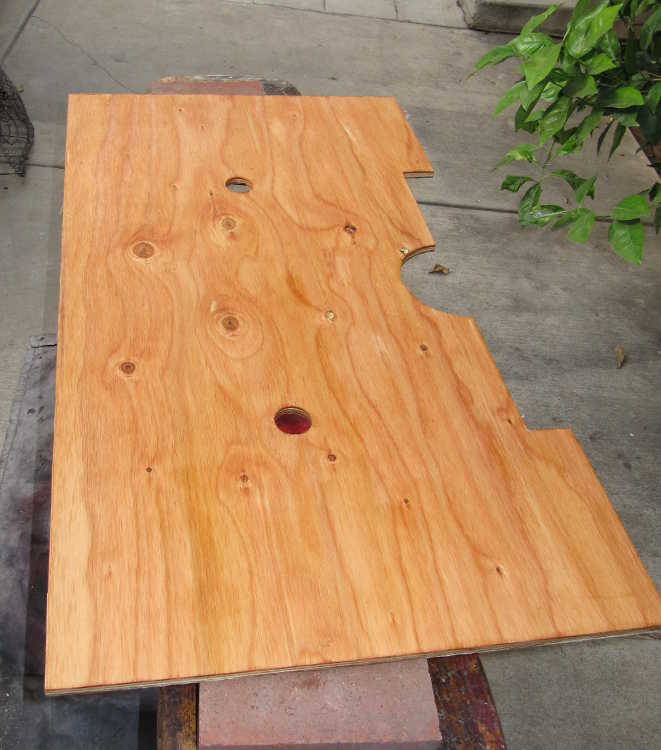
I used one of the old bases as a template and made new ones. All these parts received a couple coats of varnish before reassembly; that should prevent them from rotting, as the originals did. Once the varnish was dry, I installed the ramps and seat slides. The slides are generic, but better quality than the original type. Installing them is a little tricky, as it's important that they be precisely parallel.
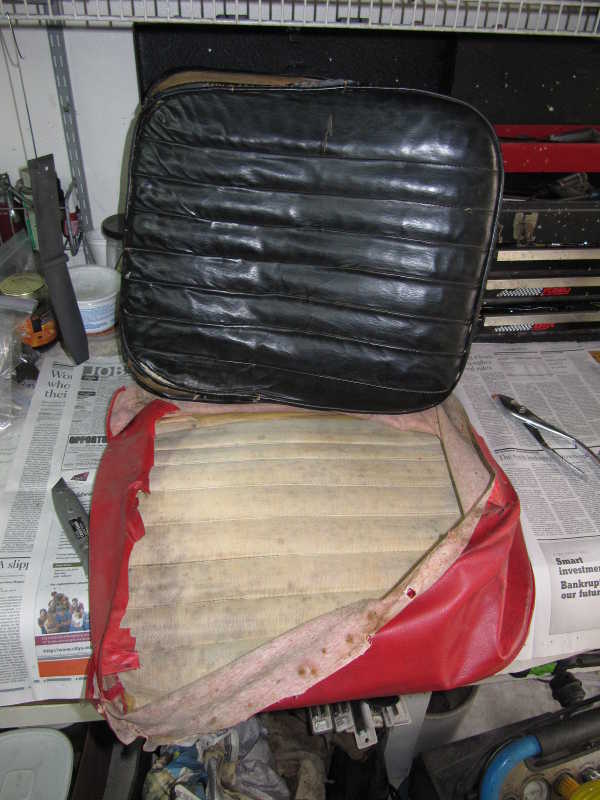
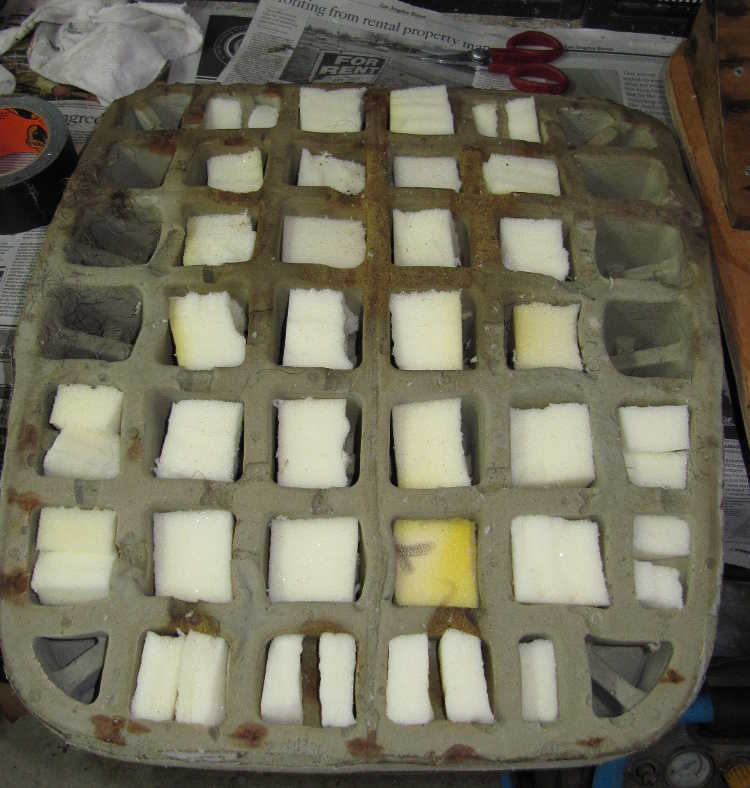
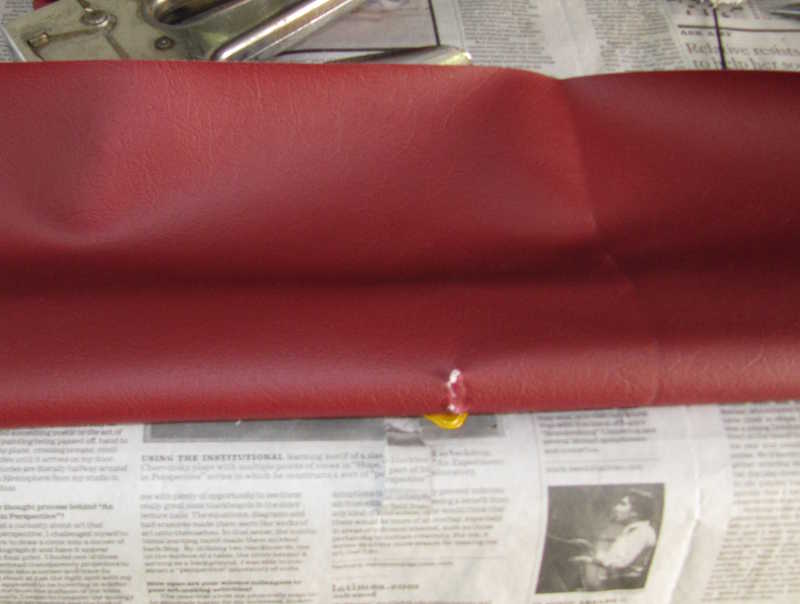
The seat cushions were not pretty, but they were functionally adequate, so I reused them. Assembling the seats was not difficult. I filled the pockets on the undersides with foam so the cushions would be a little stiffer, then taped them to the frames. I wrapped the edges with Dacron padding; without this, the sides wrinkle easily. Some people recommend a layer on top of the cushion too, but, with these covers, there just wasn't room. Finally, I attached the seat covers. I used stainless steel staples to attach them to the bases.
In my opinion, the hinges on the backs of the seat bases are underdesigned. They support the weight of the seat back, and in almost all the pictures of original seats that I've collected, they have torn loose and allowed wood rot to set in. I added cross pieces to strengthen them. I used washers under each cross piece to compensate for the thickness of the hinge.
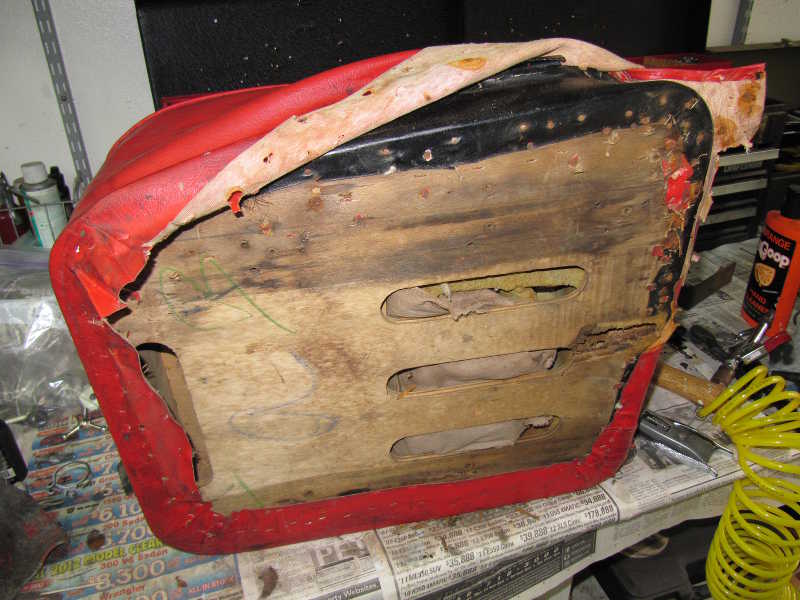
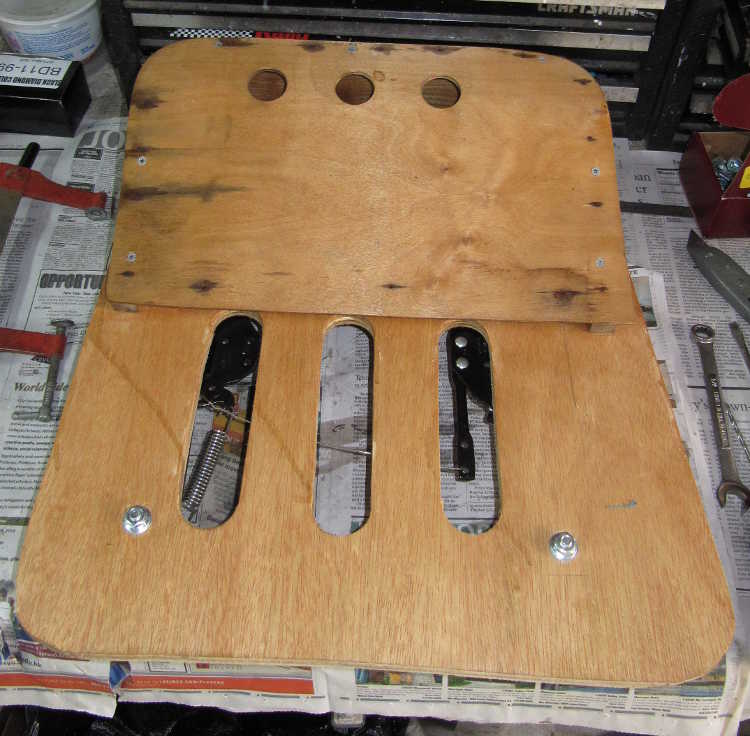
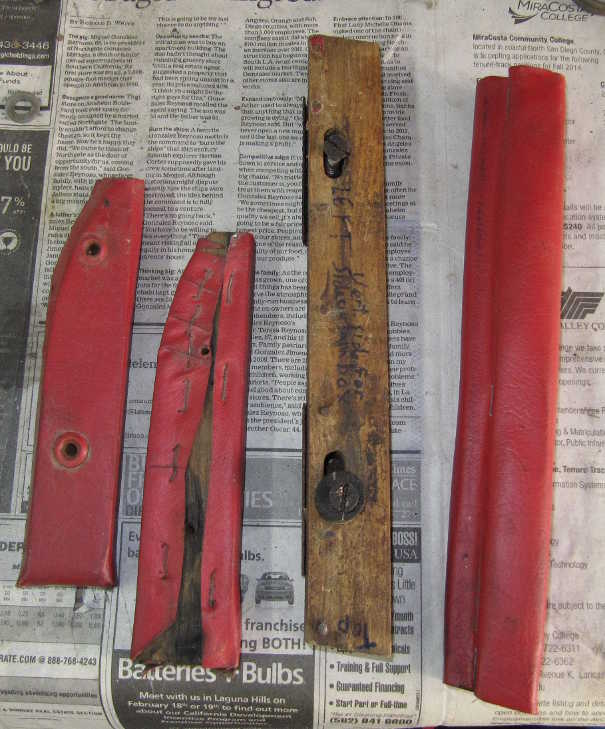
The rear cover on the seat back was held on by large brass tacks. On removing the cover, I saw that the seat back was rotted near the bottom. It wasn't restorable, so I had to make a new one.
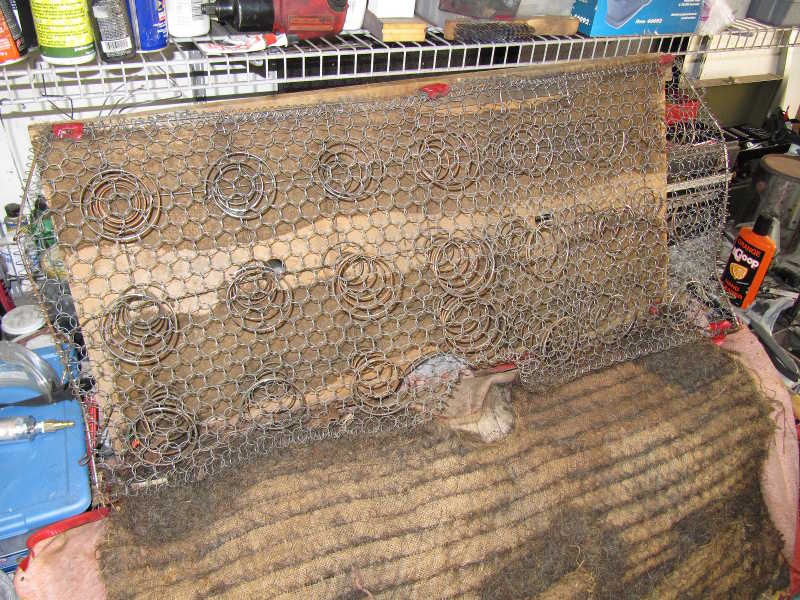
The seat has a kind of box spring covered by a horsehair and burlap mat. The pads under the springs were made of some kind of cotton. All these materials had to be replaced. The springs needed some minor repair but were otherwise in fine shape.
I have noticed that TD seat backs always seem to be depressed where the driver and passenger contact them. I always assumed that this was caused by sagging springs, but it turns out that the springs in those areas are shorter than the others. Apparently that depression is intended.
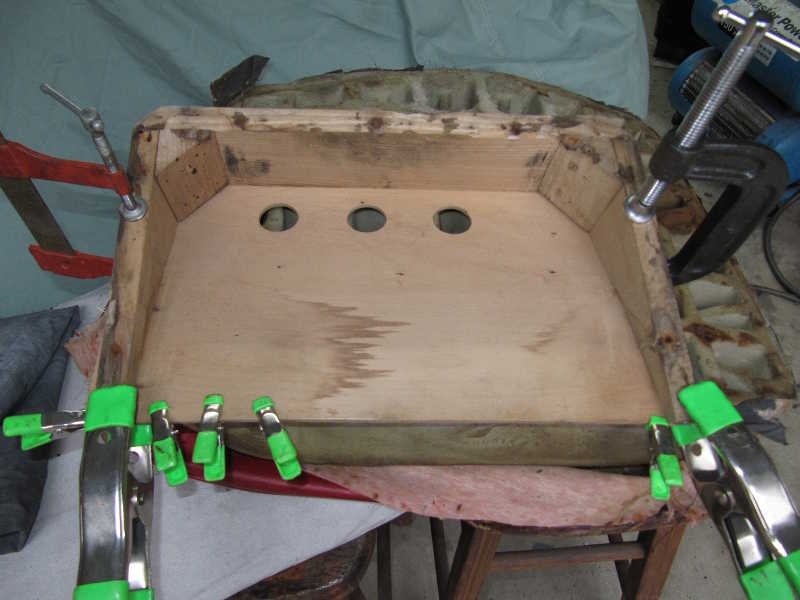
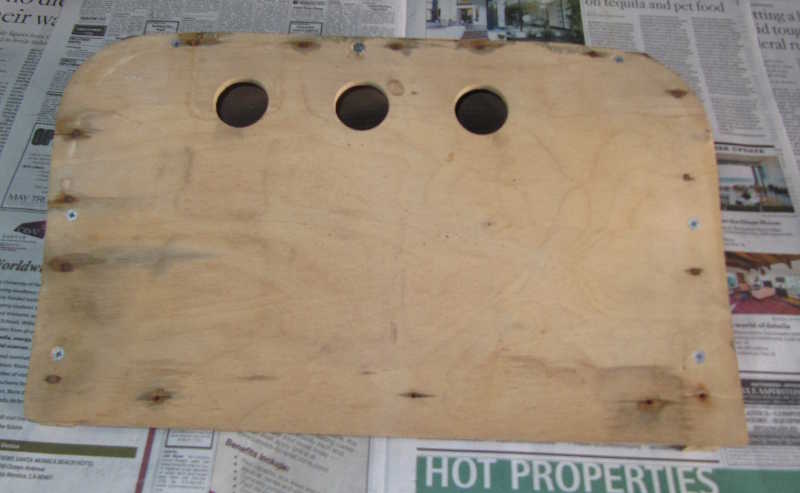
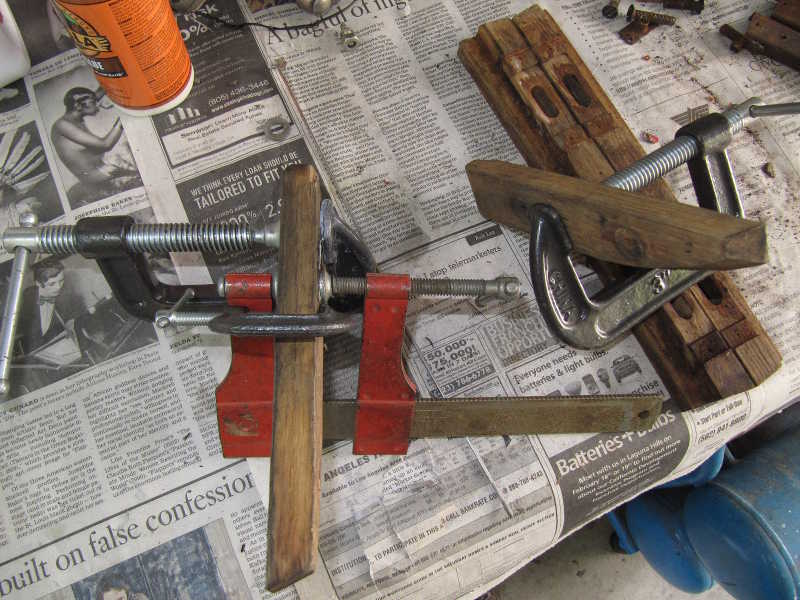
I cut a new back from half-inch plywood using the old piece as a template. I saved the hardwood strip along the top for reuse. I later discovered that the cutouts near the base were not correct; apparently they were made later, probably to remove rotted wood. I glued and clamped new wood pieces into the gaps; I used a good quality hide glue, which, when applied properly, is stronger than the original wood. The repair is visible in some of the later pictures.
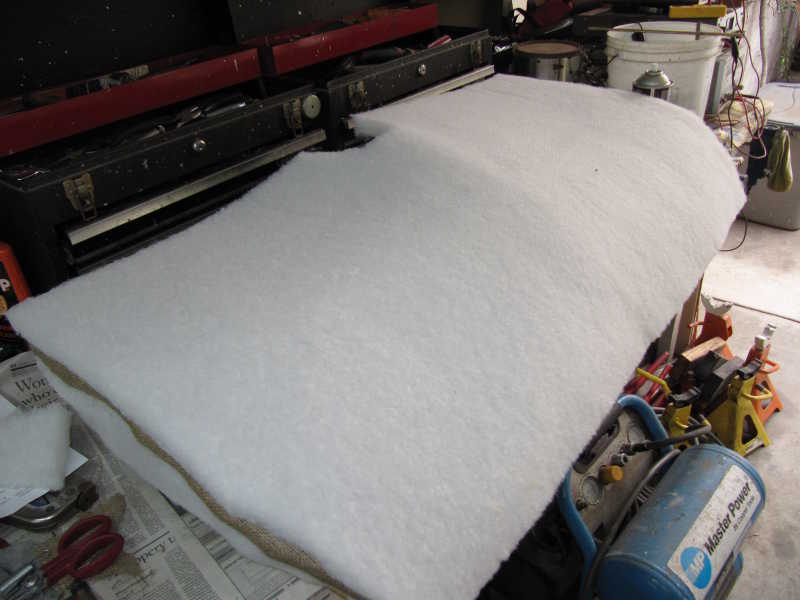
I put layers of soft Dacron under the springs to replace the original cotton. I'm not sure what that does, but I assume it was there for a reason; perhaps to prevent rattles. After some minor repairs to the springs, I reinstalled them, covered them with burlap, and finally a Dacron pad. The pad is denser than the fill material; it's a nice material, designed to substitute for the horsehair padding that was common in older furniture.
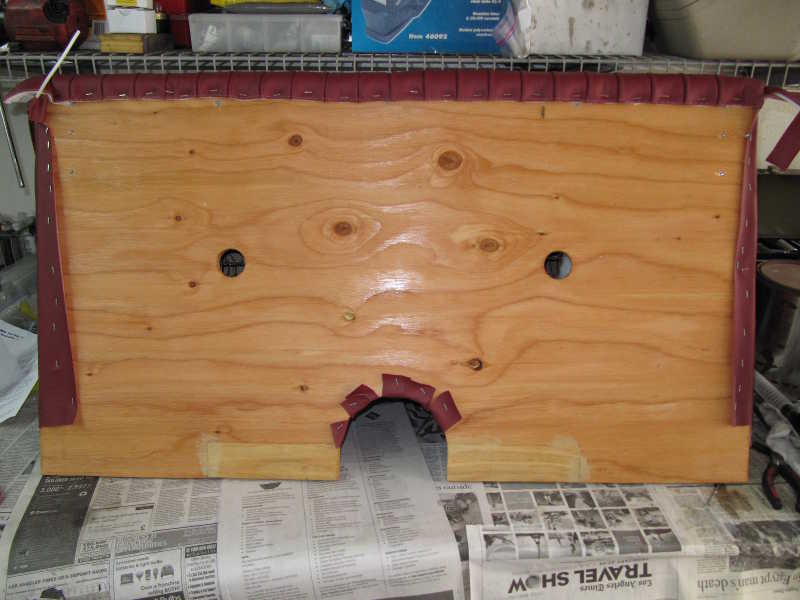
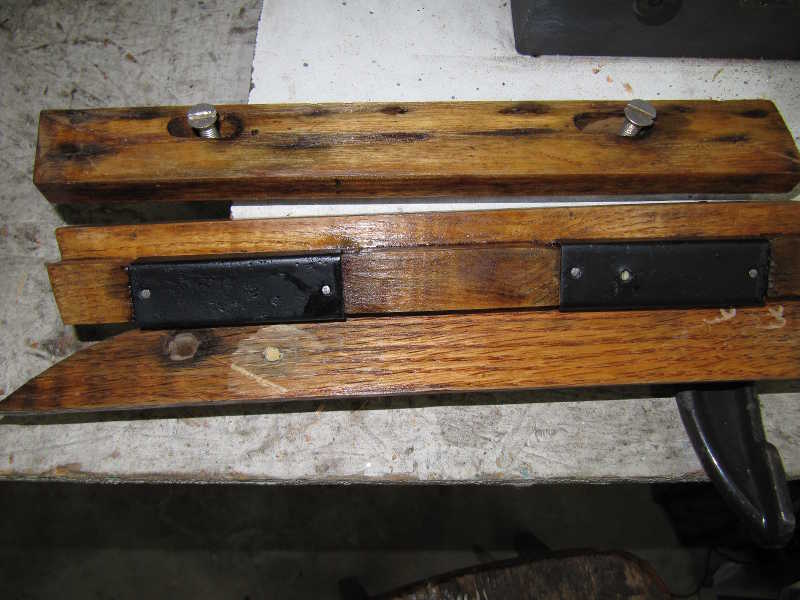
Installing the cover is a bit of a struggle. It fits tightly, and then it's necessary to pull the sides tight to prevent wrinkles. I used my stainless-steel staples here, too. The back is stapled under a cardboard strip. There isn't much material along the edge of the welting to slip under the cardboard; its tricky to get it all in place. The back piece is then folded over the wooden frame. In the picture below, you can see the speednuts for attaching the back supports.
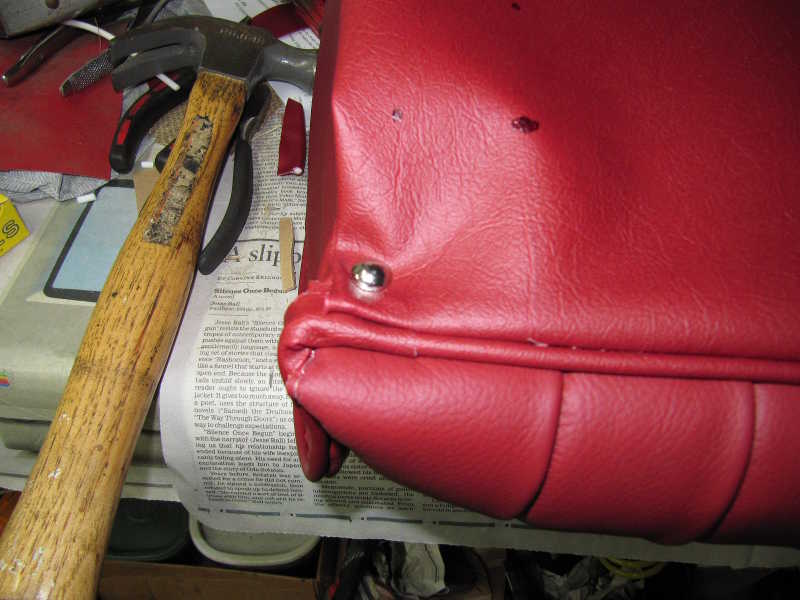
Getting the corners right is difficult. The two pieces of welting, one on the back piece and one on the front cover, have to be joined. It all has to fit neatly and to be nailed. I used a nickel upholstery nail for this and the rest of the back cover; it was the only thing that fit through the wad of material.
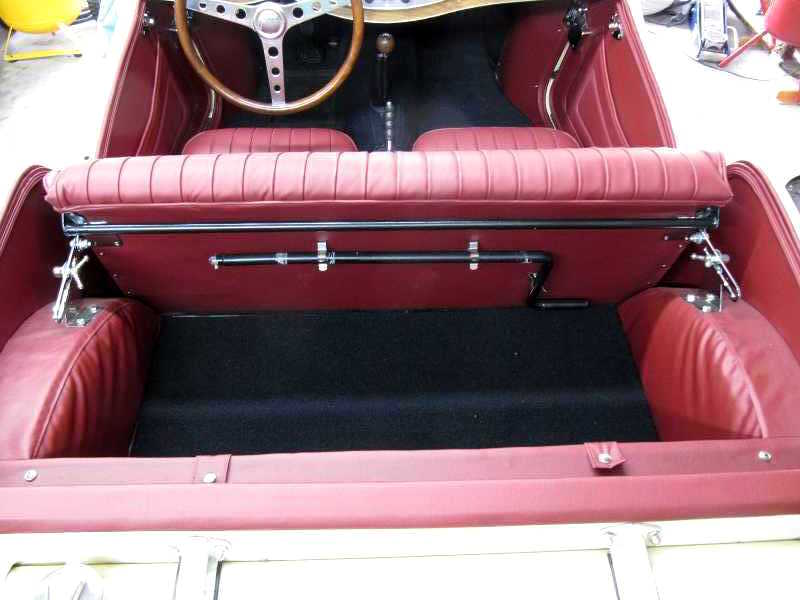
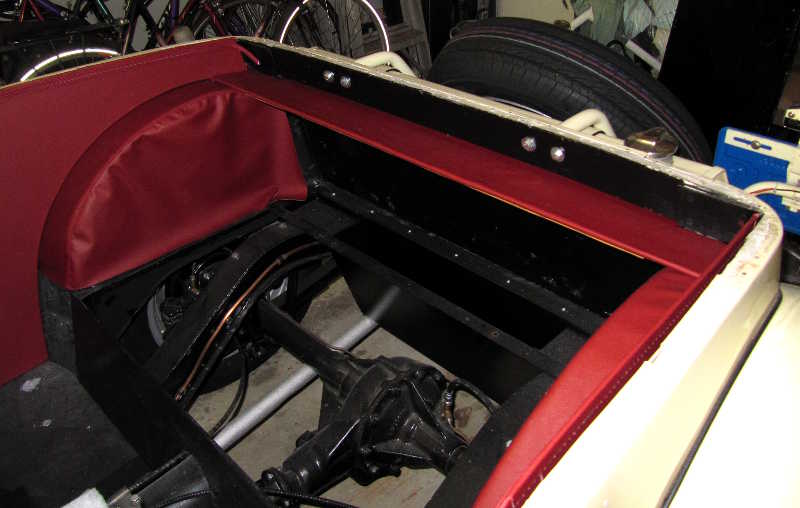
Once the cover was on, I covered the remaining uncovered wood with the same material and installed the tonneau rod, crank clips, and back supports. The mounting brackets had to wait until I installed the seat bottoms, as they had to be individually fitted to match the seat hinges. (In the picture below, the mounting brackets are hidden by the package-compartment floor.)
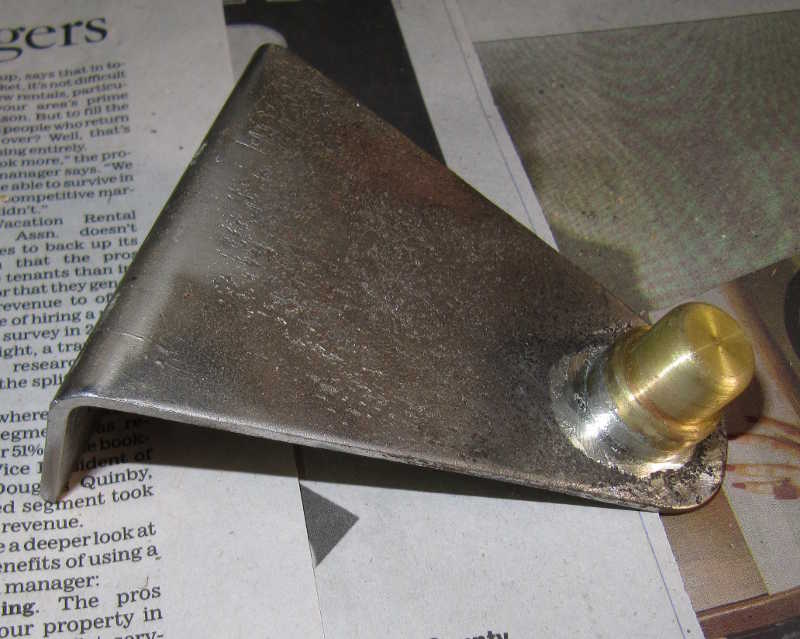
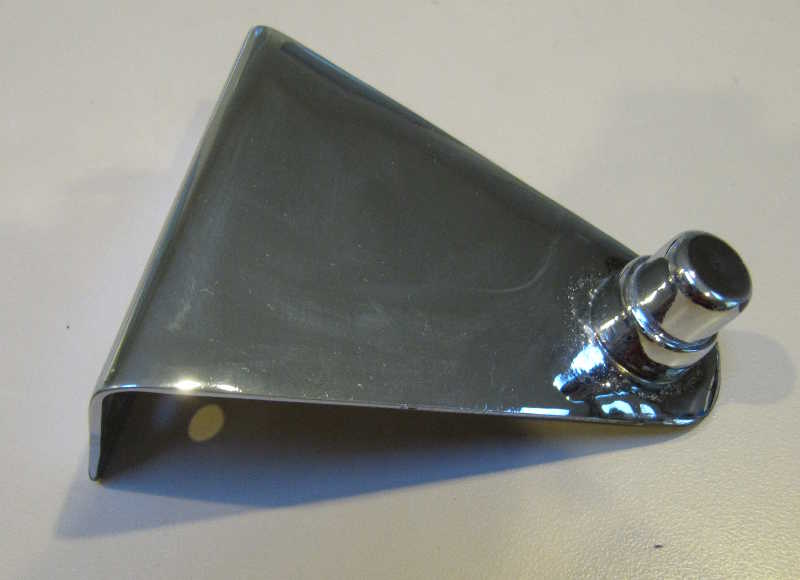
I had to replace part of one seat-back support. I made it out of brass and soldered it into place, then sent the finished piece out for replating.
Installation of the seats had to wait until the panels were in, a laborious part of the project. Once the car was ready for them, however, installation took only a day.
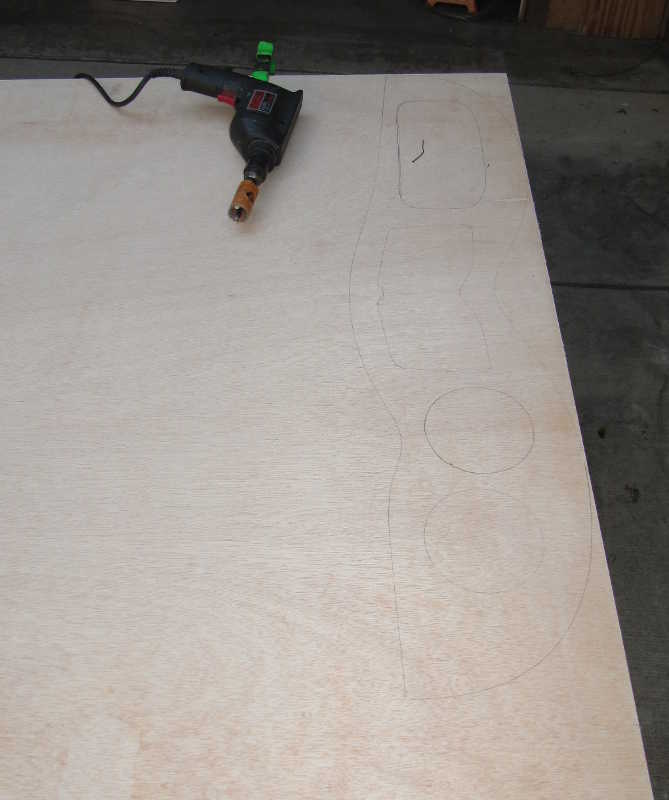
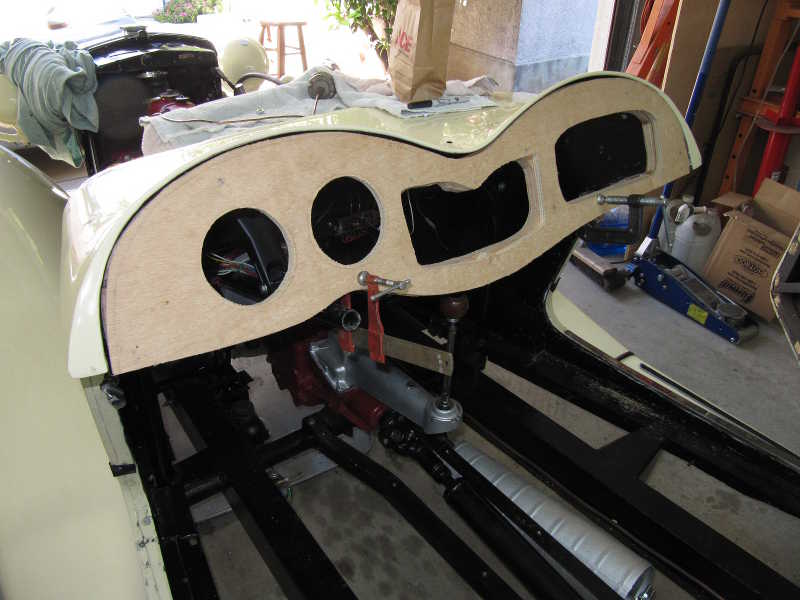
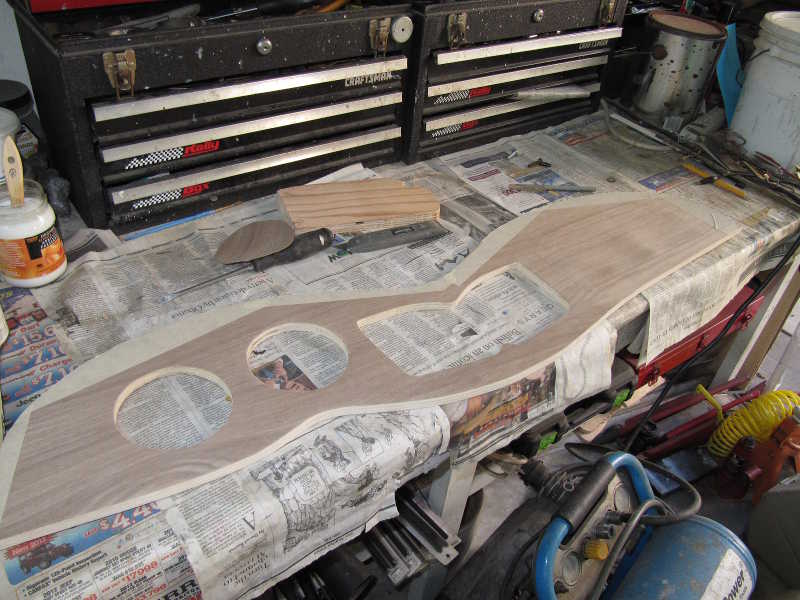
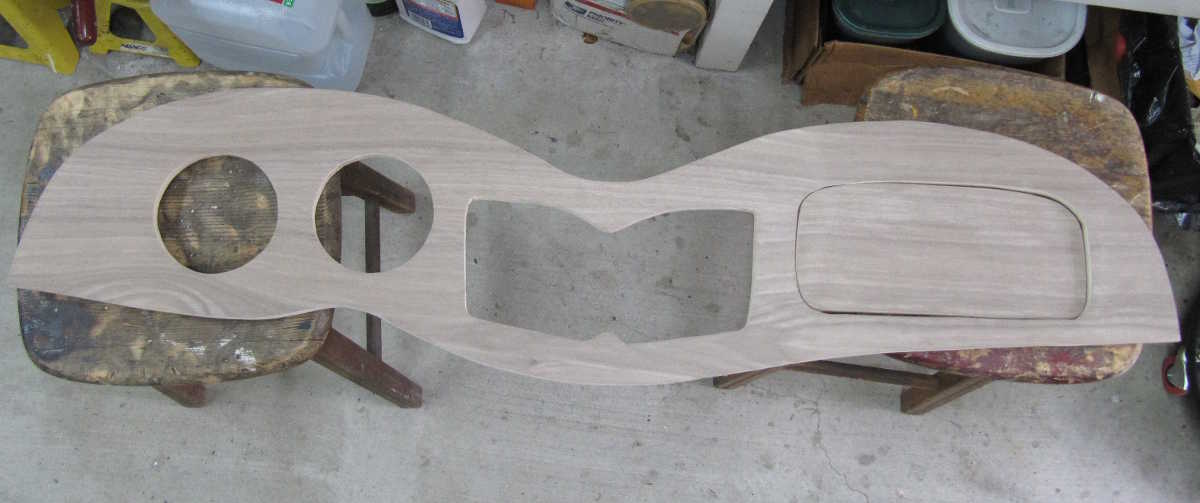
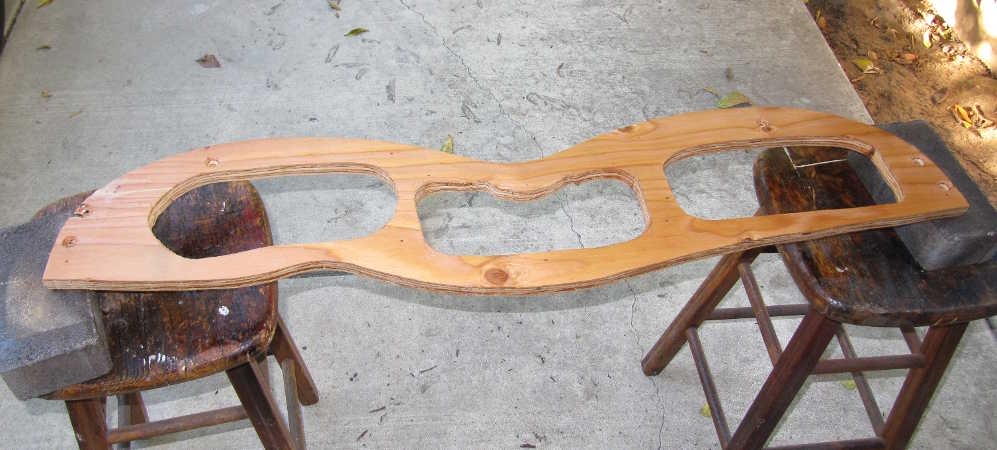
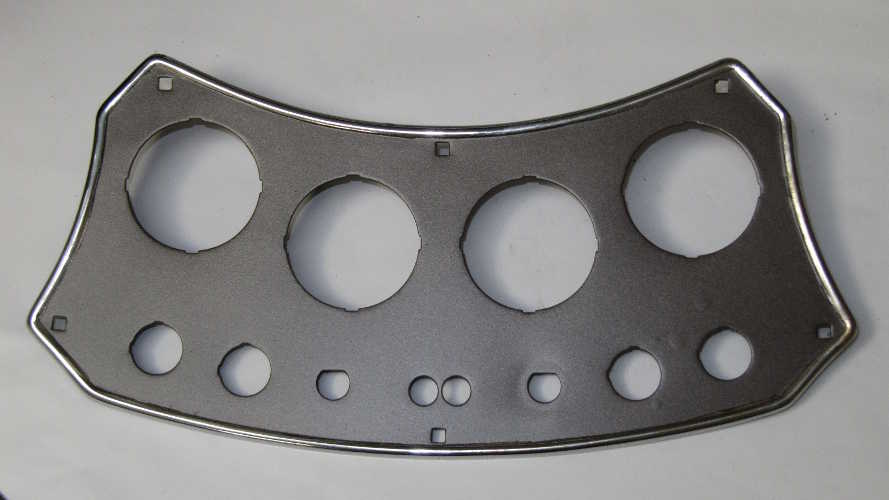
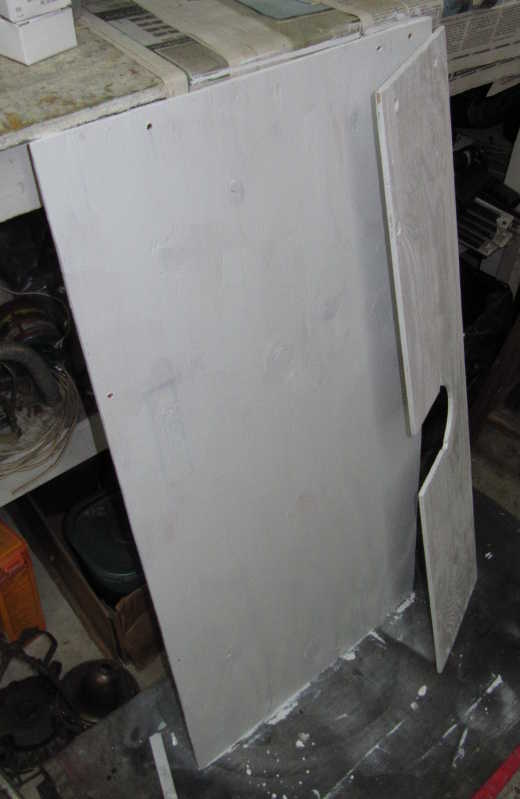
I used the old dashboard as a template for cutting a new one out of 1/2" plywood.
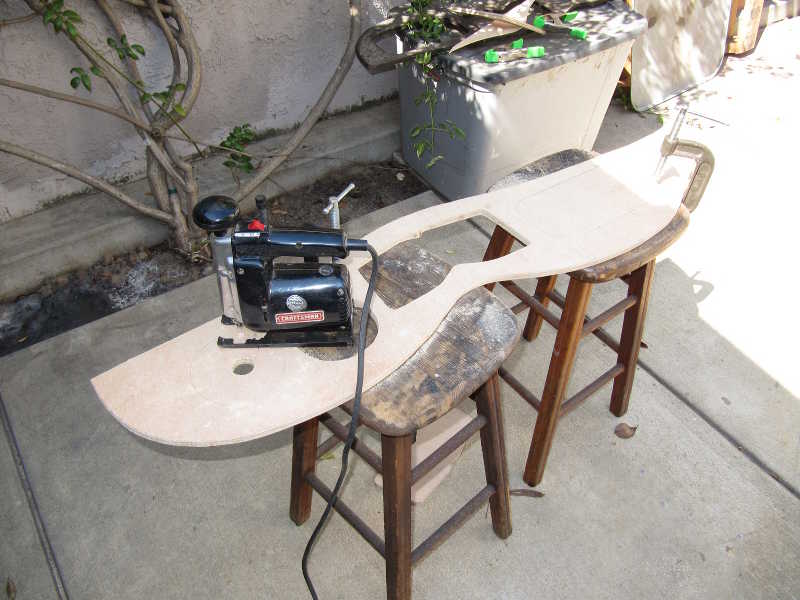
The back-up piece was made of 3/4" plywood. It's not as critical, fortunately, but still had to be done right.
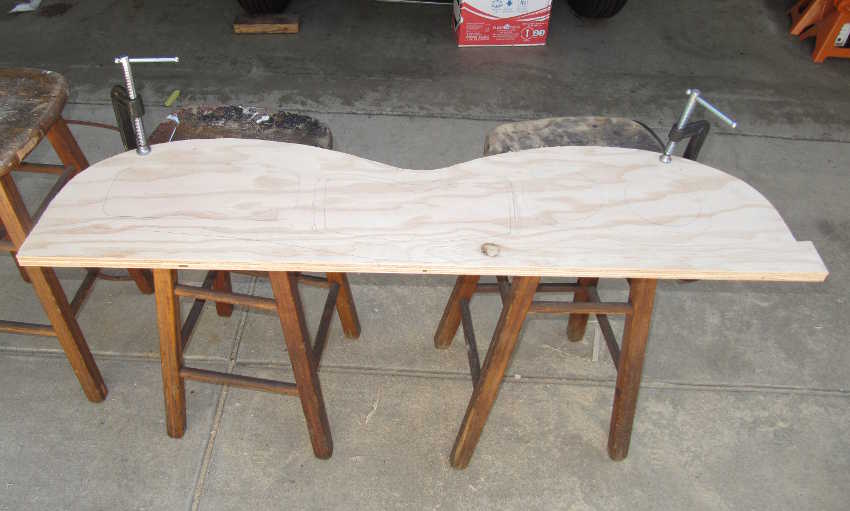
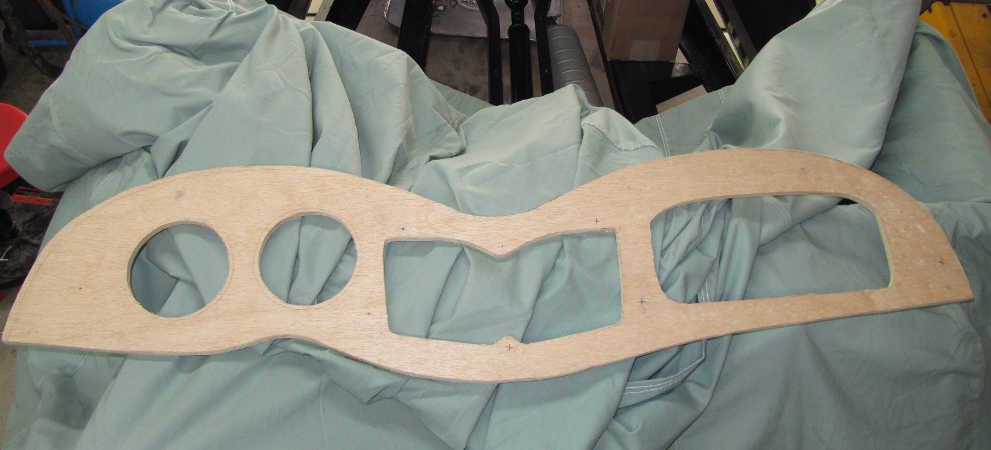
The back-up piece had to be hand-fit to the body. It's likely that these parts needed some hand fitting when the car was built; I didn't expect this effort to be any different. After fitting, I cut the holes for the instruments and drilled the mounting holes.

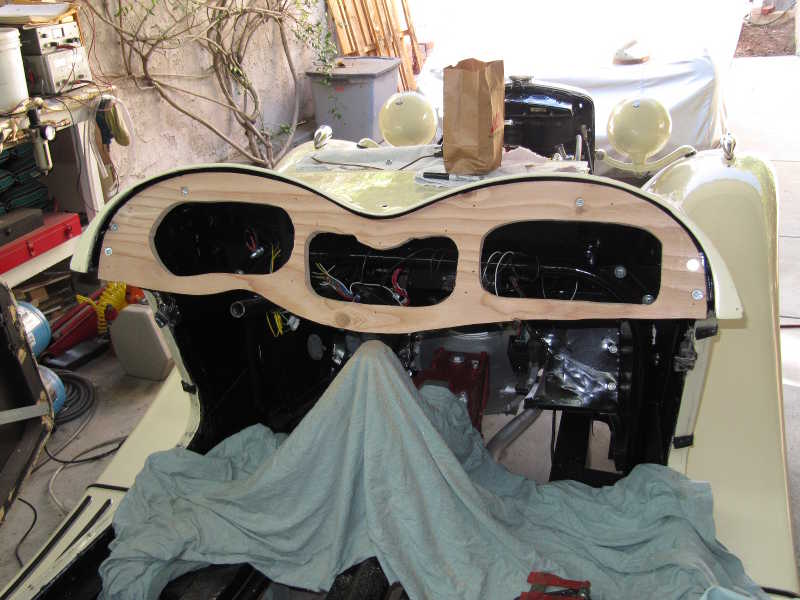
The dashboard was then fit to the backup piece. Again, it required a bit of trimming. Finally, the mounting holes were common-drilled with the backup.
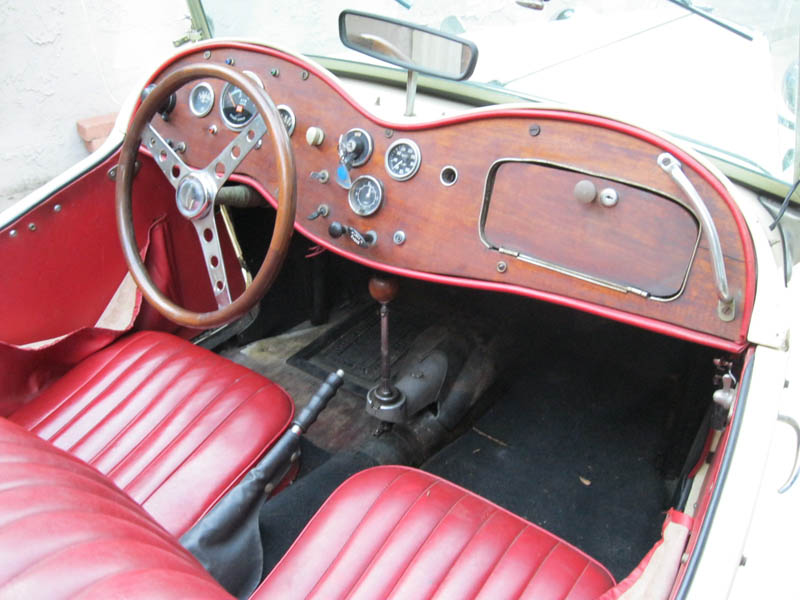
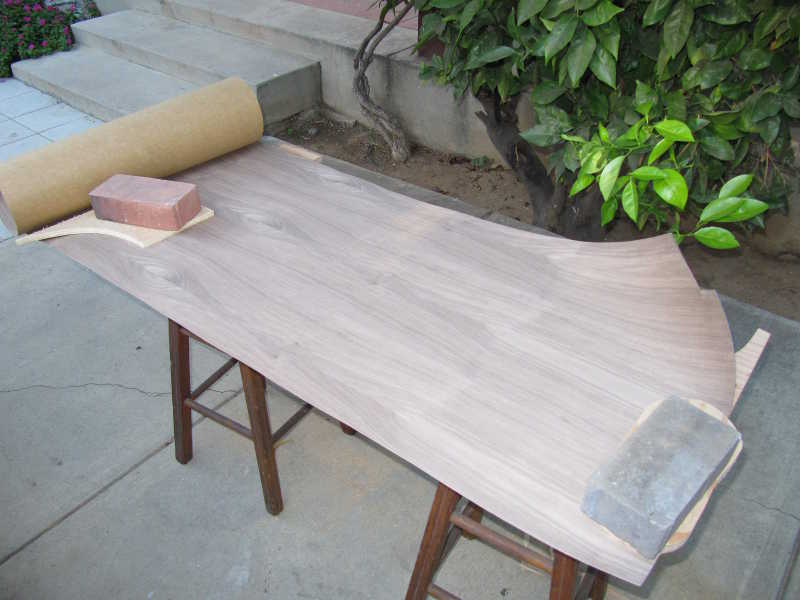
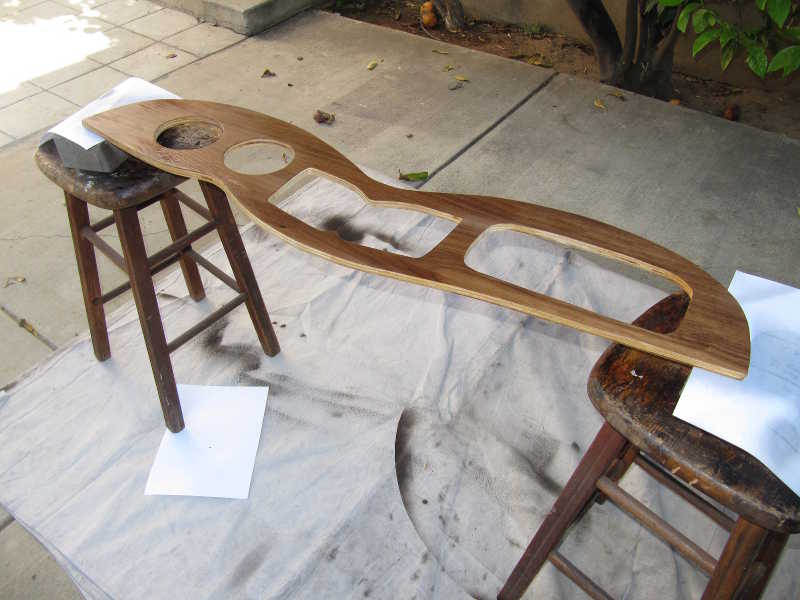
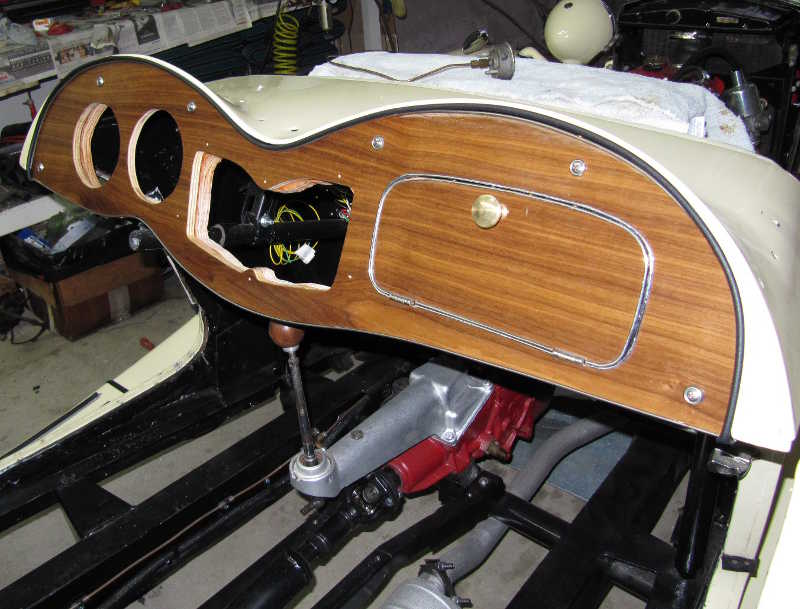
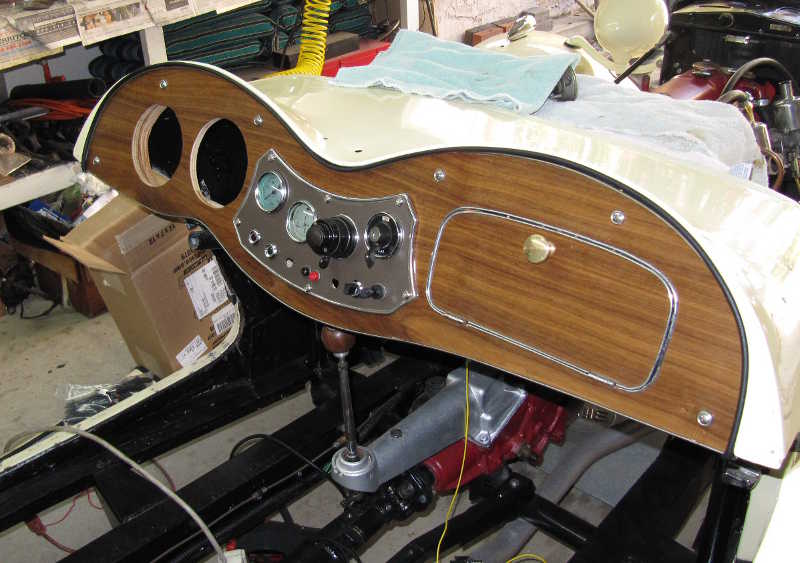
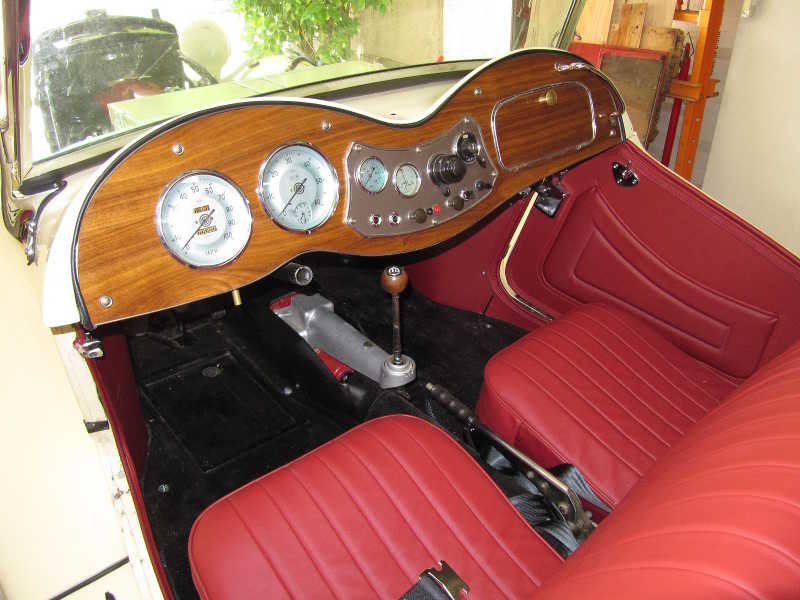
The TD dash was originally covered with a vinyl-like material the same color as the upholstery. A later modification, after that material wore out, was to cover the wood with a hardwood veneer. I chose to do this, using walnut, as it's common in other British cars. The walnut veneer came in a roll and was so springy that it was hard to handle. I straightened it by leaving it rolled up backwards overnight. The veneer has a backing, some type of wood-like paper, which keeps it from splitting as it's handled. I glued the veneer to the plywood dashboard with contact adhesive, then trimmed the holes and edges with a sharp knife. Masking tape along the edges prevented splitting.
I sanded the edges until they were quite smooth, then gave the surface a light sanding with 200-grit paper. The finished dashboard was then ready for varnish.
In the pictures below, the dash has received its first coat of varnish. Already it's starting to look like walnut. I gave the dashboard several coats of varnish, sanding between coats with progressively finer sandpaper. I used my paint sprayer for the varnish, not a brush.
Once I was sure that the dash backup fit properly, I removed it and gave it a couple coats of varnish. This is just to prevent moisture absorption and to protect it generally. It's out of sight, so its appearance doesn't matter.
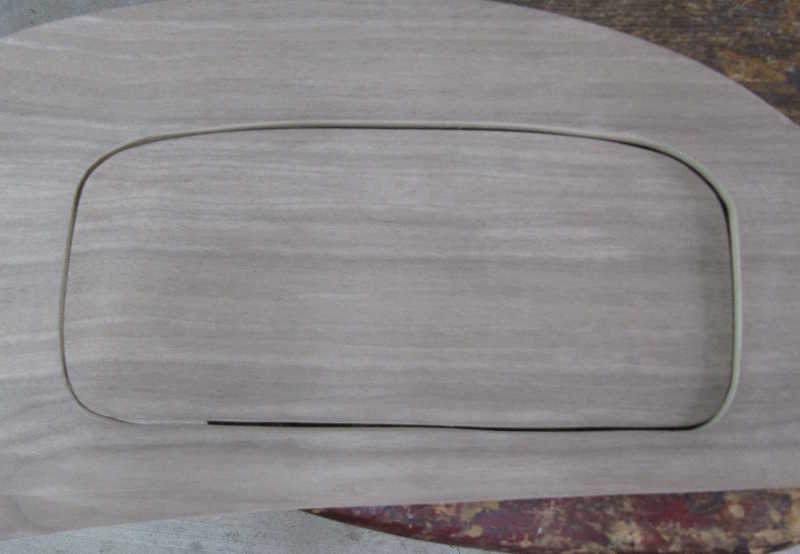
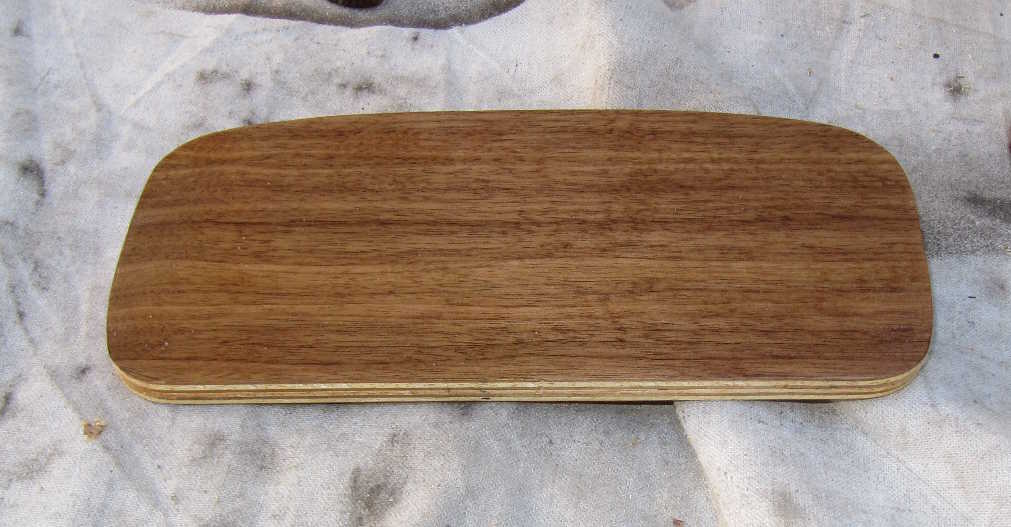
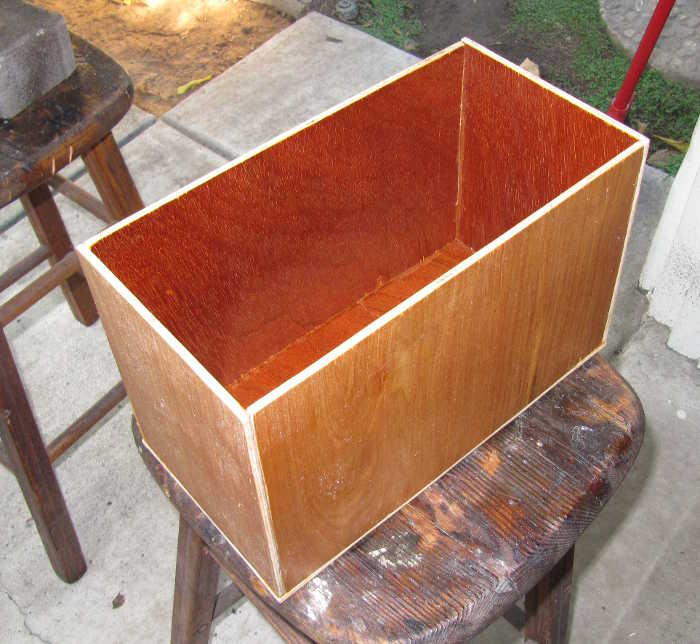
I made a wooden glove-compartment box out of 5 mm mahogany-veneer plywood. The mahogany side is on the inside, because that's what's visible. I sanded the mahogany sides of the pieces before gluing them together. I gave it a couple coats of varnish, but I'm not terribly concerned that it have a perfect finish. I added some wooden ears to it, so I could attach it to the dash backup with wood screws.
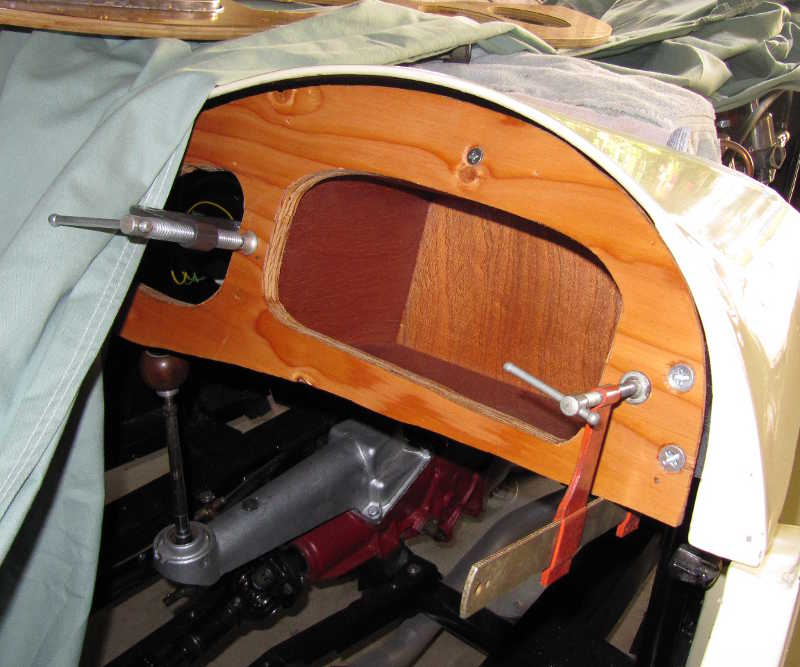
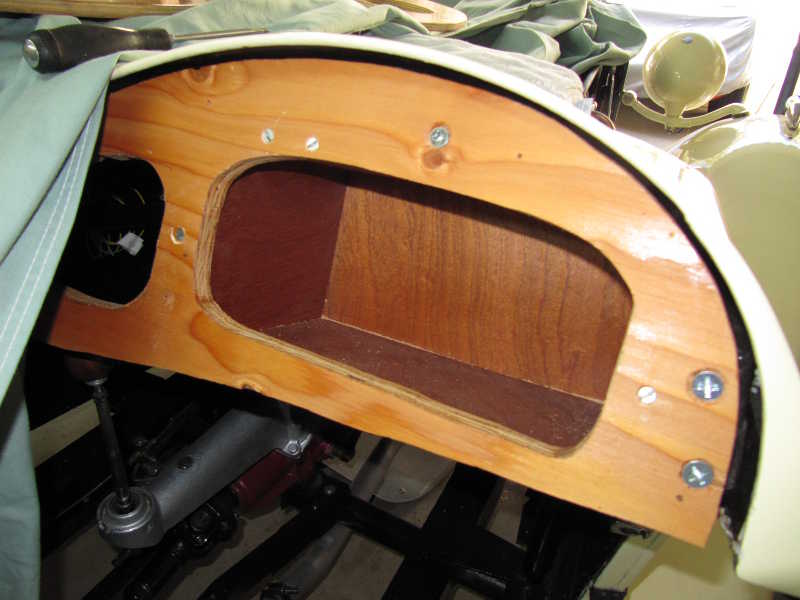
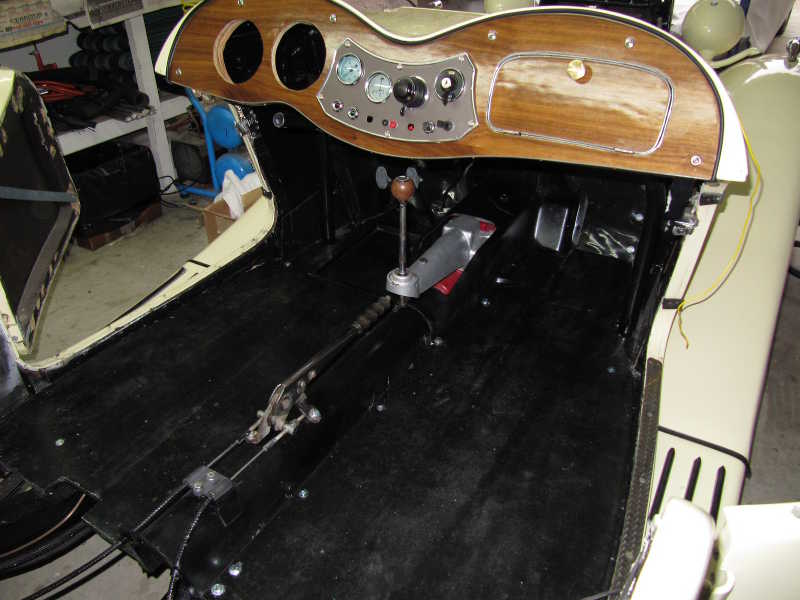
The dashboard is in! I restored the old metal rim strips and added the requisite vinyl beading around the top. Even though much of the interior will be red, I used black beading around the dash; I think it looks better with the walnut and will match the black of the carpets. The rest of the interior beading will be red, of course. The glove box uses a simple cabinet latch from a local hardware store. I used the knob from the dash that came with the car, sanded down to brass and coated with clear lacquer.
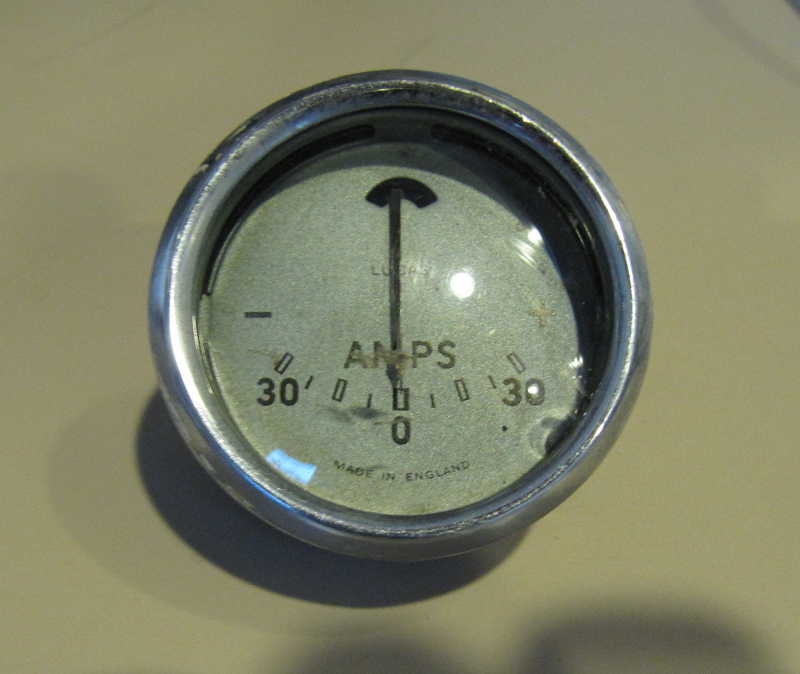
I bought a center panel at a swap meet. It was populated with a lot of useful stuff, including an ammeter. The ammeter was full of dirt, so I had to disassemble and clean it. Fortunately, it's a simple mechanism, so the dirt was easy to clean out without damaging it. I recalibrated it in my electronics lab.
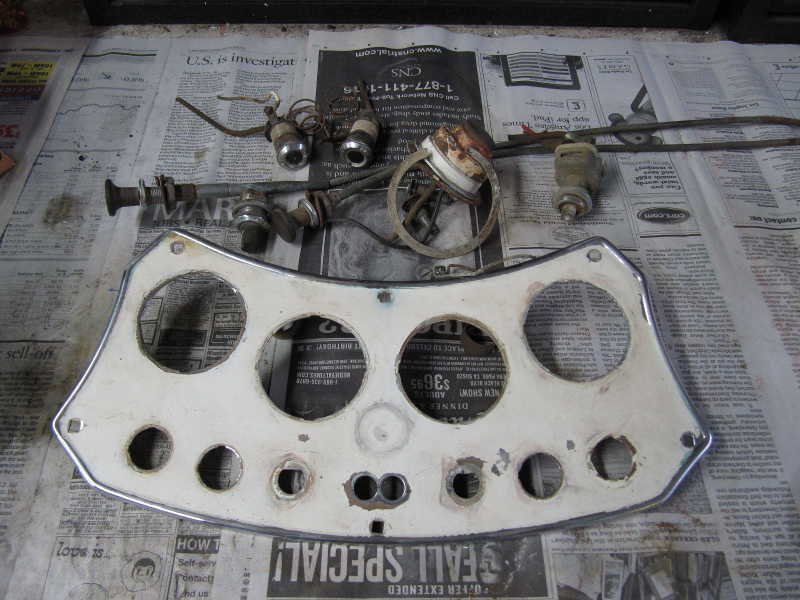
Some time after buying the above parts, I acquired a TD dashboard. Except for the glove-box door, it was complete. The parts, some of which have been removed in the pictures below, were in remarkably good condition, in spite of their superficial grunginess. As with many of the chromed parts on the car, the chrome on the center panel cleaned up nicely with just some buffing. I now have more dash parts than I need; I'll use the best ones and sell the rest.
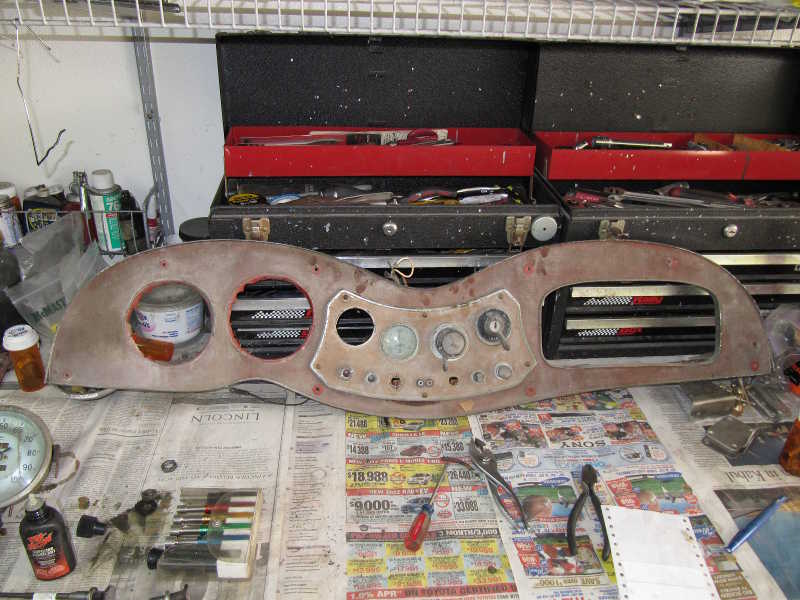
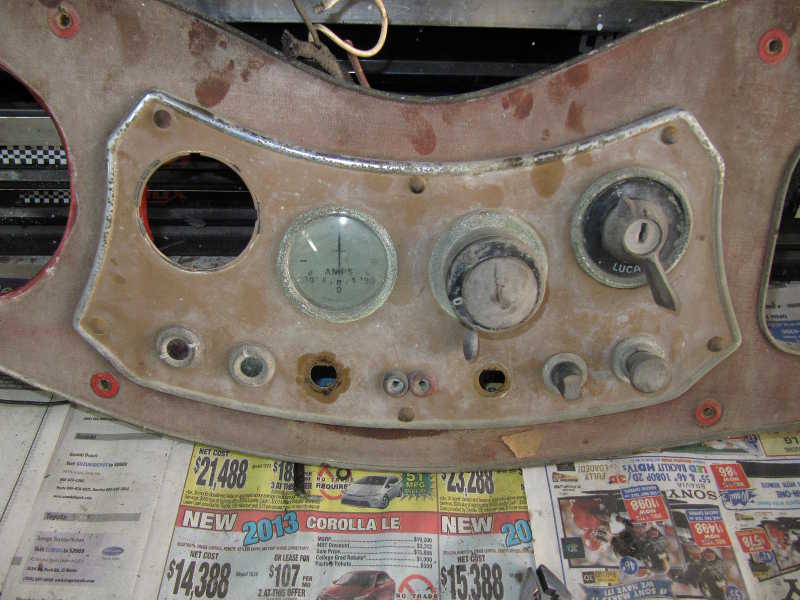
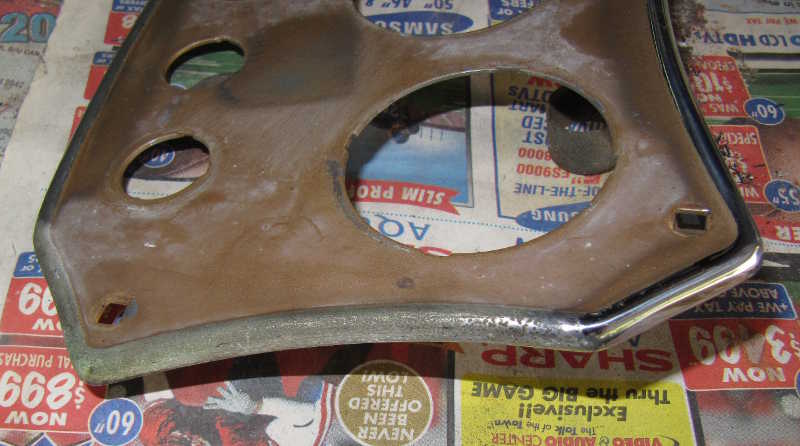
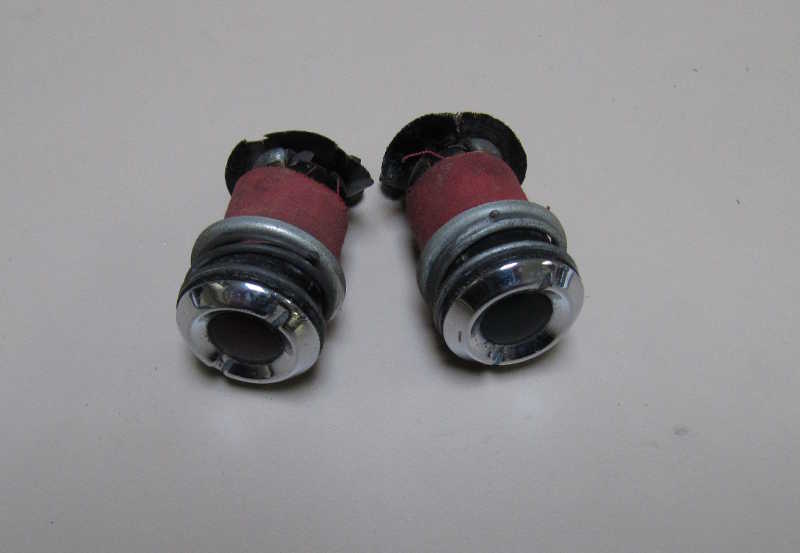
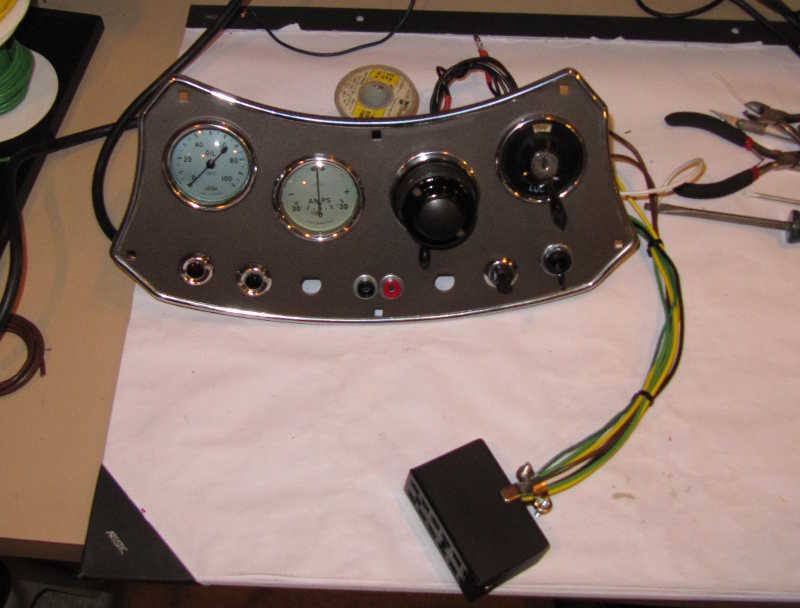
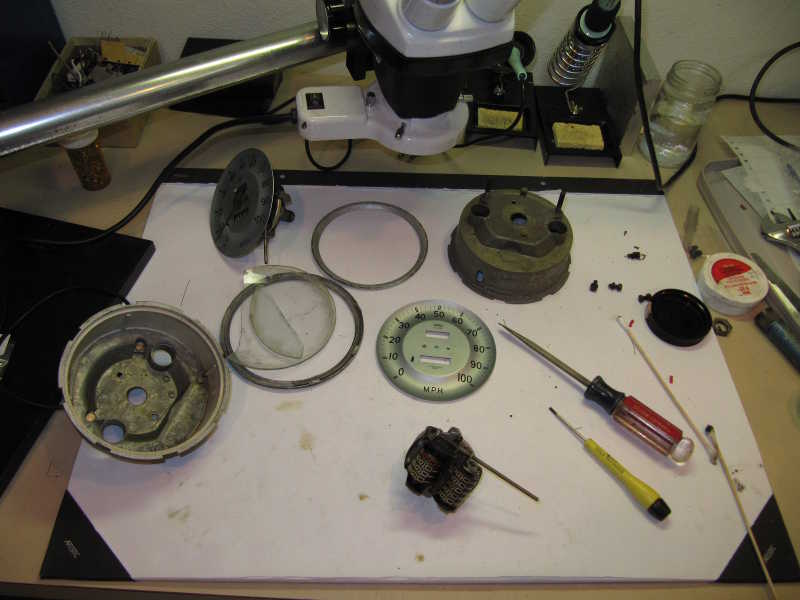
Below are some of the parts I removed from the dashboard. The speedometer and tachometer seem to be quite good internally. I'll need to clean up the bezels and perhaps faces, but that should be all they need. I finished cleaning up the chrome and painted the panel a dark bronze, which I thought would go well with the walnut veneer I used for the dash.
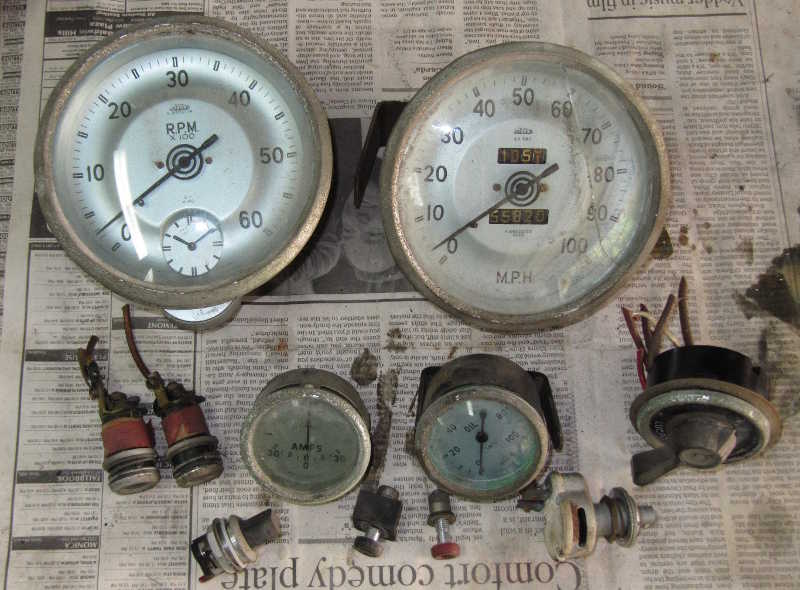
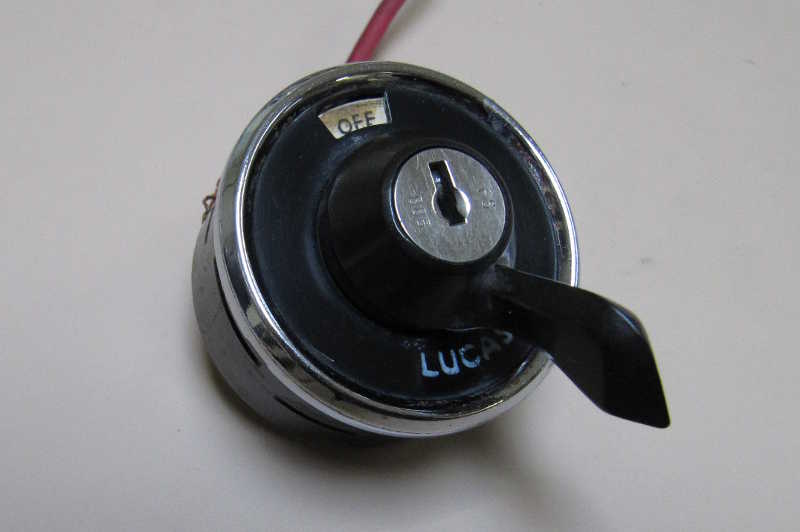
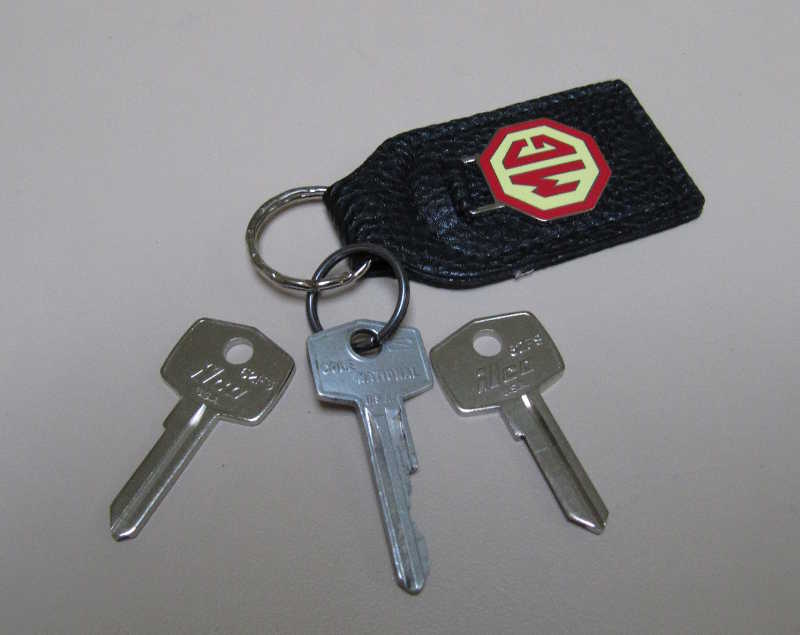
I considered converting the indicator lights to LEDs but decided to keep them original. I cleaned the chrome trim by buffing and polishing, and the bakelite parts by polishing with metal cleaner. I checked the electrical operation of all these parts, and I was especially happy that the fine resistor wire wound around the indicator lamps was OK. I bought some new key blanks on-line, as I have only one key. The blanks cost $1 each, but people try to sell these on eBay for $20 each, pretending they are out of production. The key blank is Ilco type 62FS, which is used on many MGs, Triumphs, and even Volvos. My local key guy will cut them for $2.00 each.
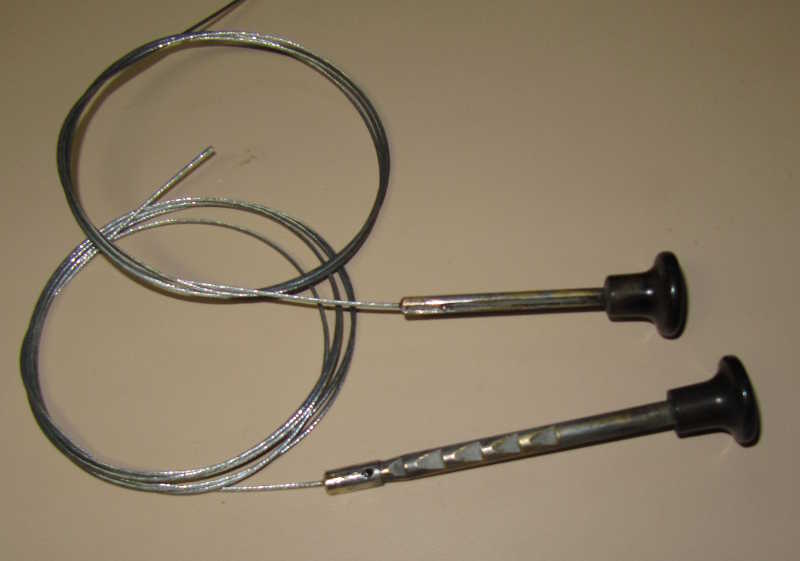
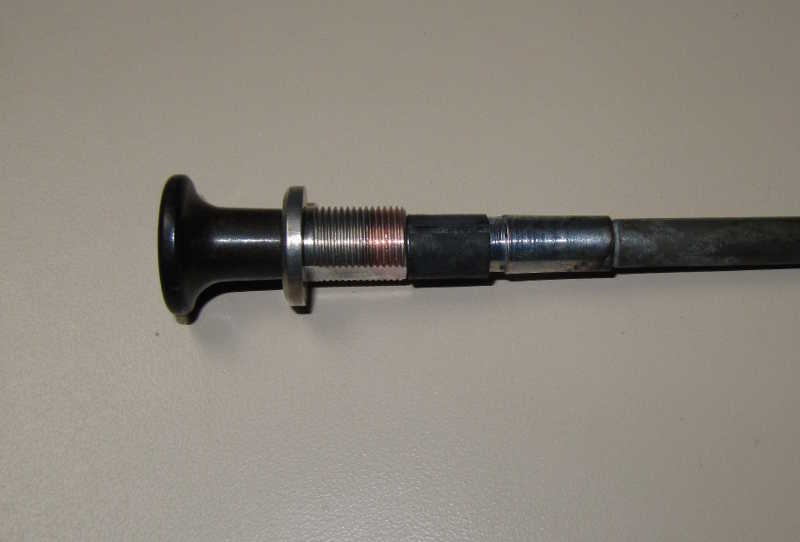
The choke control and starter pull needed new cables. Replacing them was easy; they are just soldered into place. A bicycle gear cable is the perfect diameter. I used a galvanized one (not stainless steel) because it's easier to solder. At the same time, I cleaned and buffed the knobs, replated the dash bezels, and lubed the cables.
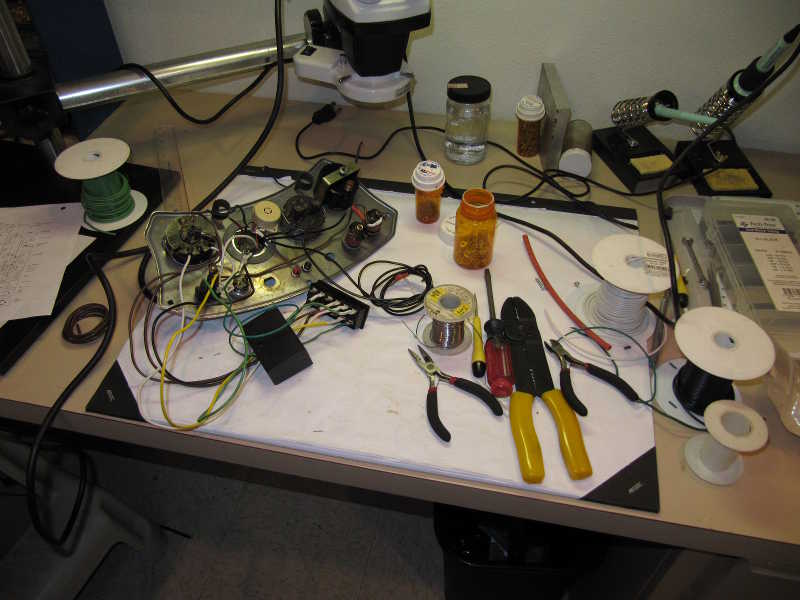
Assembling and wiring the panel was straightforward. The panel is a stock arrangement, with one exception: I replaced the useless panel-light rheostat with a switch for the turn signals. The large connector connects to my relay box under the scuttle. I mounted the panel in the dashboard, wired it in, and tested it. (There's more about this in the Electrics section.)
Finally, it's time to do something about those two large, gaping holes in the dashboard. The old dashboard that I bought had a speedometer and a tachometer. They were in poor cosmetic condition but good mechanical condition. I also had bought a broken speedometer and two broken tachometers for parts. Fortunately, the speedo and tach were easy to clean up and now look much better.
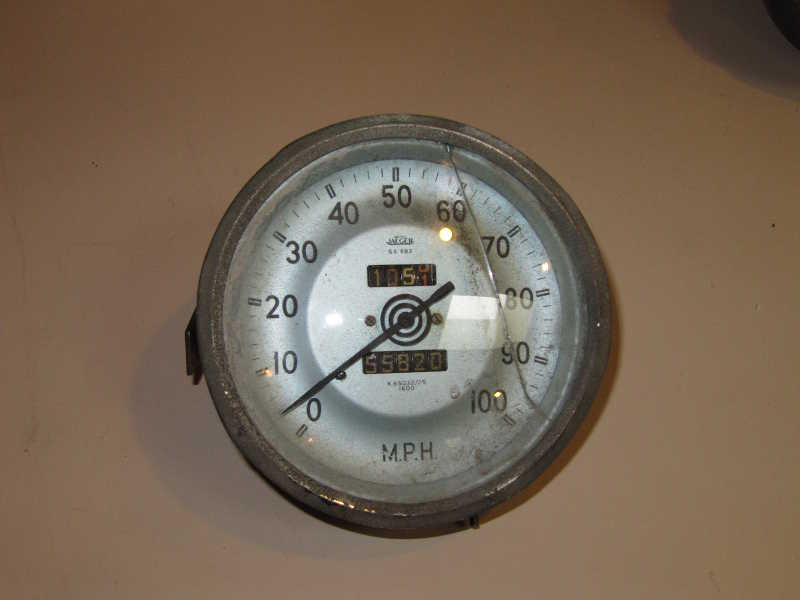
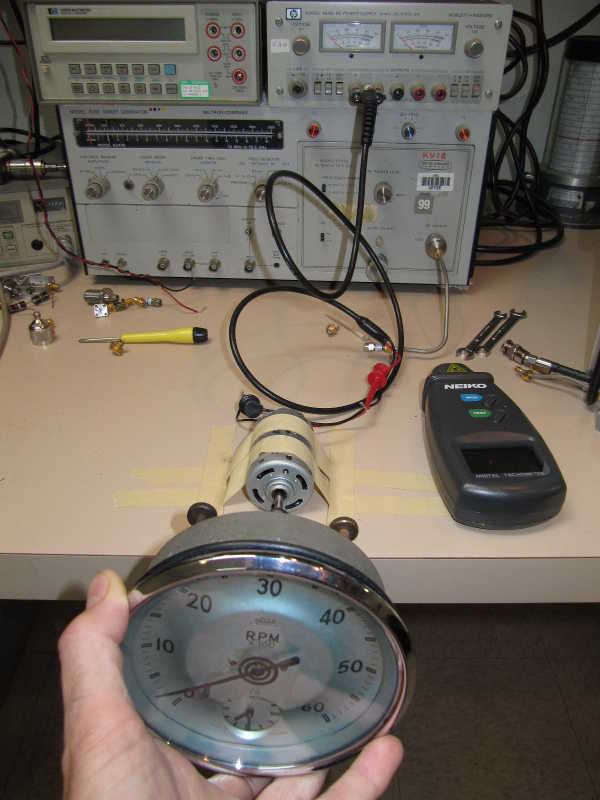
I have a test system for checking and calibrating mechanical speedometers and tachometers. I use a small electric motor, run off a laboratory power supply, and an optical tachometer. It is necessary to know the instruments' calibration factors, but sometimes that is printed on the faceplate. I reset the odometer to zero, so it would indicate mileage since the restoration.
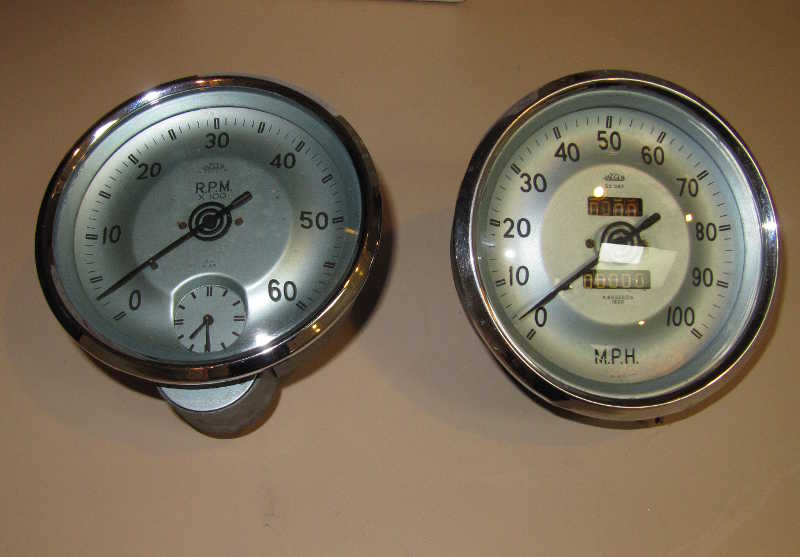
The installation of the tach and speedometer completed the dashboard.
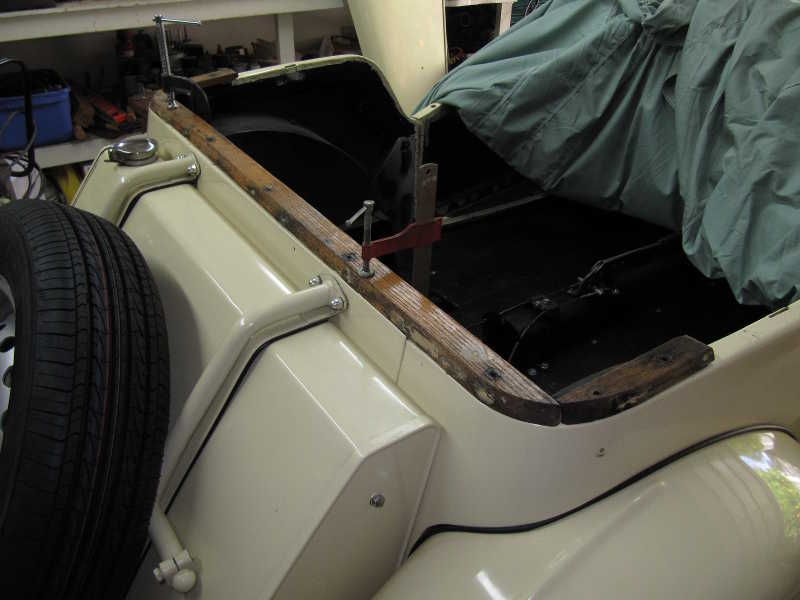
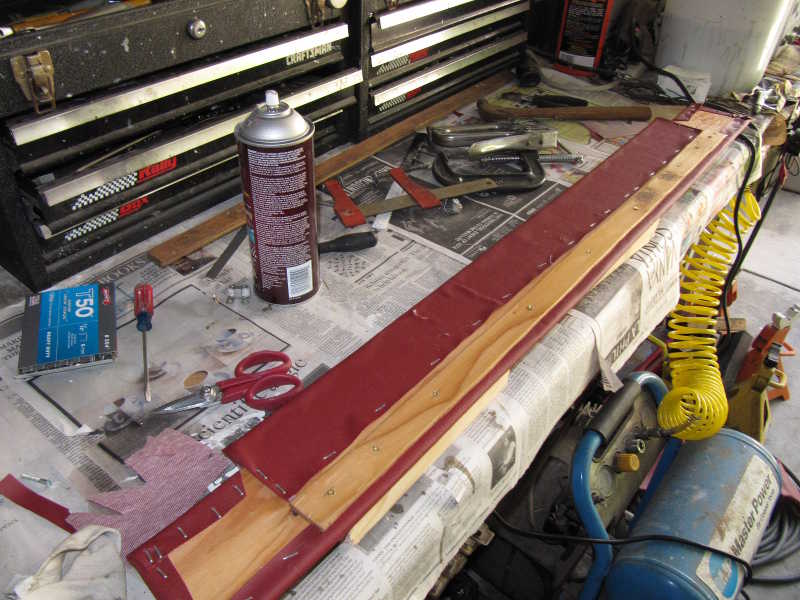
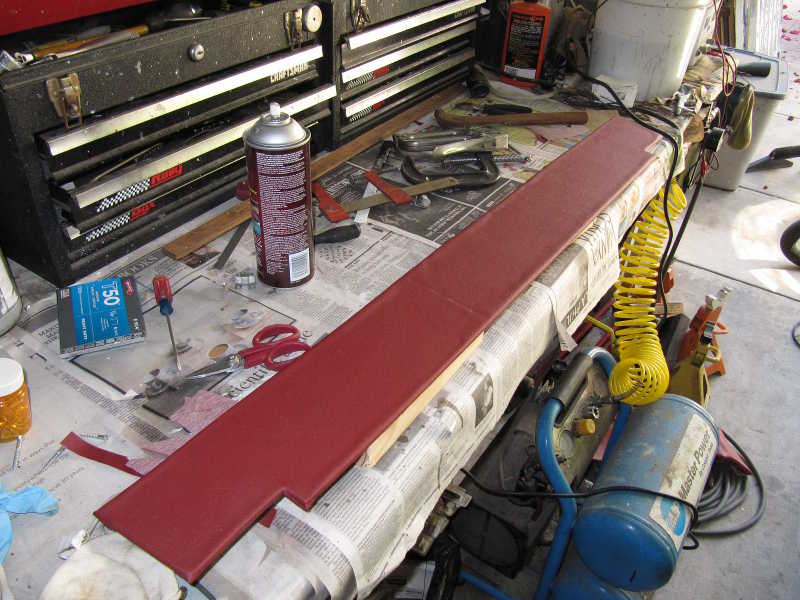
I chose vinyl, not leather, for the panels, as it is less expensive, more rugged, and easier to keep clean. I began with the wood trim that surrounds the rear edge of the body. It is wrapped in vinyl, so appearance doesn't matter, but condition does. The metal parts of the vertical, sidecurtain-container trim were rusted, so I painted and replated those pieces, as appropriate. The wood had some minor splits and unnecessary holes. I glued and clamped the splits and filled the holes with wood filler to prevent rotting in case any water gets to it. Finally, I sanded it all and gave it a coat of varnish for protection.
I clamped the trim in place and common-drilled new mounting holes in the body.
It's clear that the trim pieces must be installed in a certain order. It seems best to start from the rear. I began with the wheel-well covers, which were difficult to fit well. I had to build up several layers of felt under them to prevent wrinkles. The side covers were not as well made as they could have been, so there will be unavoidable wrinkles in the sides. Some people prevent the wrinkles by padding the sides with Dacron filler; I didn't want to do that, but in the end, it was necessary. The interior pieces were from Moss Motors; I'm not happy with the quality.
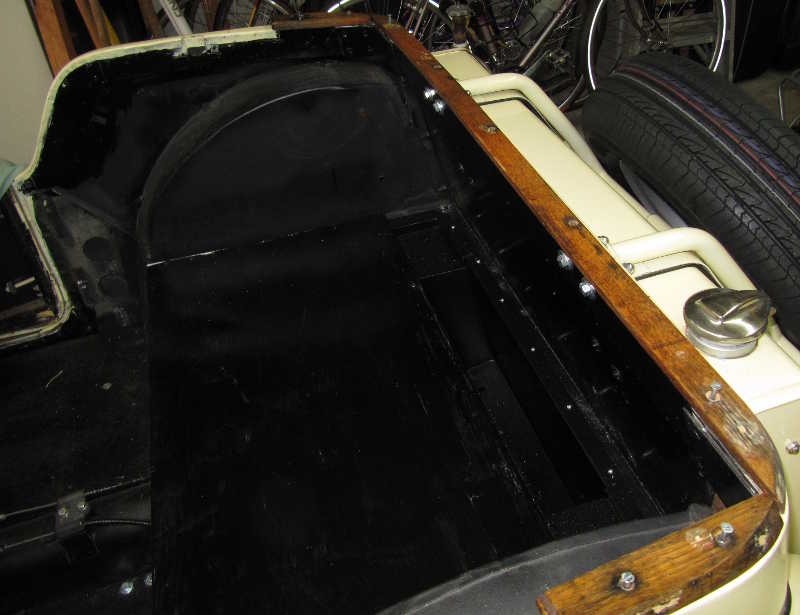
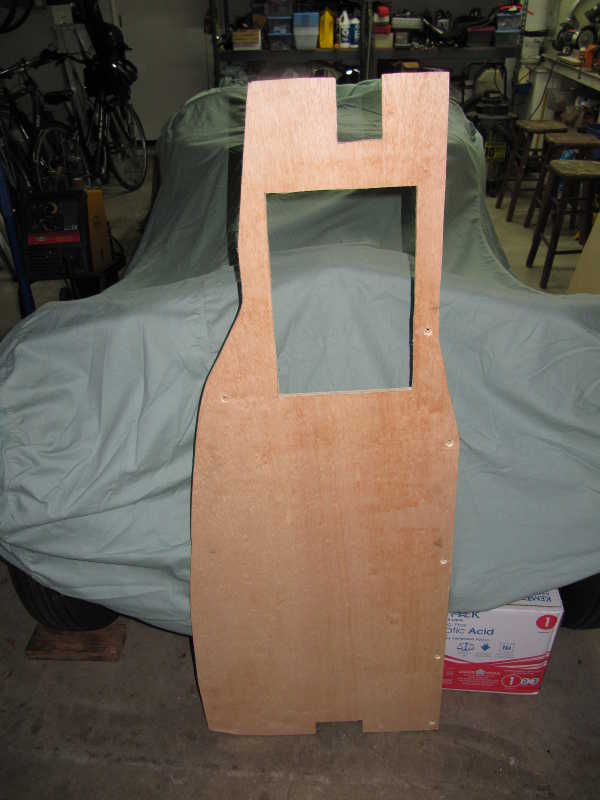
I cut a new top for the sidecurtain compartment, as the old one was warped. The thinner piece is another plywood bit, used to stiffen the cover a little and to provide an upper stop for the compartment door. I gave both the wood pieces a coat of varnish.
Covering the rear piece of wood trim with vinyl was tricky. It was necessary to cover the curved ends without leaving wrinkles, then leave the top open so it could be screwed to the car. Once installed, the flap of vinyl, which covers the rear upper beam, was secured to its underside. As I was attaching it, however, the screwdriver slipped and made a hole. I had to redo the whole thing! Fortunately, though, the vinyl piece wasn't wasted, as it fit the sidecurtain container's top.
Covering the top of the sidecurtain container was straightforward. I attached the stiffener with #4 x 1/2 screws, using it to help hold the edge of the vinyl. I trial-fit it to the car, then set it aside.
Installing the interior was a slow process. Everything had to be fitted (then removed and refitted, sometimes several times), and wrinkles ideally had to be eliminated. In reality, eliminating them is a lot to hope for. Minimizing them is about the best I could do.
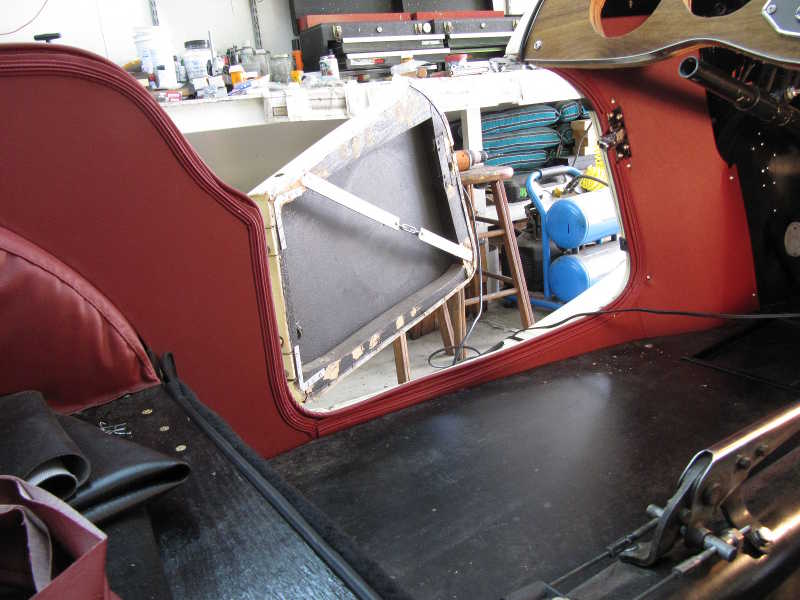
I made a new door for the sidecurtain container from 1/4" plywood, varnished it, and covered it with vinyl. Its hinges are ordinary brass ones from Home Depot; these were installed with flathead machine screws, as the wood isn't thick enough to hold wood screws reliably. The hinges are under the vinyl covering, so they are largely invisible.

To prevent interference with the screws and angle bracket that support the dashboard, the footwell side panels had to be modified at the end closest to the dash. This involved peeling back the vinyl, cutting out a one-inch piece of the backing, and gluing the vinyl back in place. It's a minor modification, completely out of sight.
The windshield supports must be installed before the front panels, as their mounting screws are inaccessible with the panels in place. Since the windshield cannot be installed when both supports are in place, the entire windshield must be installed before the front panels.
The footwell panel wraps around the frame hoop; this is an extreme bend, and it's easy to damage the panel's backing. Some cars have been restored with the frame hoop outside the panel. This looks fine, in my opinion, and should prevent scuffing of the panel by the driver's shoes. It also creates a neater, flatter installation. Installing it this way, however, would require taking a few inches off the forward edge. Doing the right side, where there is less room, might also be tricky.
It's a good idea to install both the front and rear panels before nailing them, as the point where they meet might require some trimming to get a perfect fit.
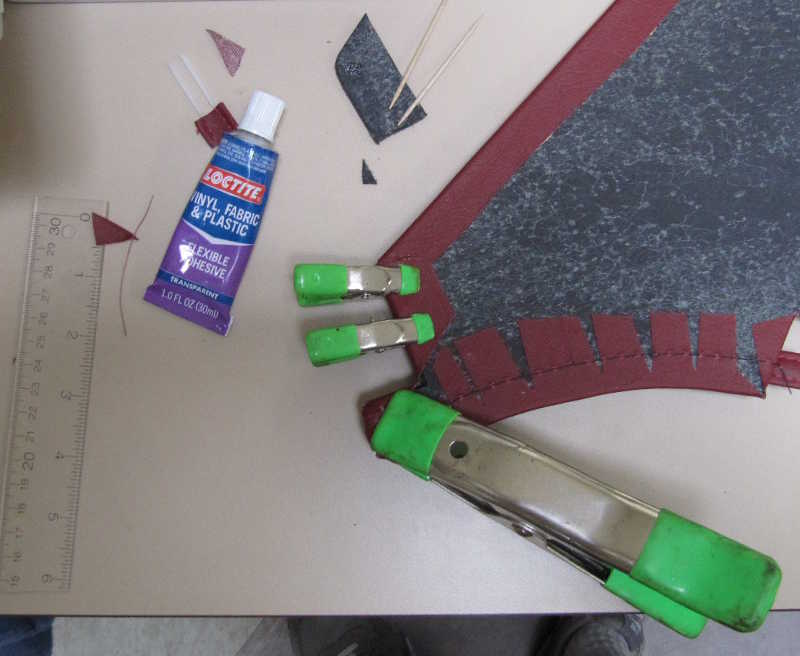
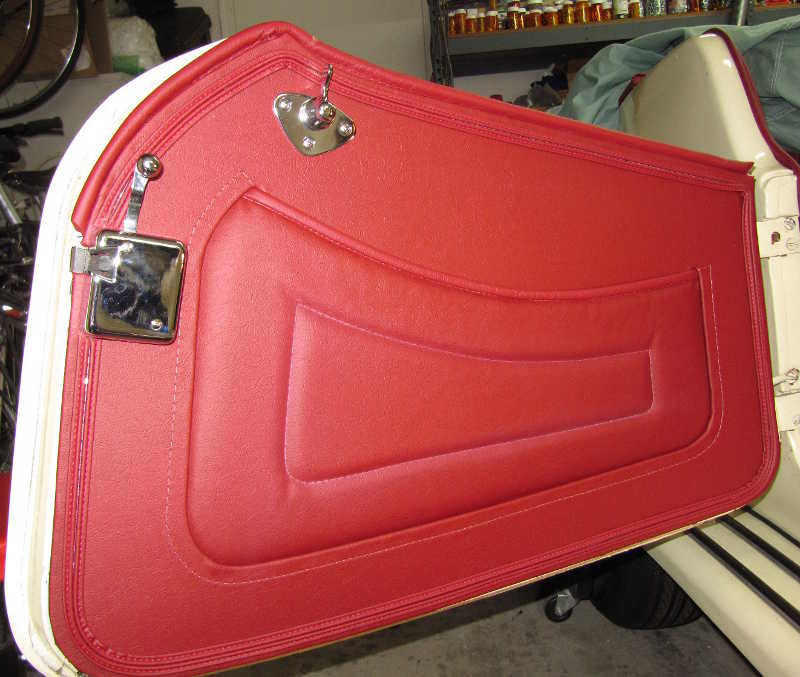
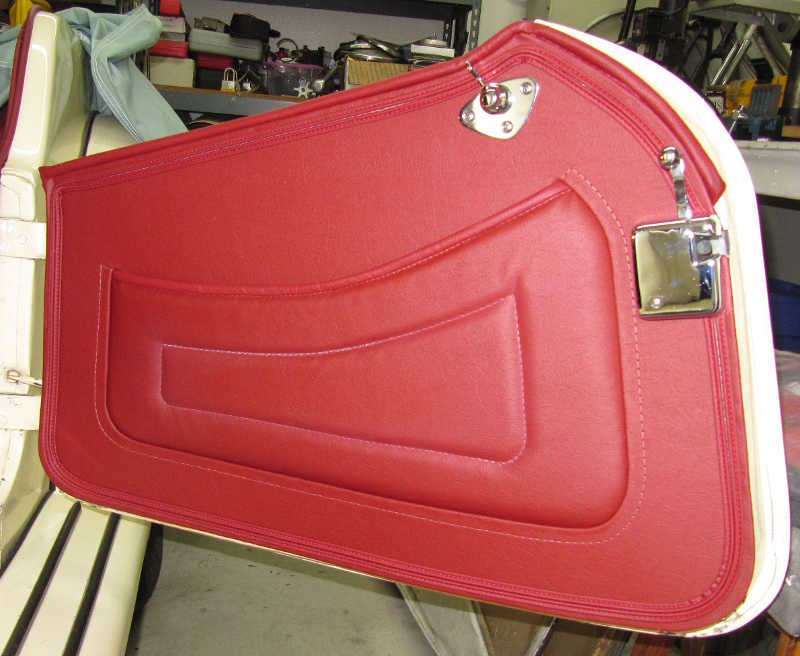
Fitting the door panels can be a little tricky. The panel must be located precisely or it may rub on the body. It's also necessary to locate the welting precisely, so it doesn't prevent the panel from going where it should be, but also doesn't stick out. To do this, I first clamped the panel to the door, got it adjusted right, and marked its edge on the door. I then removed it and stapled the welting so its seam aligned precisely with that edge mark. Finally I again clamped the panel to the door and, once it was located correctly, nailed it to the wooden frame. I used small, stainless-steel nails inserted between the ribs of the edge binding.
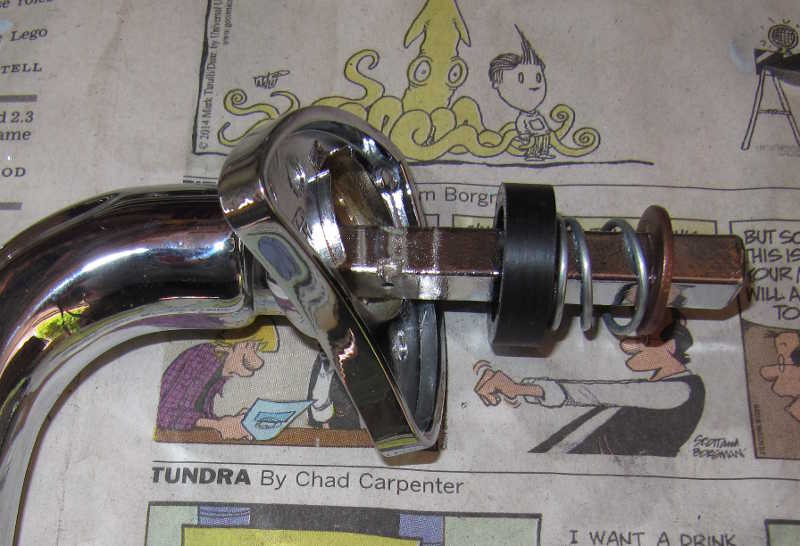
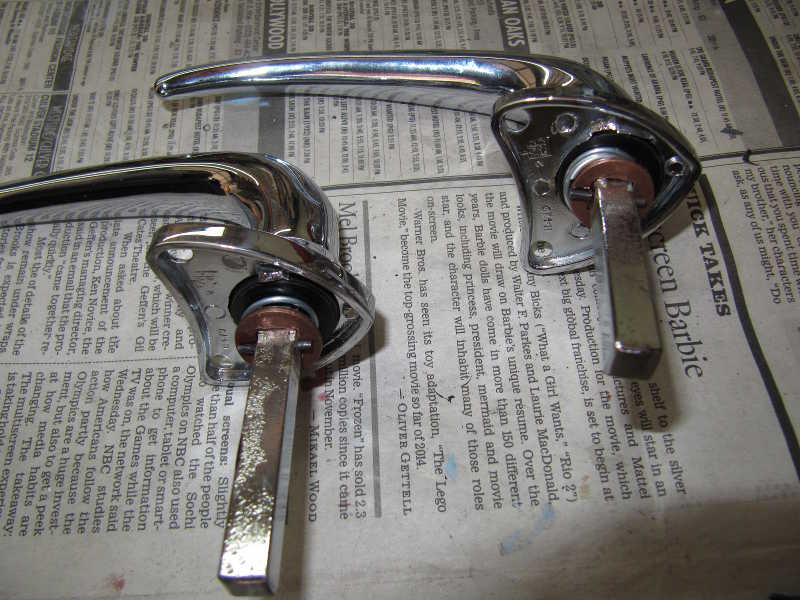
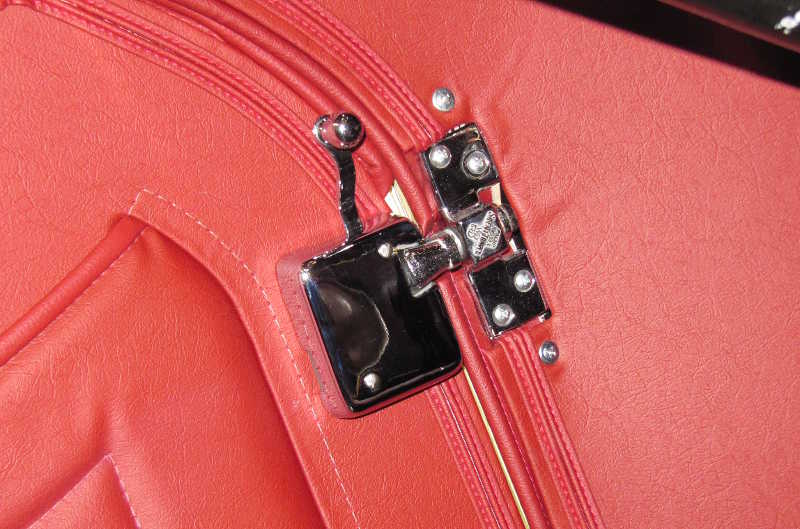
Plating assemblies that consist of several pieces can be a problem, as they have to be disassembled but often are not designed to be disassembled. The door handle is one such example. The outer washer, which holds it all together, is crimped onto the square rod; this is something that can't be reproduced outside the factory. Instead, to hold all the pieces together, I drilled a hole in the square rod and pressed a pin into it, with a little red loctite to be sure it stayed in place. I had the foresight to drill the hole before getting the parts plated, as trying to drill through a chromed surface is not easy; it requires carbide drills. I made new parts, as the old ones were pretty cruddy. To modernize the assembly, I replaced the cupped washers with a Delrin piece.
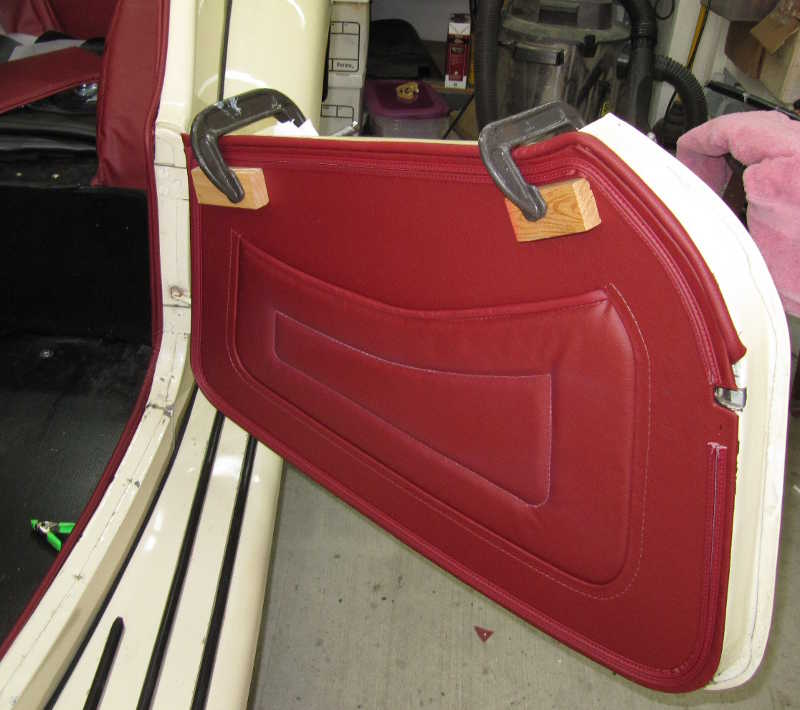
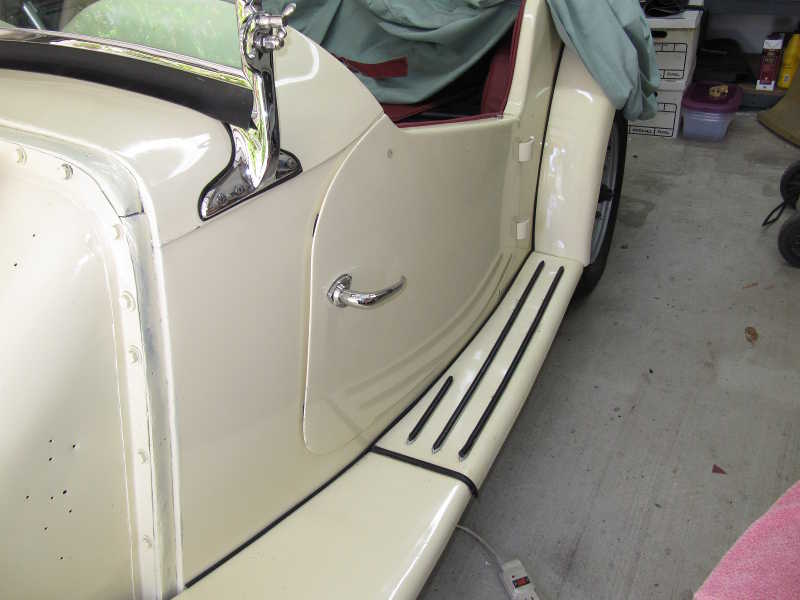
Finally, the left-side panels, including the door panel, are in place. The latch looks good and the door fits nicely, too.
The panels are all finally in, and I'm glad to see the end of that part of the project. I think they look really nice.

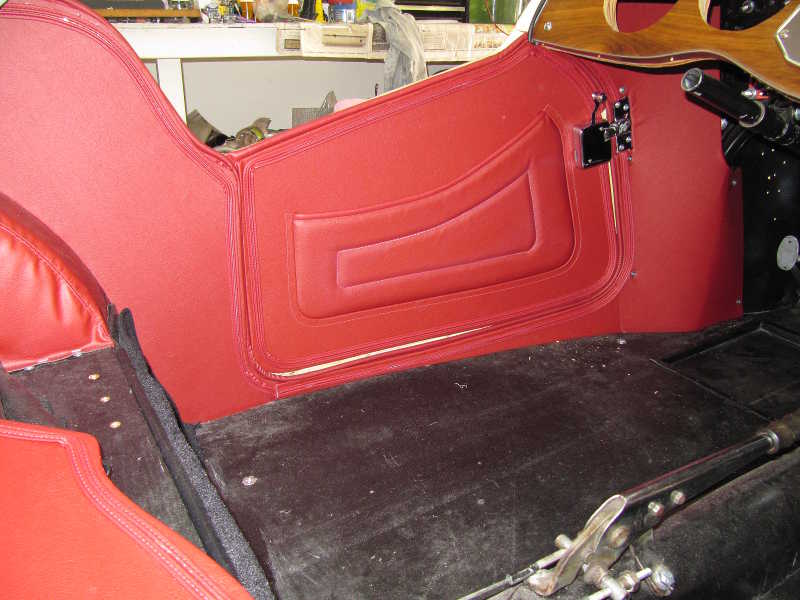
With the installation of the panels and seats, the interior is really starting to take shape.
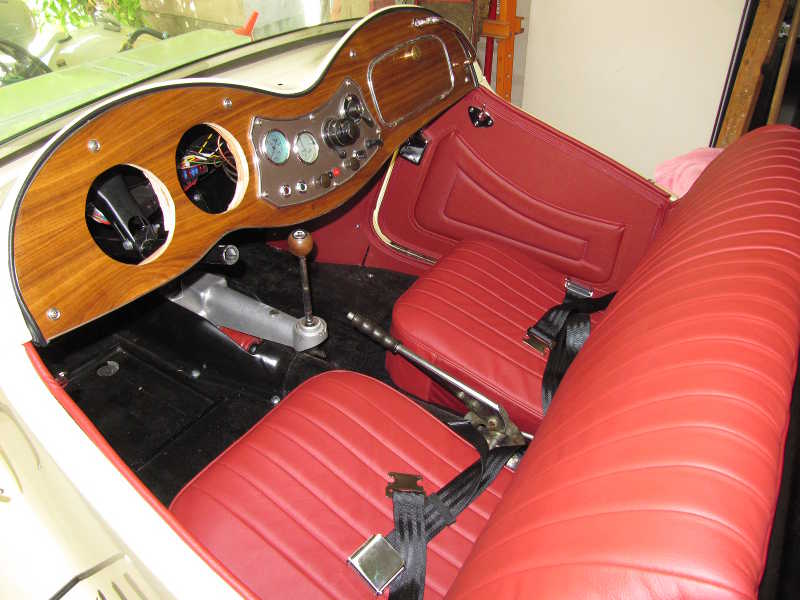
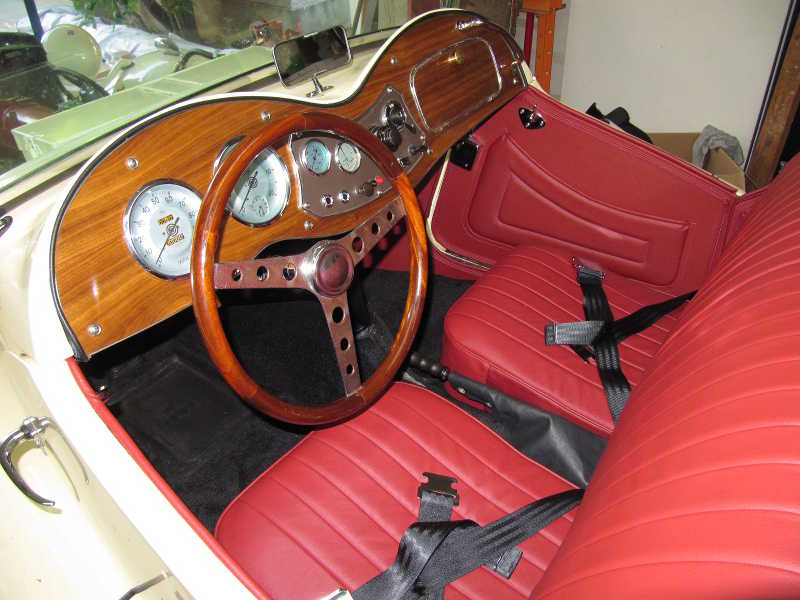
With the installation of the remaining dashboard bits, steering wheel, and carpets, the interior is now largely complete. One or two of the transmission-tunnel carpet pieces have not been installed, but they are problematical and serve little purpose, so I am not installing them at this point. Maybe later, if I feel they are needed.

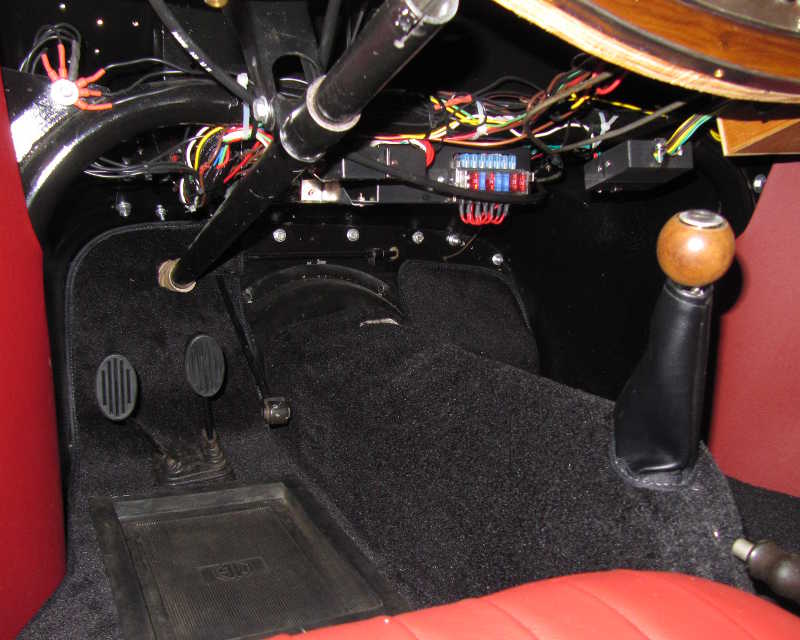
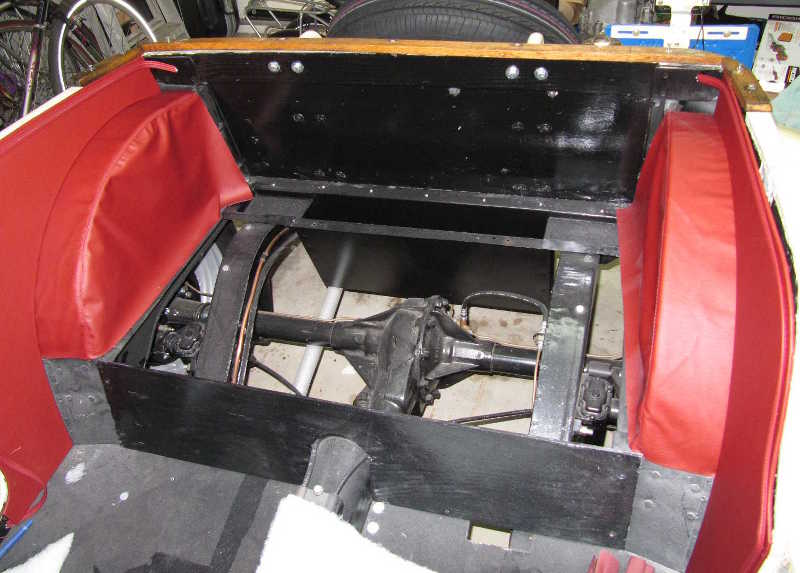
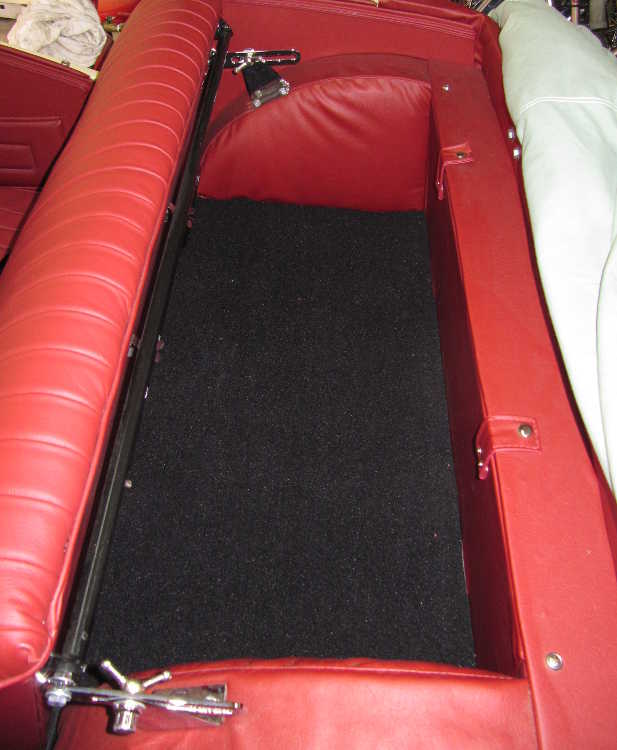
The carpet set, incredibly, didn't include a piece to cover the floor of the rear compartment. I bought a piece of black automotive cut-pile carpet, trimmed it to the right size, and glued it over the floor. I normally don't glue carpet (the other pieces are held down by snaps), but the floor panel is not intended to be removed, so a more permanent installation is warranted.
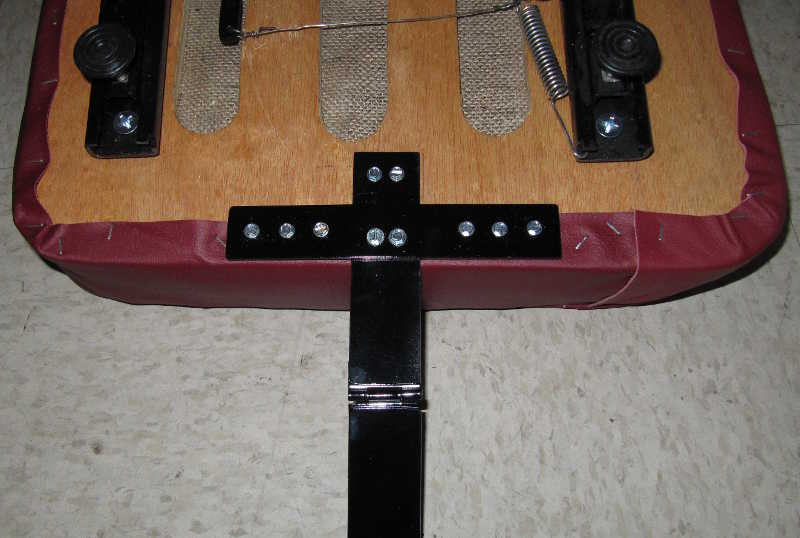
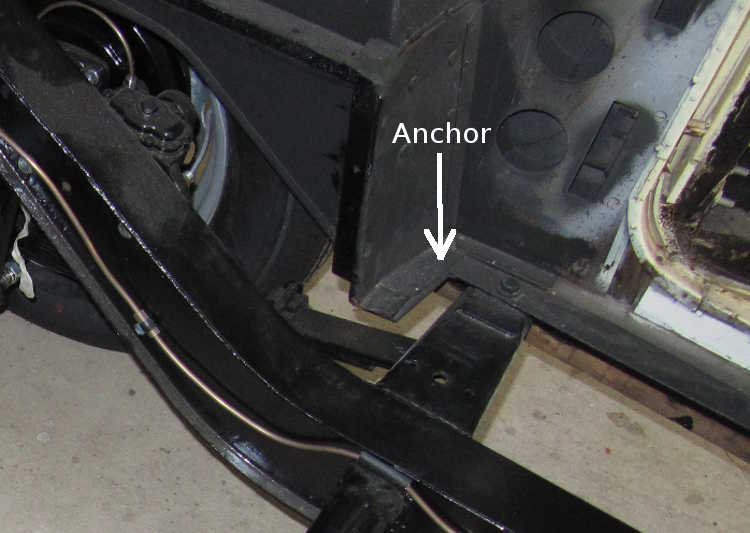
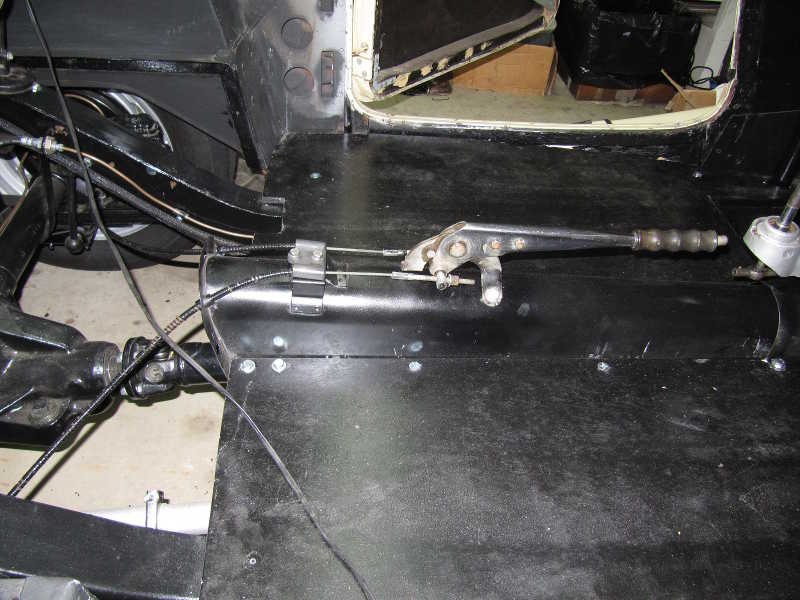
I obsessed quite a bit over this one. The TD ain't exactly your archetypal safety car, but still it should have a pair of competently installed seat belts. Ideally, they should be anchored to the frame. Problem is, the anchor points also have to be located correctly for the seat belts to be effective, and there really is no frame piece that is available and properly located.
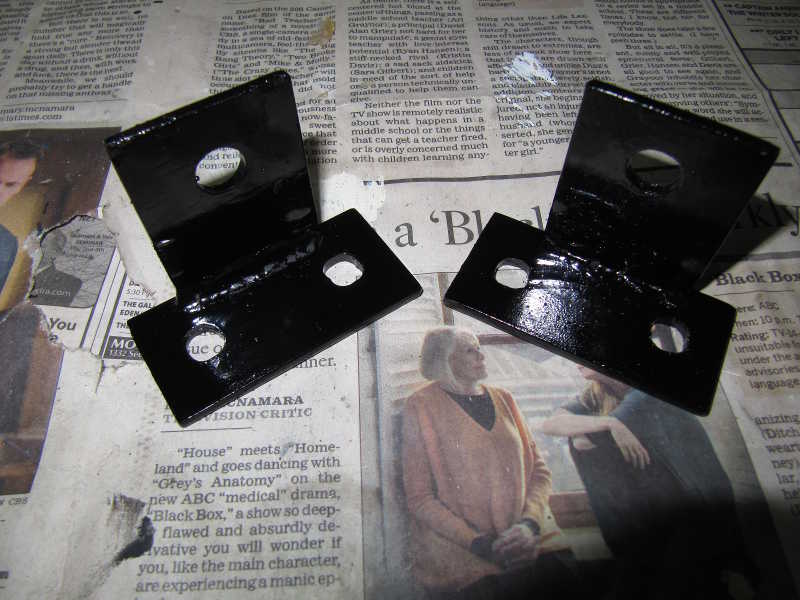
For the inner mounts, some people weld extra steel to the floor mounts at the rear end of the drive-shaft tunnel. This reinforces the tunnel so the belts can be mounted on its sides. I did something similar, but without the frame welding: I made L brackets out of 1/8" steel and mounted them on the two 5/16" bolts that go into the floor mounts. This should be quite strong.
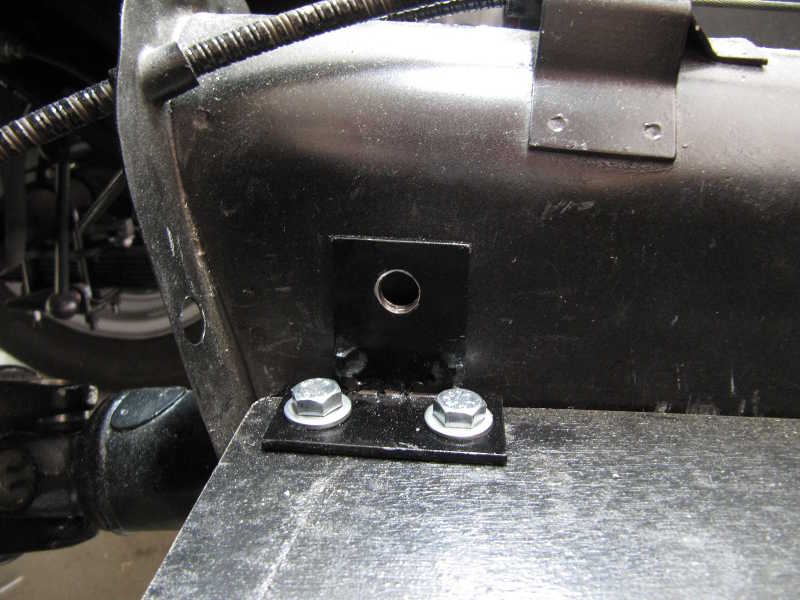
For the outer anchors, I drilled holes through the floor and the steel body frame underneath it. This steel angle stock is bolted to the frame very close to the anchor point, so it should be quite strong. In the right picture below, you can see the part of the body frame where it connects, although on the opposite side of the car. (If you're wondering why I didn't mount it to that large, strong piece just forward of the mount point, there's a reason: it's used to mount the rear spring. It's pretty well filled by the spring-mounting hardware, so the opposite side is not accessible.)
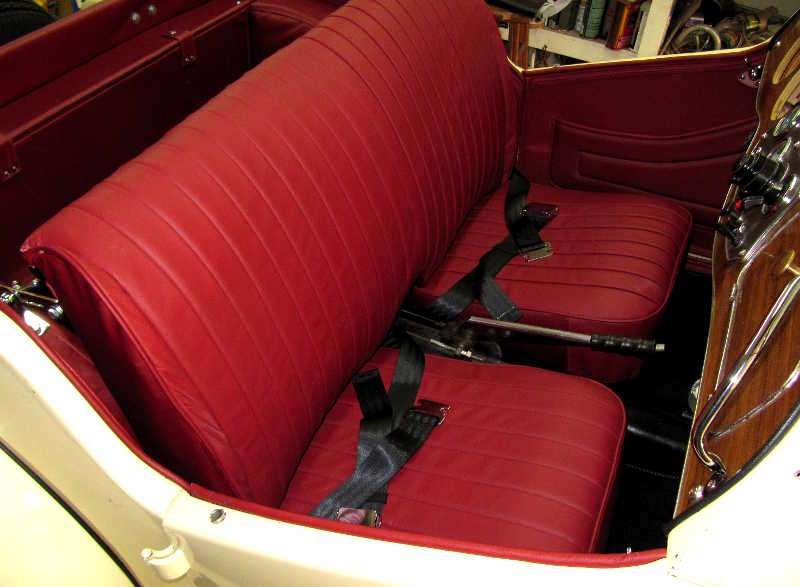
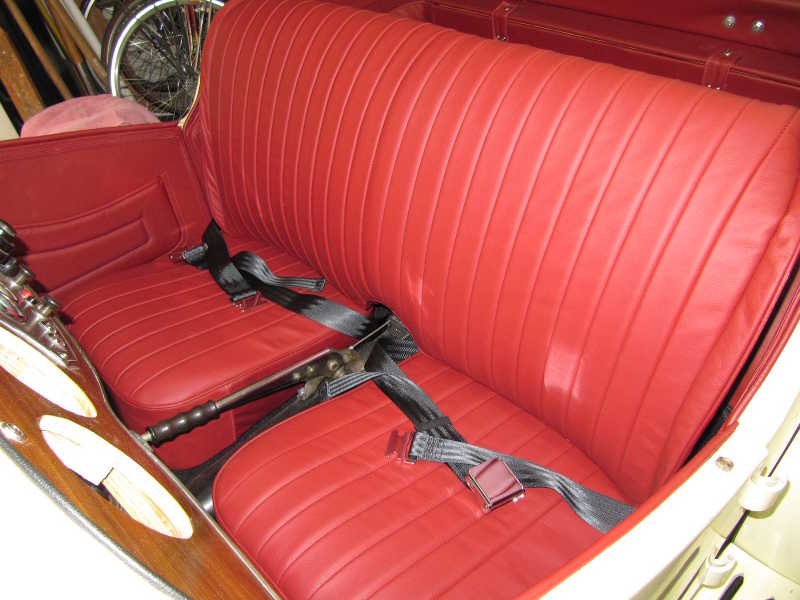
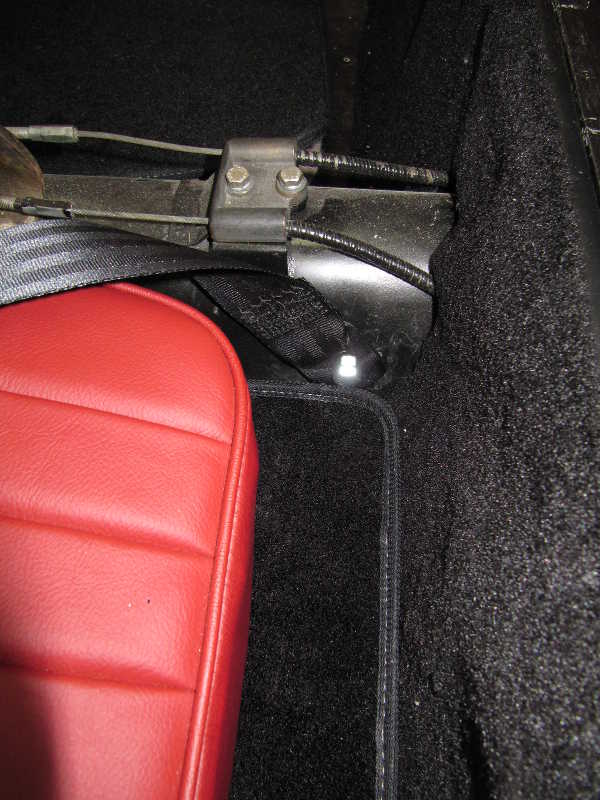
The seat belts were installed at the same time as the carpets and seat bottoms. The belts now look good and are correctly oriented to provide whatever degree of safety they can.

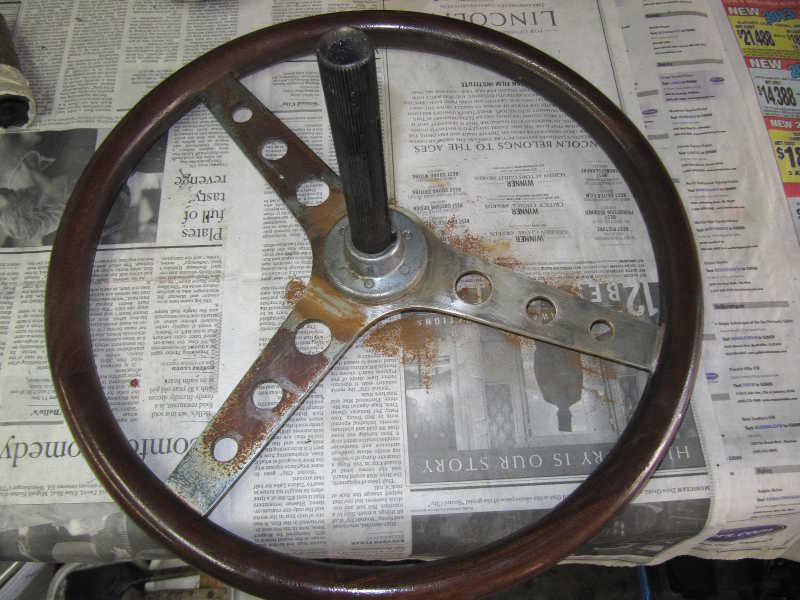
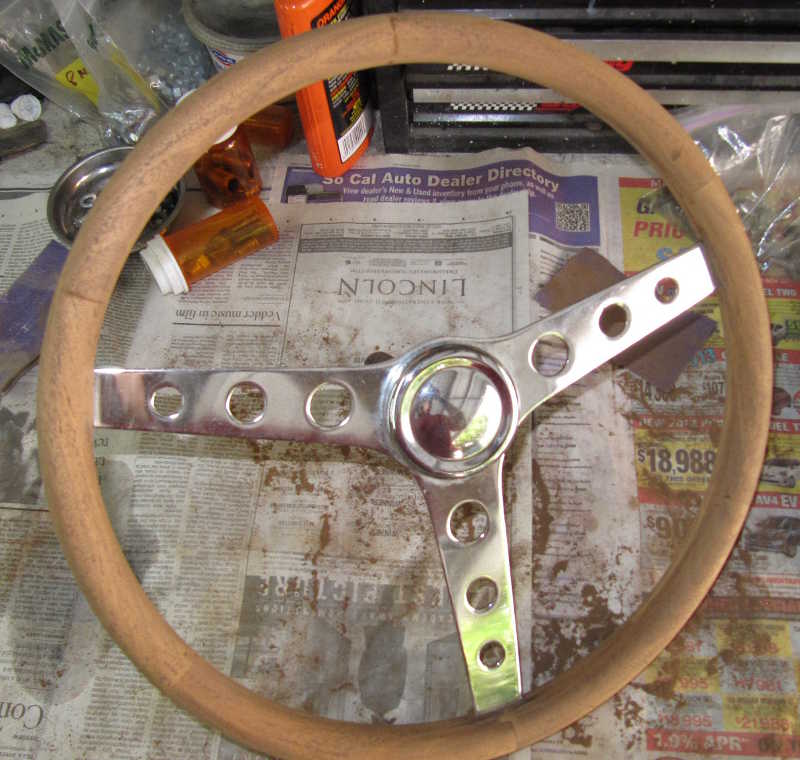
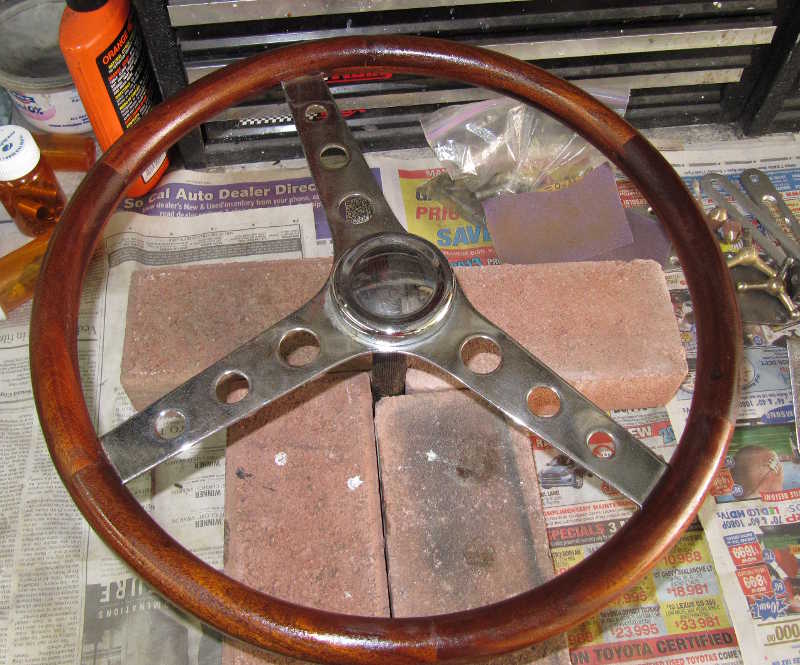
The steering wheel was not original, but I kept it anyway, as it was pretty nice. It had some problems: there was rust on the rear side of the spokes, and the wood's finish had absorbed a significant amount of crud. I sanded off the rust and gave the backs of the spokes a coating of clear lacquer, as replating wasn't practical. I sanded the wood rim, removing all the old varnish, and gave it a fresh coat. The last picture below shows it drying after the first coat (it received two).
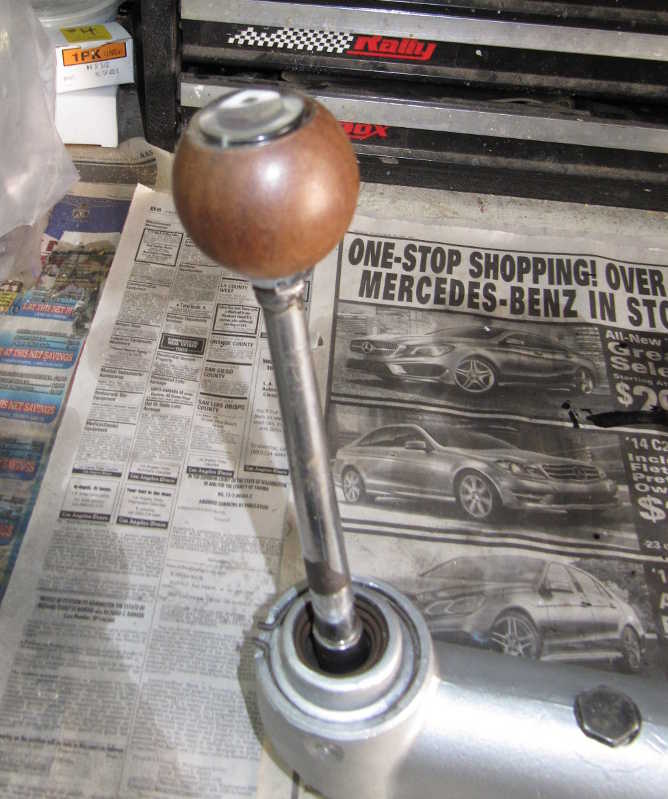
The shifter had an ugly wooden knob with the wrong shift pattern printed on it. I got a new one with an MG logo; it looks much better. The threads for the new knob were 8x1 mm, for some strange reason, while the earlier ones were 3/8 UNC. Apparently the threaded part of the shifter had been damaged at some point, because the end of the shift lever was cut off and a 3/8" bolt was welded upside-down to the top. I couldn't remove the shift lever to work on it without drilling out some locating pins, and I didn't want to do that, as it risked damaging the shift housing. So, I ground the existing bolt down to the right diameter and cut new, 8mm threads with a die. The new knob fits nicely now, and the shifter looks like it was designed for it.
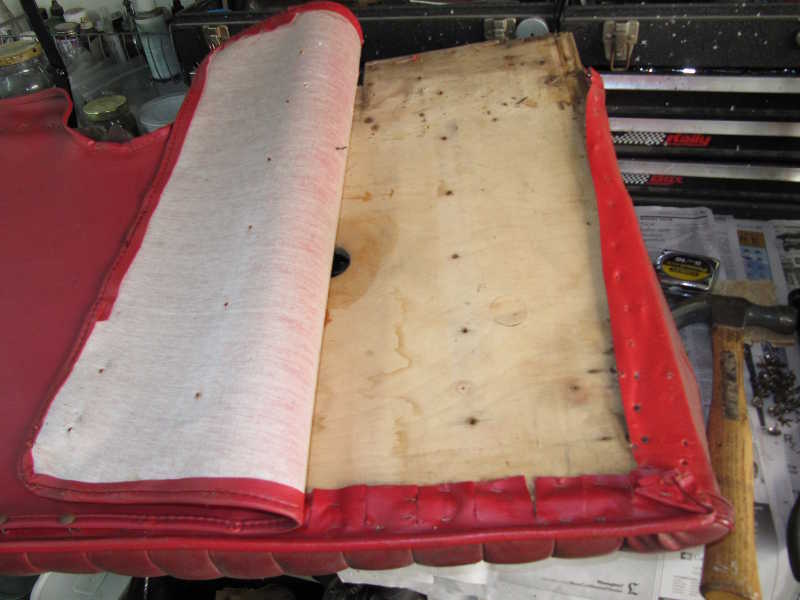
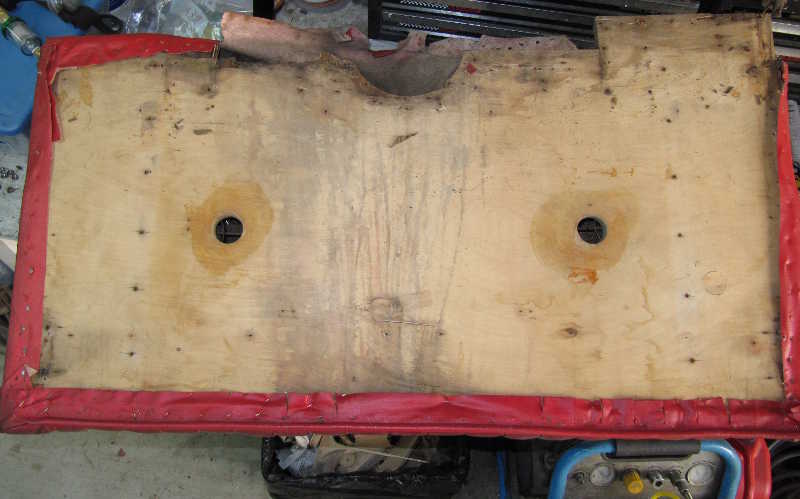
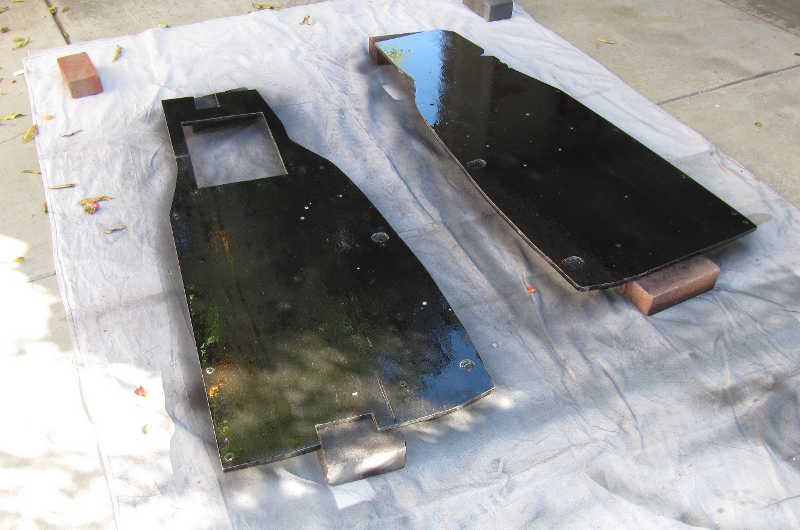
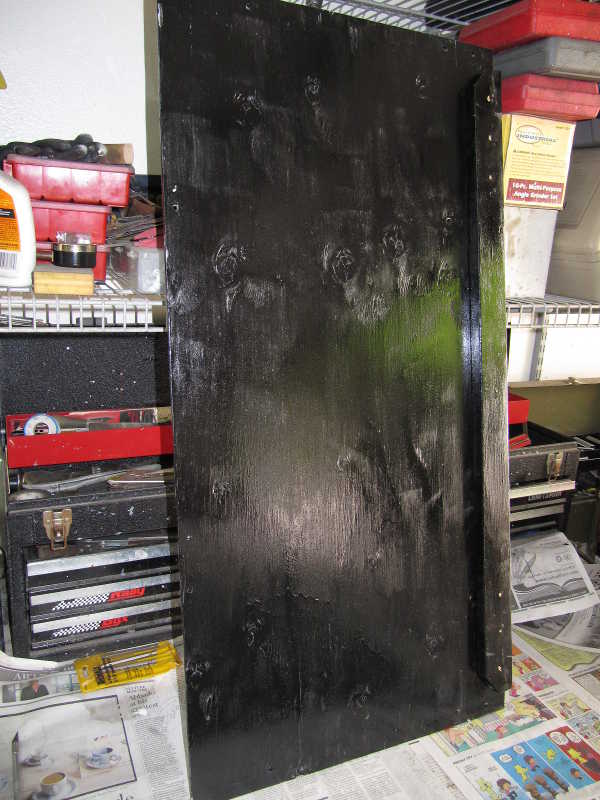
The existing floors had never been finished, so they had absorbed a lot of oily crud. They were not restorable. I cut new ones out of 1/2" plywood, using a drawing and the original floors as a guide. A lot of the cutouts in the drawing seemed unnecessary, so I left them out until it was clear that they were needed. (Most weren't.) I gave them coats of primer and gloss black paint.
The wood in the rear section also had to be redone. From what I've been able to determine, the vertical wall behind the seats originally was a metal piece, but it's long gone. The wood replacement should be fine, though. I trial-fit the pieces, then primed and painted both and added a stiffening part to the larger piece. It all fits well and looks good.
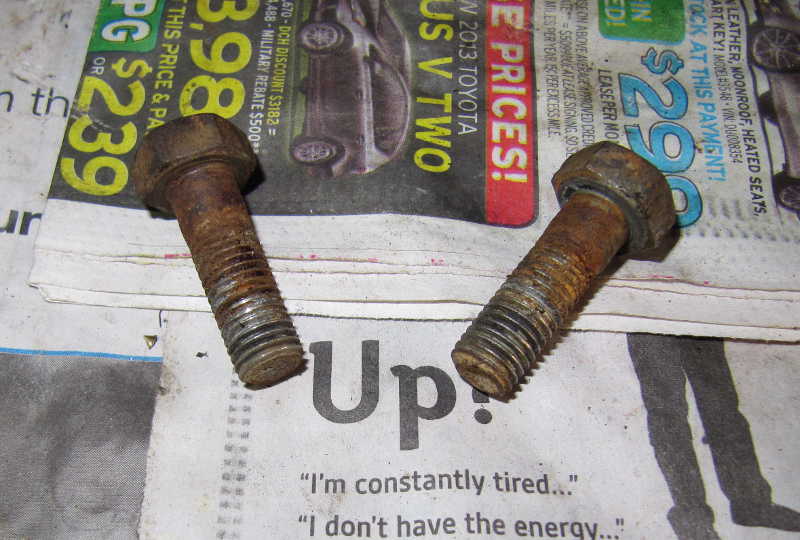
Many of the parts I removed from the car needed refinishing. Although some, like bolts, could have been purchased, they're expensive. BSF bolts go for at least a dollar each, often quite a bit more. Electroplating is extremely expensive these days, so it probably would have cost at least as much to get the old ones replated.
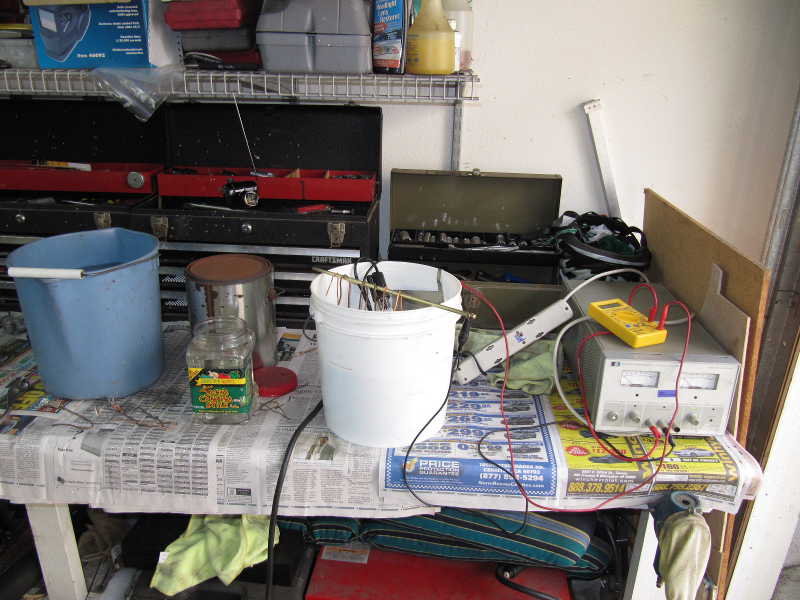
I've been doing electroplating for a long time. I started doing it when I was restoring bicycles. I don't have any way to galvanize hardware, but I do have a nickel plating setup, and that should do. Below is a picture of it. The tank, filled with nickel sulfate solution, is the white bucket. The others are a bucket of clean water, a degreaser solution (strong detergent), and a small container of a hydrochloric acid solution. The latter is used for removing any remaining galvanization (zinc) and pickling the parts before plating. The parts being plated are hung from a brass rod set on top of the plating tank (the white plastic bucket). The laboratory power supply is perhaps a little grand, but it allows me to regulate the current easily.
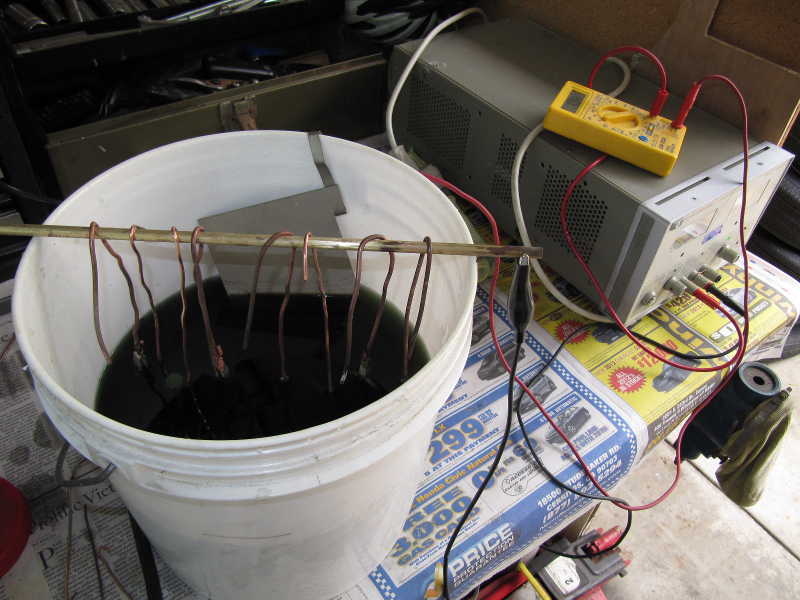
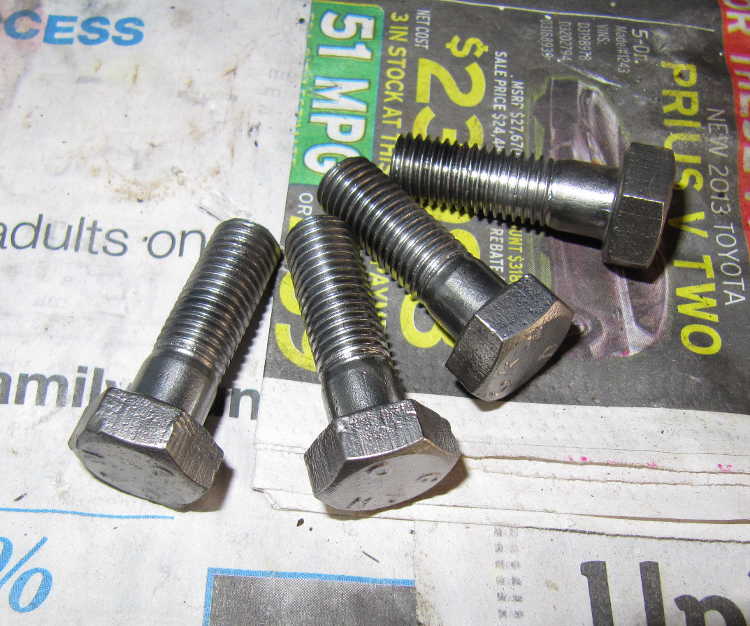
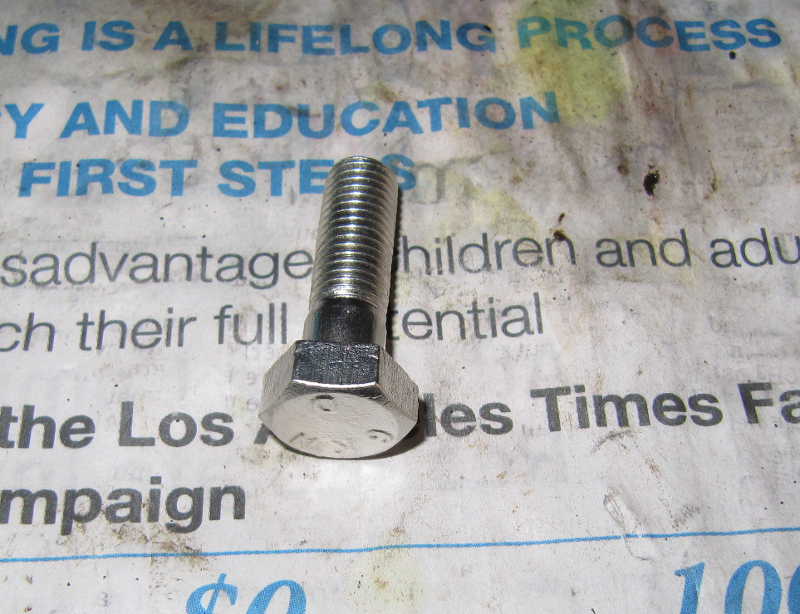
Below is an example of what I start and finish with. The hardware coming off the car is, unsurprisingly, pretty beat up. I use a rotary wire brush on a bench grinder to remove the rust and dirt. If the parts are greasy, I clean off the oil in solvent. The second picture shows a set of cleaned but unplated bolts. I then clean the parts in the hot degreaser to remove any residual oils, rinse, and put them in the hydrochloric acid solution. When they have stopped fizzing, the remaining zinc has been removed; I rinse the parts and move them to the plating tank. It takes about a half hour at 100 mA per square inch to deposit a few tenths of a mil of nickel. A finished, plated bolt is shown in the third picture.
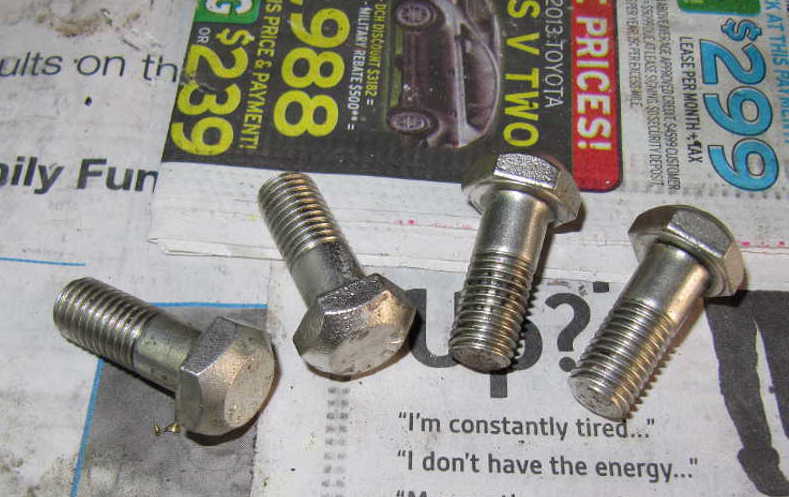
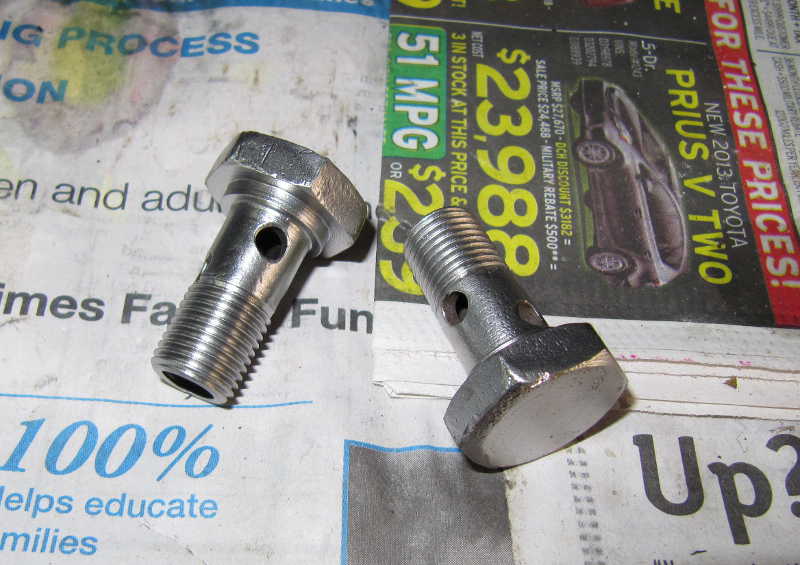
Below is a picture of the plated mounting bolts for the brake backing plate. A few spots on the threads did not get plated, probably because they weren't cleaned well enough. This is the trickiest part of plating screws; it's difficult to clean the threads completely. For the most part, I do my best, and I don't worry if the plating on the threads is imperfect. Below also are two of the bolts that hold the banjo fittings for the tubes from the engine to the oil filter.
The pictures above show protective plating; that is, plating intended primarily to protect the parts and secondarily to improve their appearance. Many parts, however, need to have their original, shiny, chrome-plated appearance restored; that's decorative plating, a much more difficult thing to do.
It's important to note that a lot of modern "chrome plating" is really just bright nickel plating or some other metal finish that looks like chrome. Real chrome plating requires a copper layer, nickel, and then just a flash of chromium. Most of the plating done in 1952 was real, three-layer chrome, and today that's both expensive and difficult to find. My process is fundamentally bright nickel, but with some cobalt salts added to the bath, making the nickel look a lot like real chrome. This eliminates the chromium bath, which is expensive and toxic. I still do the copper layer, as it fills imperfections and buffs easily to a good shine. Plating the nickel on top of the shiny copper gives it a nice shine as well, which can be further buffed to make it really gleam.
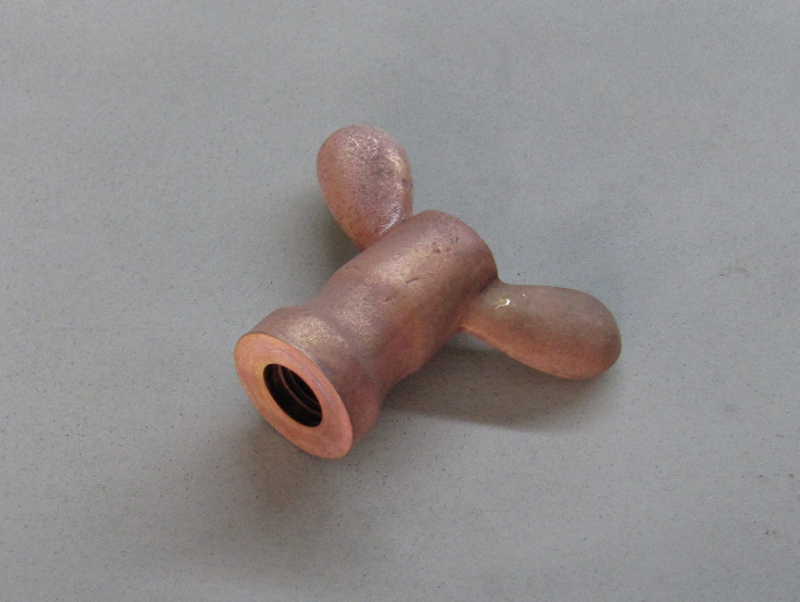
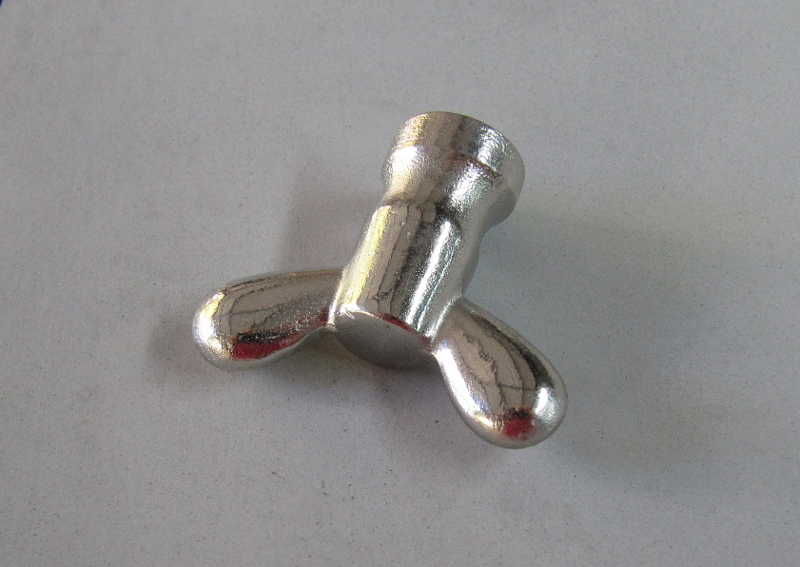
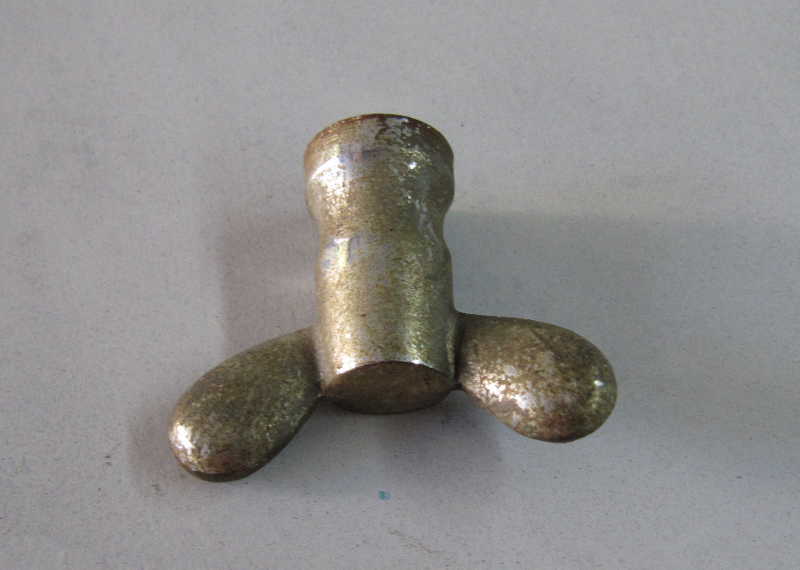
Here's how I replated the windshield wing nuts. The first picture shows the nut in its original, corroded condition. I wire brushed it to remove the dirt and corrosion; in the second picture, you can see that the loose chrome and nickel were removed by the wire brush alone; the copper layer is showing through in places. To remove the rest of the chrome, I unplated the part in a hydrochloric acid bath at a fairly high current density (~1A/square inch). The bubbles around the cathode are hydrogen, and the anode, oxygen, caused by electrolysis of the water. The blue bath is my copper-plating tank, filled with copper sulfate solution and sulfuric acid. I use ordinary no. 12 copper wire as an anode.
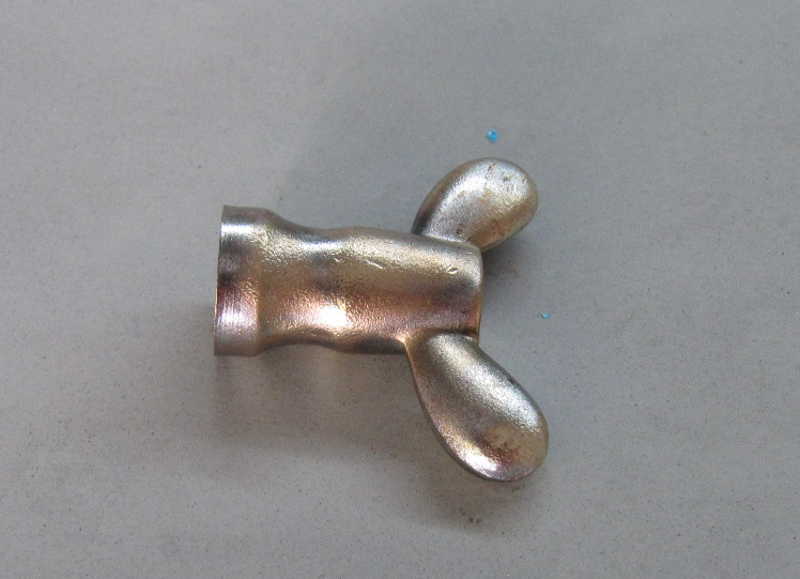

After removing the chrome, I wire-brushed off the old copper layer, which was surprisingly thin, showing that the part was made of brass (I had expected steel). The second picture shows it copper plated, before buffing. After buffing, the part was cleaned carefully to remove all traces of the oily buffing abrasive; then it was nickel plated. For decorative plating, I use twice the metal thickness of protective plating, so I can buff it without worrying about buffing through the plated layer.
The result is in the last photo. I think it looks good, but with a thicker copper layer, I could have eliminated a lot of the imperfections. Plating enough copper to do that, with a piece this rough, would have taken several hours. I just didn't think this part was worth it.