Fuel System Upgrades
Steve
Maas
Long Beach, California, USA
The Porsche's fuel system is typical for a car of its era. It uses a mechanical fuel pump to move fuel directly from the tank to the carburetor, and it has no fuel filter. This has a number of disadvantages which are easily overcome by modern fuel-system design. Thus, the project to upgrade the car's fuel system with an electric pump, regulator, and filters. The fuel tank in any older car can also be a problem, as the interior eventually rusts, and rust flakes can clog the carburetors or fuel pump. For that reason, I sealed and coated the inside of the tank, as well.
Click on any of the pictures below to bring up a larger version in a new tab or window.
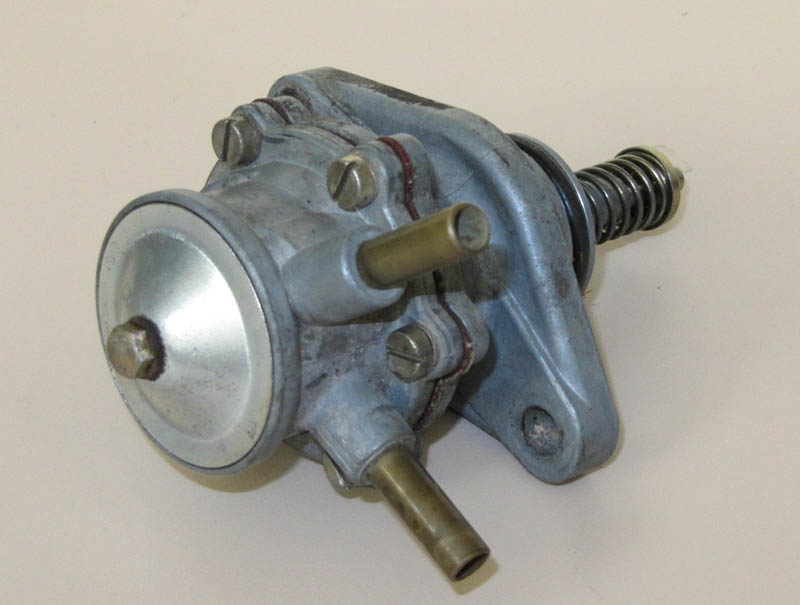
The Mechanical Fuel Pump
Mechanical fuel pumps have a number of problems. First, eventually every pump's diaphragm splits, creating the potential for coil contamination. (I realize that this point it controversial, but I'm not convinced it can be ruled out.) A second problem is that mechanical pumps often do not self-prime easily, especially when, as in the Porsche, they are far from the tank. This results in difficulty getting the car started when it has been out of use for a week or so. Several times I have had to disconnect the fuel line and use a hand-operated vacuum pump to prime the pump. A third problem is the lack of any adjustment for the output pressure. It can easily be too high, blowing fuel past the carburetors' float valves and causing flooding. A final problem is a propensity to vapor lock, especially if fuel bubbles get lodged in the pump's valves.
Below is the Porsche mechanical fuel pump. A nice pump, for what it is.
Installation of an Electric Fuel Pump
The problems of the mechanical pump are easily eliminated with the installation of an electric fuel pump. I used a Facet pump, rated for a slightly higher output pressure than needed for the carburetors, and a regulator to set the pressure at the carburetors. The higher fuel-line pressure gives some slight reduction in the likelihood of vapor-bubble formation and provides an adjustment for the fuel pressure. Of course, I added a fuel filter ahead of the regulator.
The Facet pump was chosen for its high reliability and low cost. It was mounted in the "smuggler's box," a box in the trunk that was originally intended for an auxiliary heater, about the only sensible place where it fits and has good access to the tank. To minimize noise, rubber bushings were used on both sides of the mounting flange. Power was provided by a new, fused circuit, controlled by a relay that handles all the car's switched power.
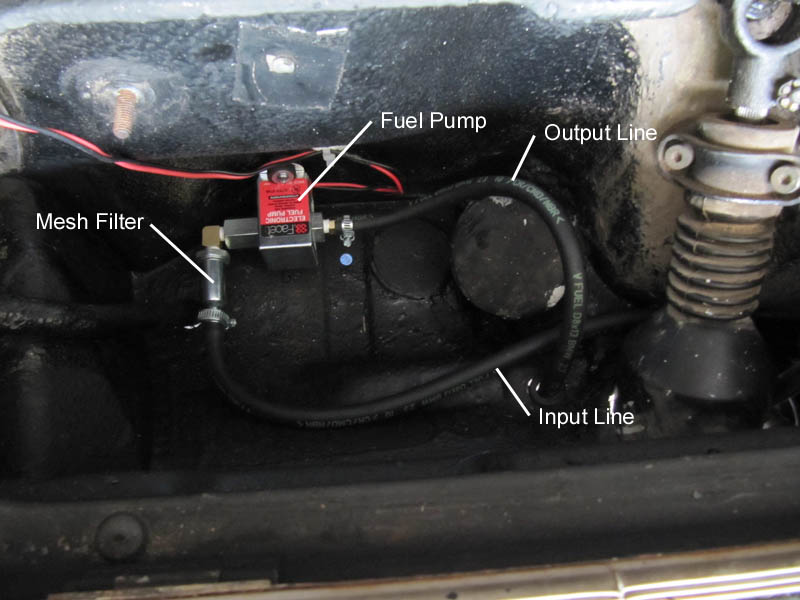
I installed the manufacturer's recommended mesh filter ahead of the pump. To prevent the need for a tight bend in the fuel line, it was mounted at a right angle to the pump. Unless the fuel tank is in very bad condition, this filter should not require frequent replacement.
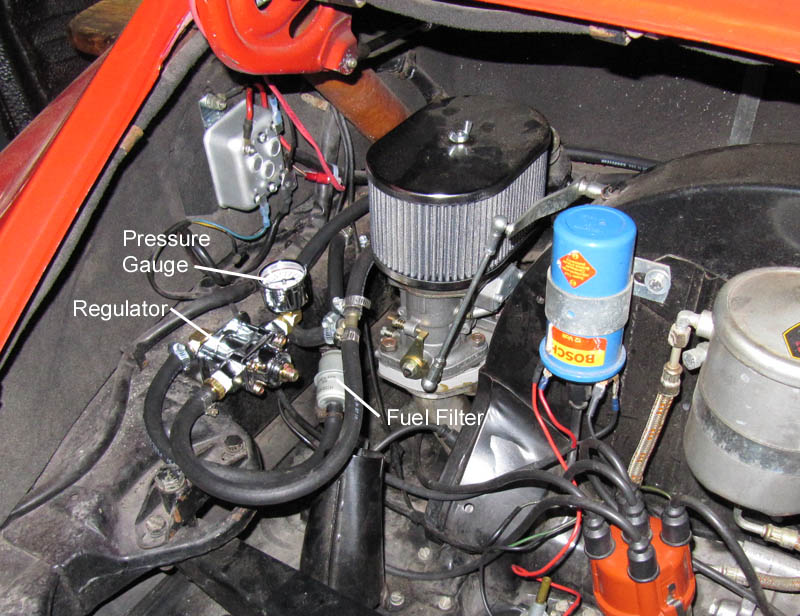
The pump had a rated output of 5-7 PSI, which was too high for the carburetors. To reduce the pressure to a sensible level for the Weber carbs, I installed a Holley low-pressure regulator. This is a nice unit, reliable and inexpensive, and it holds its setting very well. I mounted the regulator in the engine compartment near the point where the fuel line emerged. So I could check and adjust the fuel pressure conveniently, I installed a pressure gauge on the regulator's unused outlet port. I keep the outlet pressure around 2 to 2.5 PSI. There is no need for a higher pressure, and, indeed, higher pressure could force fuel past the carburetors' float valves, causing flooding.
I removed the mechanical pump and made a blanking plate from 1/4-inch aluminum. I cut a gasket for it from 0.010-inch paper gasket stock.
Restoration of the Fuel Tank
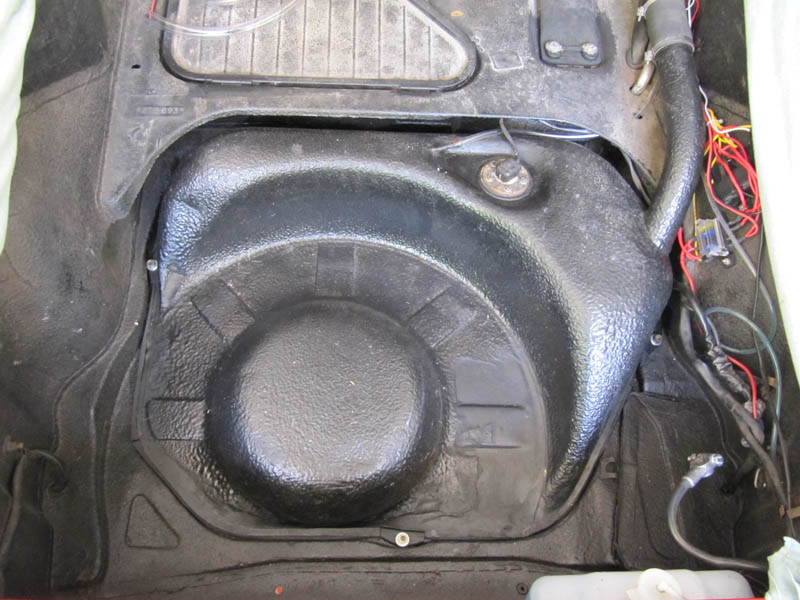
While the car was apart, I removed the fuel tank and fixed a number of age-related problems. One was a very slow leak (a couple drops per day) around the drain plug. The leak was caused by corrosion of the sealing surface, which I fixed. I also made new aluminum gaskets for the plug and the fuel-outlet fittings on either side of it. The fuel pickup had a fine mesh screen, which had deteriorated considerably. Since the pump had a mesh filter at its input, I felt that this was not necessary, so I removed the screen. The tank's external coating was peeling over a large area, so I removed it, finding rust underneath. I cleaned off the rust, which fortunately had not progressed very far, and primed and repainted.
I used the Eastwood kit to seal and coat the inside of the tank. Although it was a cumbersome job, which took several hours, it was straightforward and went well. Because of its complex shape, the Porsche tank is a little tricky to coat thoroughly and requires care to make sure that all surfaces are coated. Fortunately, it is unlike other tanks, in that it has no interior baffles; that would have made the job considerably more difficult.
Before reinstalling the tank, I replaced the sealer around its edge and replaced the old hardware with stainless steel fasteners. Instead of the $45 Porsche sealing tape, I used a good-quality weatherstripping tape from Home Depot, costing $5. It's almost indistinguishable from the Porsche part, except that it is somewhat higher quality. I now have a fuel tank that should not become a reliability problem.
Later Additions and Modifications
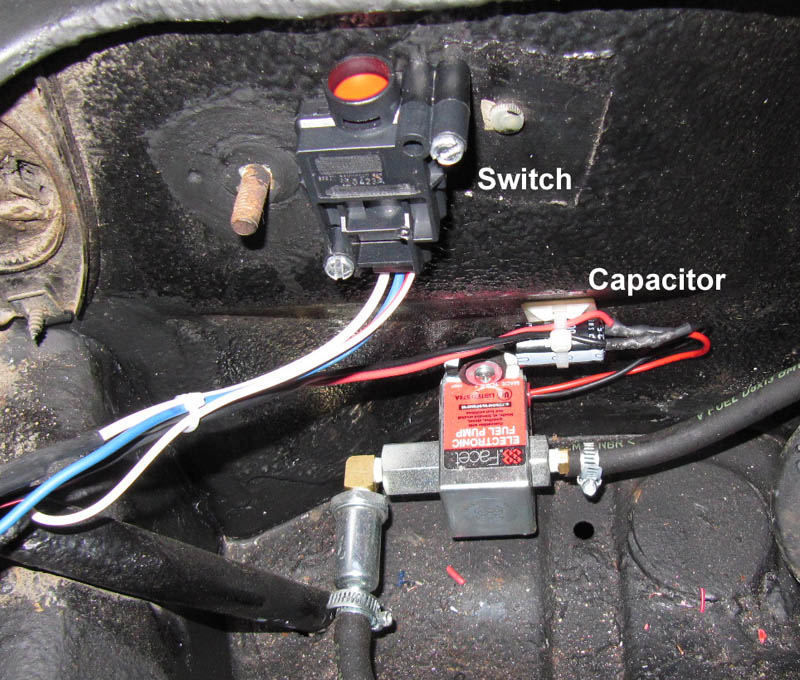
Two modifications to the fuel-pump electrics seemed prudent. The first was the addition of an impact switch, which shuts off the fuel pump if the car is in an accident. The switch, designed for a mid-90s Ford Ranger pickup truck, has become the standard for this application. The second was a 3300-uF capacitor connected in parallel with the pump's power-supply terminals; it eliminated electrical noise from the pump that was getting into my radio. It was mounted on the firewall under the dc lines' cable support.
While investigating an engine problem, I noticed very small bits of black stuff in the fuel delivered to the carburetors. I assumed that it came from deteriorating rubber fuel lines, probably caused by ethanol in the fuel, even though the lines were rated for ethanol-containing fuel. In response, I replaced all the lines after the fuel filter with steel fuel-line tubing; rubber tubing was used only for links. I slit open and inspected some of the rubber lines that were removed,but I couldn't find the source of the contamination. Still, those lines were the likely source, and this change eliminated it.
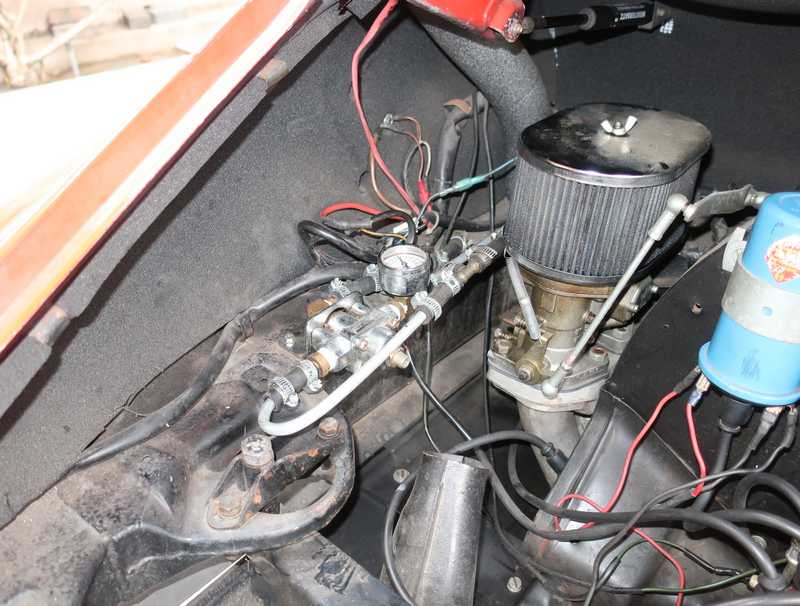
Originally I had a long, stupid-looking U-shaped tube from the car's fuel line to the fuel filter and regulator input. I eventually changed it to the simpler, cleaner layout shown in the picture.
Disclaimer
I don't like writing this, but now that the lawyers have taken over American society, I suppose it's necessary. If you choose to do this, or something similar, but don't know enough about automobiles to be comfortable with it, get some help. Gasoline is toxic and highly flammable, so the consequences of a fuel leak, or other errors in working on the fuel system, can be serious. In any case, I'm not forcing anyone to make these changes, so if you choose to attempt them, you take full responsibility for the results. This is solely a report on my experience. It is not intended to be a set of instructions for duplicating my work or a recommendation to do it. It's entirely possible that some of the things I've done in this installation may not be consistent with existing automotive standards and practices, or may even be unwise. You're on your own.