BMC 1275 cc A-Series Engine Rebuild
Steve
Maas
Long Beach, California, USA
December, 2008
I bought a used 1275 cc MG Midget engine (a 12V, probably made between 1972 and 1974) with the thought of putting it into my Sprite. This is a common upgrade, as the Sprite's stock 948 is flea-powered, and the 1275 is virtually a drop-in replacement. I had to rebuild the engine, of course; I chose to do this to stock specs, no fancy stuff. This page describes the project.
In the end, I decided not to put the engine into the Sprite. My Sprite still has its original engine, and I'd like to keep it and the car together. Not a wasted effort, by any means, as I learned quite a lot about the details of the A-series BMC engines. To me, it was well worth the cost and effort.
Click on any illustration to open a larger version.
Tear-Down and Inspection
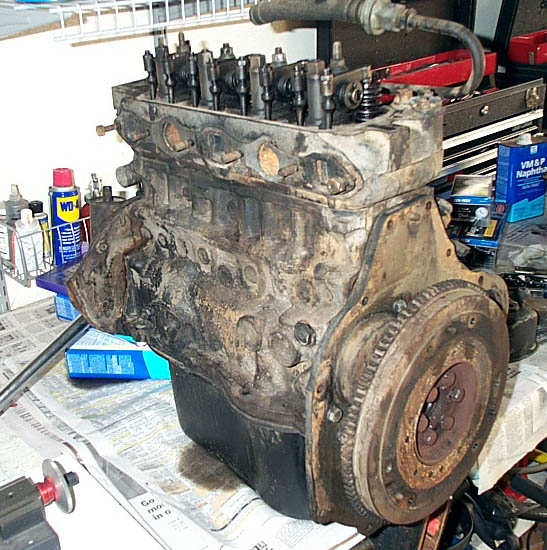
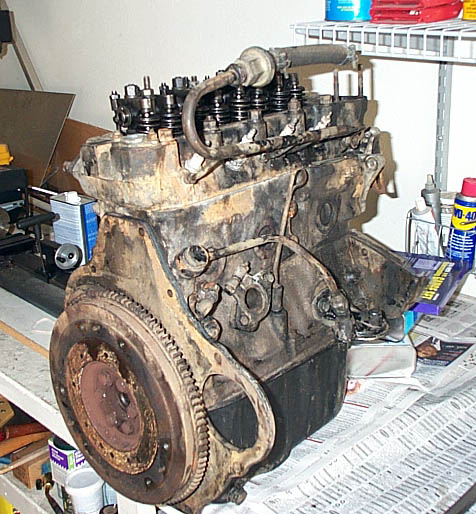
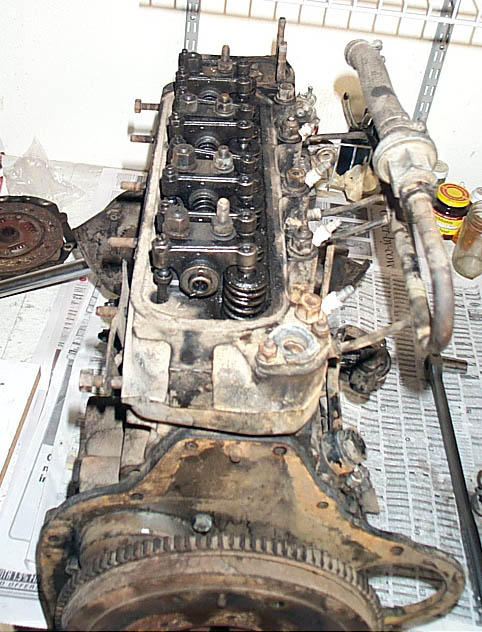
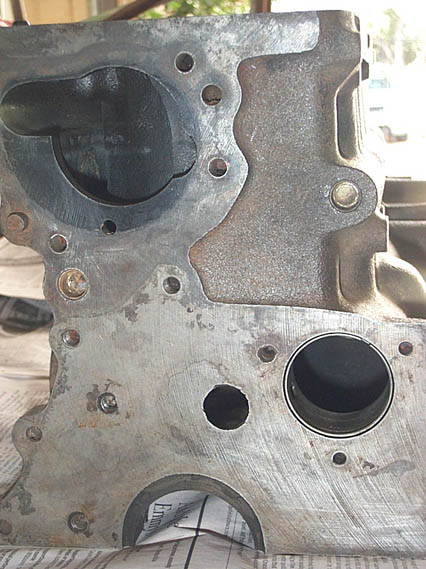
The engine, as I received it, looked pretty grim. Dirty and covered with gunk. As I pulled it apart, however, I realized that it was actually in very good shape, and the gunky, black oil which coated the interior had done a good job of embalming it. I have no idea how long it had been sitting around, but at least it had not deteriorated during that time.
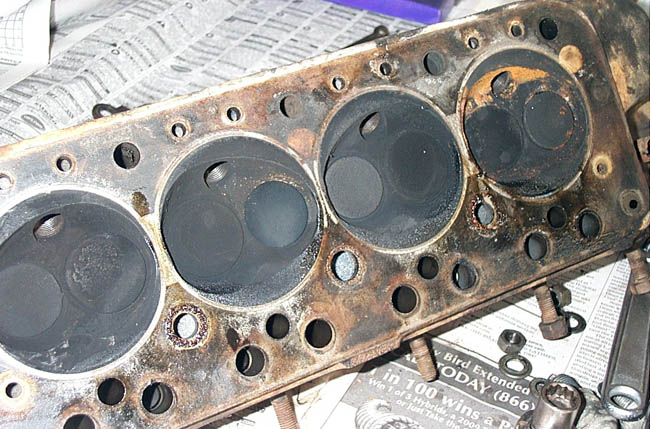
Below are some pictures of the engine as I received it. Grungy looking, but actually it was in remarkably good shape.
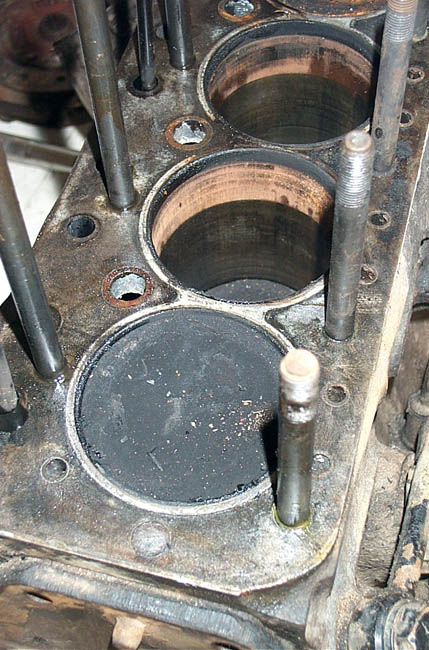
Pulling it apart, I found pretty much what one would expect. Lots of carbon in the combustion chambers and black oil all over the interior.
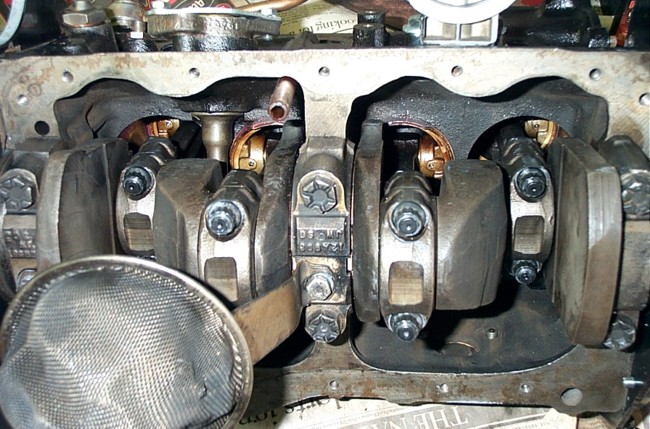
Some parts were better than others. The bearings were in remarkably good condition, except for one of the rod bearings, but the tappets were awful. (This is not unusual; for some reason, tappets are often not hardened properly, so they show this kind of pitting. It results from fatigue of the hardened layer of metal at the surface.) The crank was 0.01" undersize, showing that it had once been reground. It looked great; smooth journals and correct fillets in the corners. (The striations visible in the pictures are not scoring; they're just oil stains.)
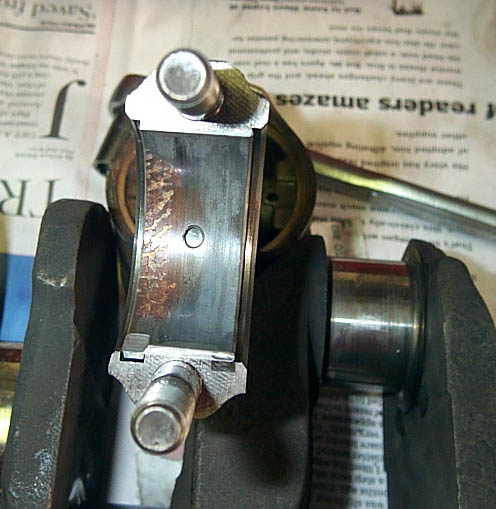

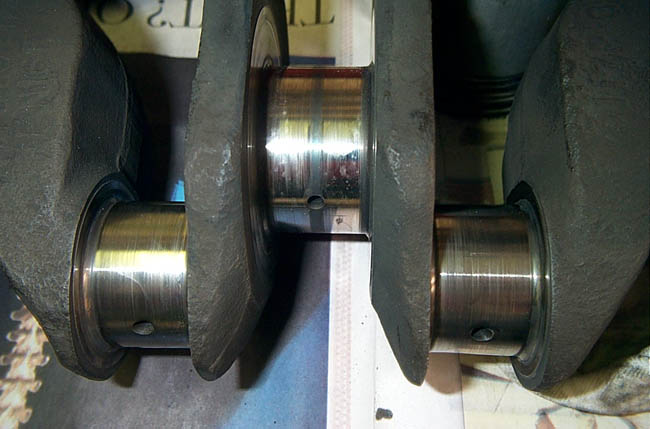
One bad bearing, when all the rest are OK, sets up a red flag. There may have been some kind of blockage in an oil passage, which prevented this bearing from getting enough oil. I was especially careful to check the passages to this rod; they seemed OK. The crank journal was good, too; no sign of scoring or excess wear. The deterioration of this one bearing seems to be an example of common, high-mileage engine wear.
The Rebuild
I cleaned the block and other parts in petroleum distillates, a couple gallons in a big, tupperware storage bin. I brushed off all the greasy stuff and ran pipe cleaners through all the oil passageways to make sure they were clean. I decarbonized the head and pistons and cleaned the ring groves. In short, everything was cleaned, degunked, decarbonized, or otherwise returned to pristine condition.
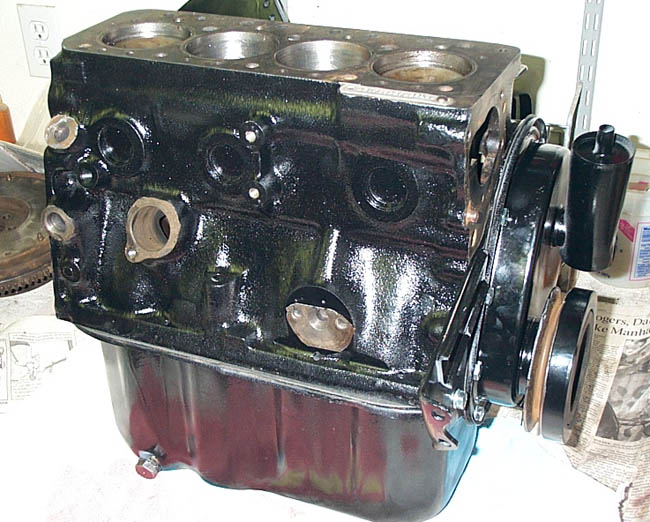
After cleaning the block in solvents, some dirt and rust was still cemented to the sides. I took this off with a wire brush. I had to treat the outside of the head similarly, as well as the front and rear plates. Afterward, everything looked good, ready to be painted. I decided to paint the engine black, which is BMC's standard color for 1275s. BMC green is sometimes used, so that, when installed in an early Sprite, it looks more like an original 948.
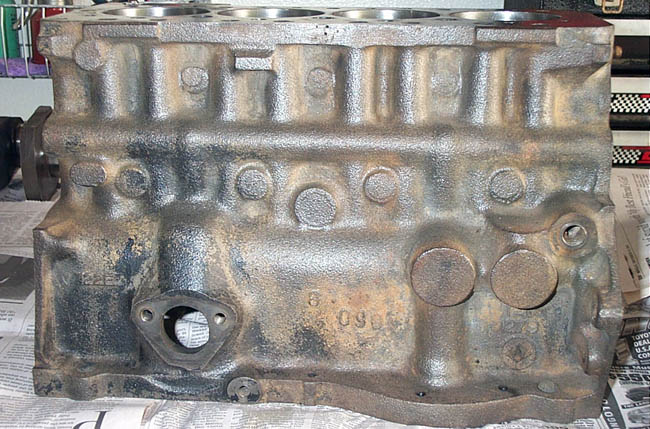

I checked all the critical dimensions and was pleased to see that they were quite well within spec. Especially the cylinders, which previously had been bored 0.020" oversize, were cylindrical within about a half mil, showing virtually no taper or out-of-roundness. The cylinders were identical in diameter within about a mil. The engine's previous rebuild was certainly done competently, and the owner obviously cared for the engine properly.
Somehow, I didn't get a lot of pictures of the reassembly. Of course, I put in new crank and rod bearings, and I checked their clearances with plastigage. I didn't replace the camshaft bearings, as they were perfect, and replacing them can introduce alignment problems. I replaced the piston rings, sizing the gaps in the usual way, and honed the cylinders. I bought tappets that were tested and guaranteed to be at least 55 durometer, the magic number for tappet hardness. Finally, I replaced the timing chain, even though the existing one looked good. In general, I think it's prudent to replace such parts; even if they seem OK, they still may not be good for another 100,000 miles. Naturally, I checked all dimensions, clearances, end-float dimensions, and so on, as I installed new parts. Because the previous work was so good, and wear was insignificant, literally everything was within spec. I smeared everything with molybdenum assembly lube before finally torquing it all down. I also used Loctite on inaccessible nuts and bolts.
I used ARP fasteners for the connecting-rod bolts. I just figured that the original ones had had enough use. They cost $120, but there are places where you just don't take chances.
The existing camshaft concerned me, as it had some light but obvious pitting near the lobes. The pitting was not nearly as bad as the tappets, but still there. I was reluctant to put that cam back into an engine, so I bought a good used one on eBay.

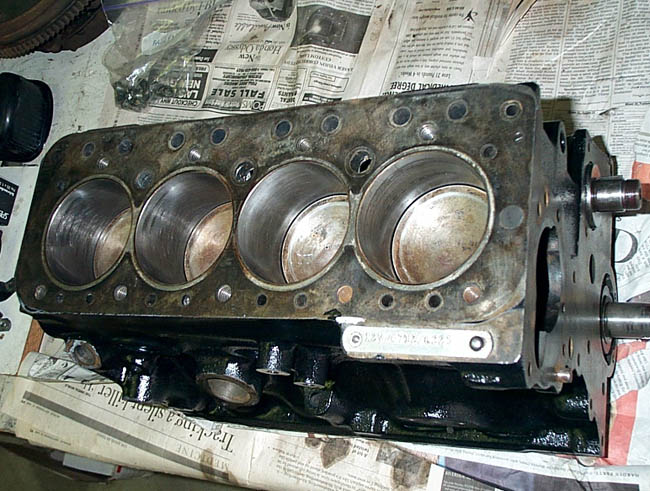
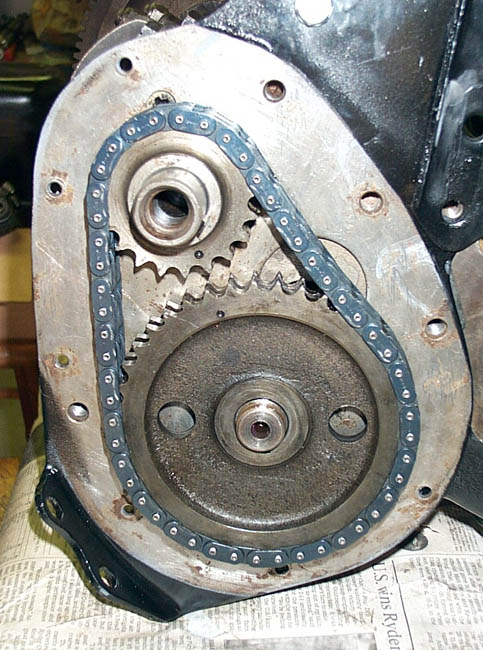
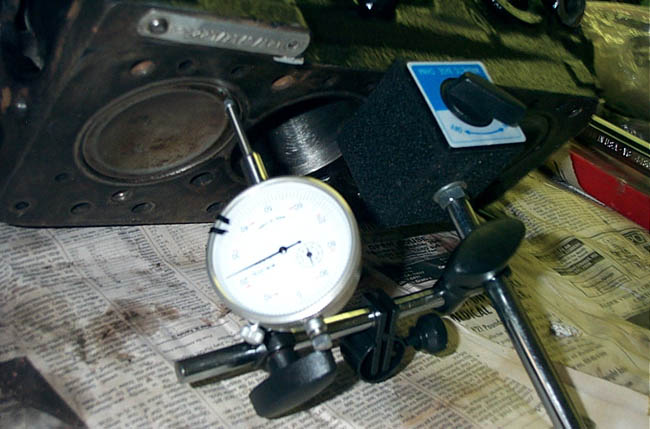
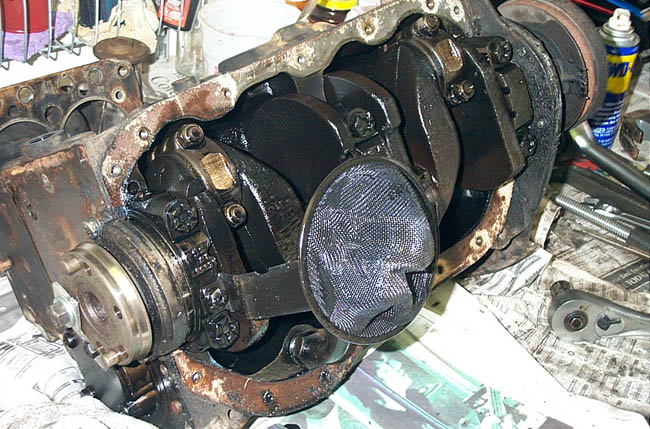
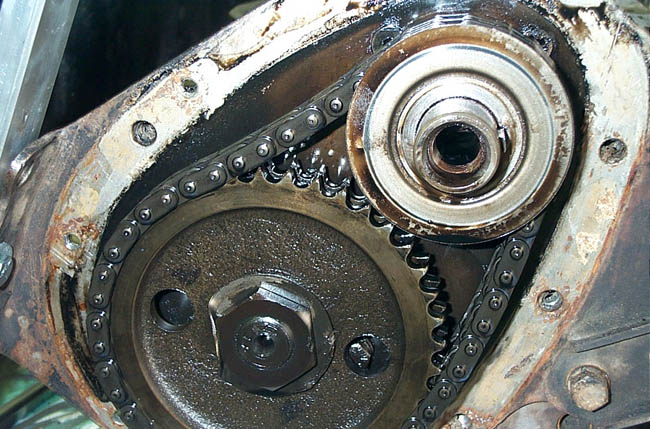
The pictures above show the crank reinstalled with the pistons and connecting rods. For safety, I used ARP fasteners for the connecting rods. Also shown is the aligned timing gear and the right way to find top dead center (TDC). Note that the block has been painted. Instead of the simpler and more common practice of painting the whole thing once it's together, I chose to paint it piece by piece, masking off the parts that had to stay unpainted. This is more trouble, but it results in a nicer-looking job.
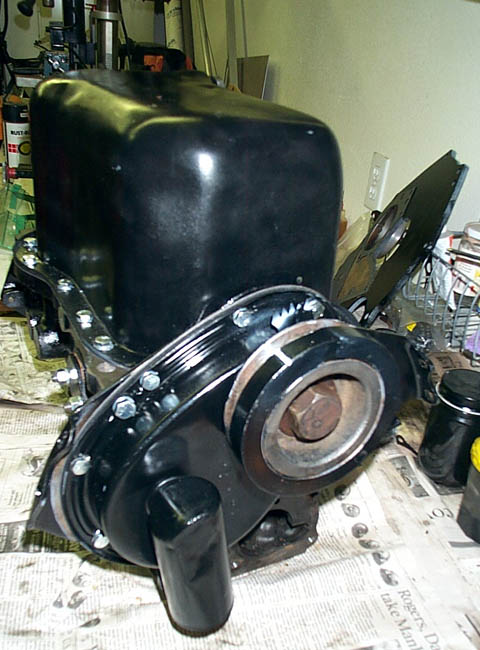
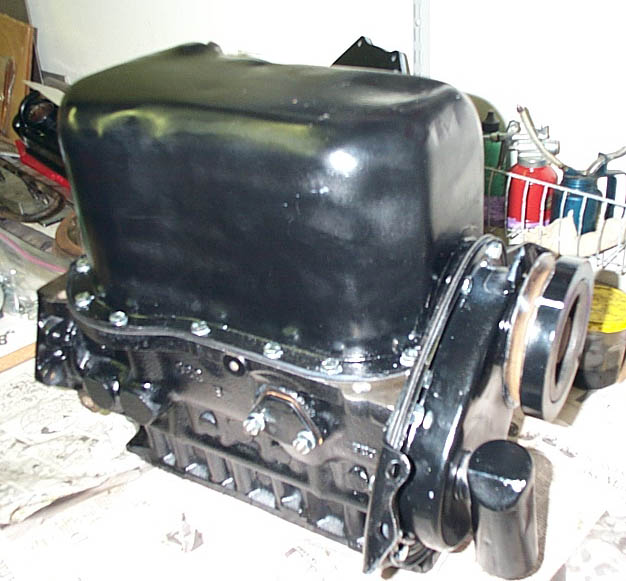
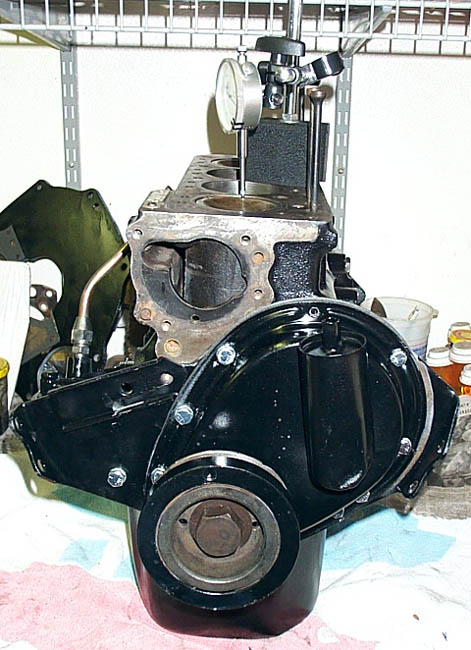
Finally, I installed the external parts, cleaned and painted as needed. I used all new fasteners of the appropriate grades. In the pictures above, you can see the white stripe I added to the crank pulley to make the ignition-timing mark clearer.
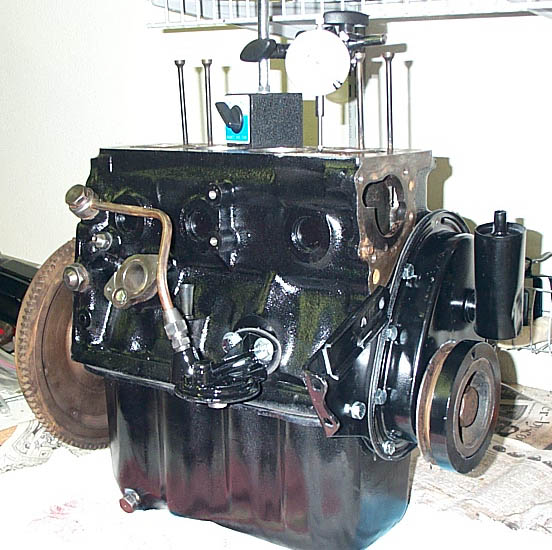
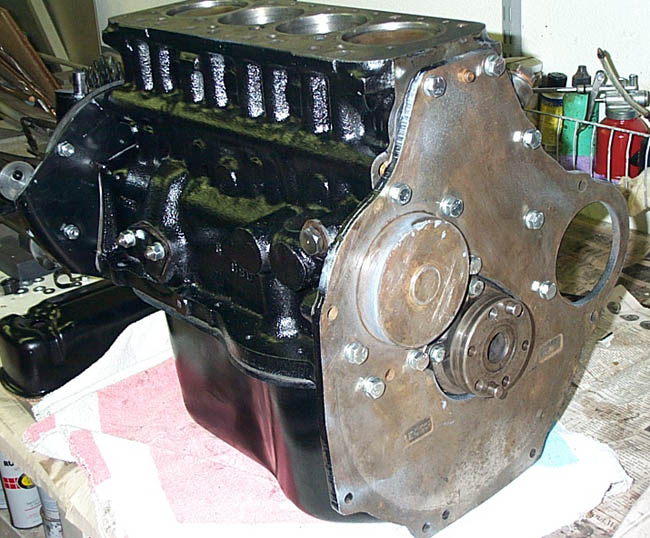
In the above pictures, the block is largely complete. To save weight, I'll leave off the flywheel for now. (In the pictures, I had just slipped it into place for turning the crank.) I dropped the valve pushrods into place so I could be sure I was on the compression stroke at TDC; this is necessary to get the distributor drive aligned correctly. And, yes, I know that four of the bolts shown in the rightmost picture will have to come off when a transmission is mated. I just wanted to be sure that the rear-plate gasket was compressed uniformly. Also, there are still a couple screws missing in front. I need to make one more trip to the hardware store.
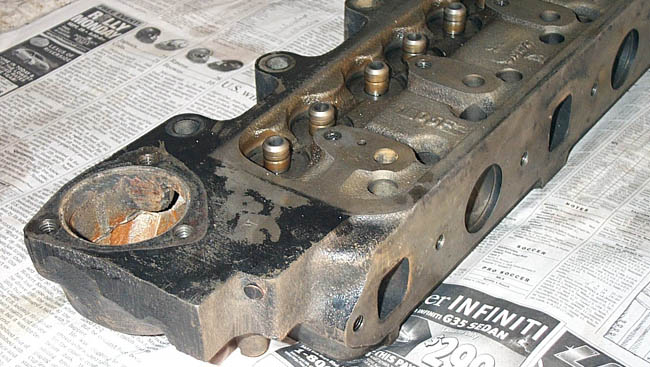
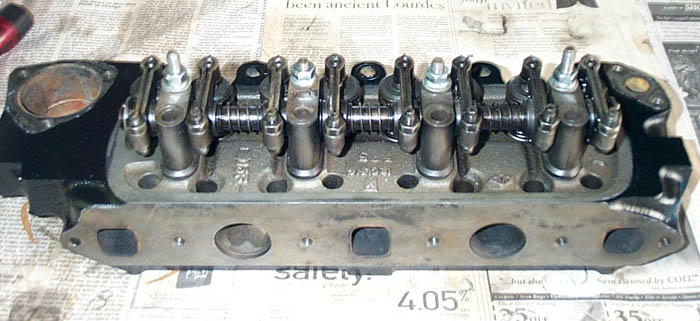
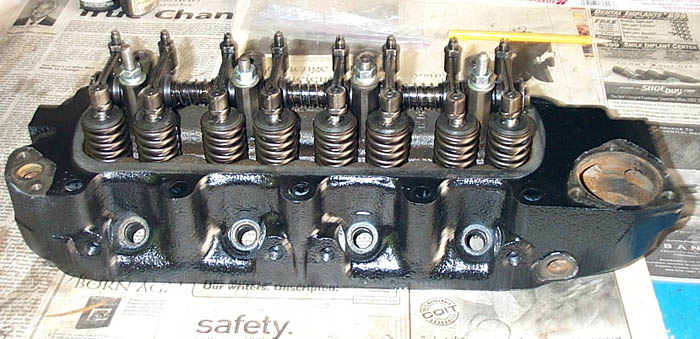
The Head
Now, what about the head?
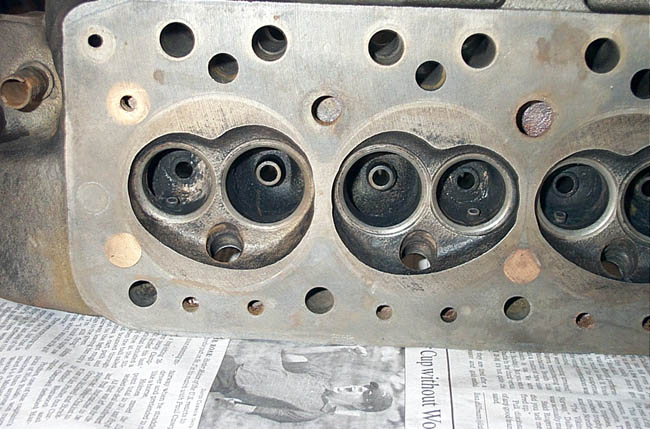
First, the problem of unleaded fuel. The conventional wisdom states that the use of unleaded fuel in these older engines leads to recession of the exhaust-valve seats, and eventual loss of compression. The solution is to install hardened valve seats. That's correct, as far as it goes, but the problem is greatly overestimated by most old-car enthusiasts. Valve-seat recession takes a long time to occur, and even then, it requires extended running or hard running, such as long freeway trips or racing. It probably never will be experienced in a "weekend car," which describes most Sprites and MG Midgets today. Finally, there are fuel additives that may help prevent seat recession. They don't use lead, which is the real need, but they probably do some good anyway. On the other hand, hardened seats are held in the head only by an interference fit. They can come loose, especially if the shop that inserts them is inexpert; then, major engine damage results. Most of the time, it's just not worth the risk.
I checked the diameters of the valve stems and the guides, and they were all within spec, so I saw no need to replace either. I just reground the valves the old-fashioned way. I also checked the rocker shaft and determined that it had no measurable wear. This is really unusual; most head rebuilds include a new shaft. This is another sign that the previous owner used good oil and changed it regularly. In the end, I replaced only the springs, again on general principles. If the next owner wants to do more, it's easy enough.
Some Final Thoughts
Although I did quite a lot of British-engine excavation in my younger days, this was my first full rebuild of a BMC A-series engine. I did it as much for the educational experience as for the finished product. It's not a difficult thing to do, but it does require quite a bit of attention to detail. All measurements must be checked, all torques have to be correct.
Because the engine was in remarkably good condition internally, and I was doing a stock rebuild, I didn't need the services of a machine shop. I think that any good, competent machine shop could do the usual kinds of work that are sometimes necessary for such a project. I would try to find a shop with A-series experience, however, if I were to install hardened valve seats in the head. The possibility of getting this wrong really scares me. Similarly, I would trust moderately scary things like rod lightening or port polishing to a shop with experience in building racing engines for British cars.
As of this writing, I haven't installed the head. I'll probably sell the engine. The new owner might want to do more with it than I did, and the block might be easier to ship with the head off.
Disclaimer
I don't like saying this, but I suppose it's necessary, now that the lawyers have taken over American society. If you choose to do anything based on this information, but don't know enough about automobiles to be comfortable with it, get some help. I make no guarantees that this information is correct, so you take full responsibility for the results of anything you do that is based on it. Engines are heavy and use substances that are both toxic and flammable; dealing with them can be dangerous. This is just a report on my experience with these engines. It is not intended to be a set of instructions for duplicating my work or a recommendation to do it. You're on your own.