![]()
Rebuilding the suspension is an important part of any restoration, one that is regularly ignored in favor of the engine, body, and interior. In this car, the brakes were in fairly good shape, but the suspension needed cleaning and many components had to be replaced. Fortunately, it had been well and regularly lubricated, so important (and expensive) parts like the king pin and pivots were in good condition.
Click on any picture to see a larger version in a new window.
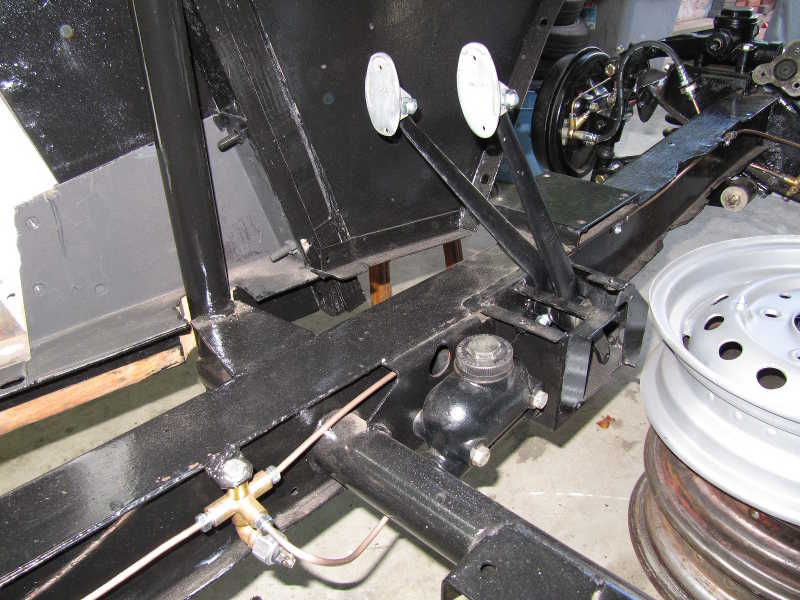
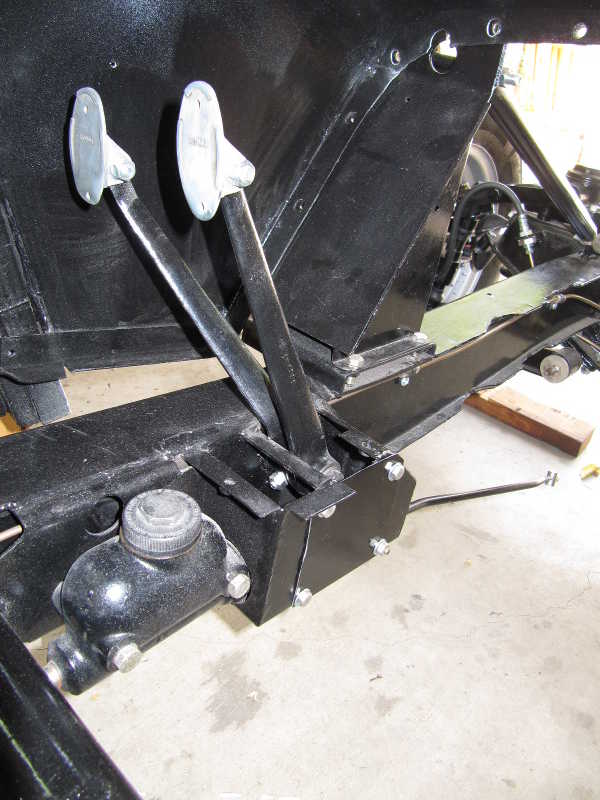
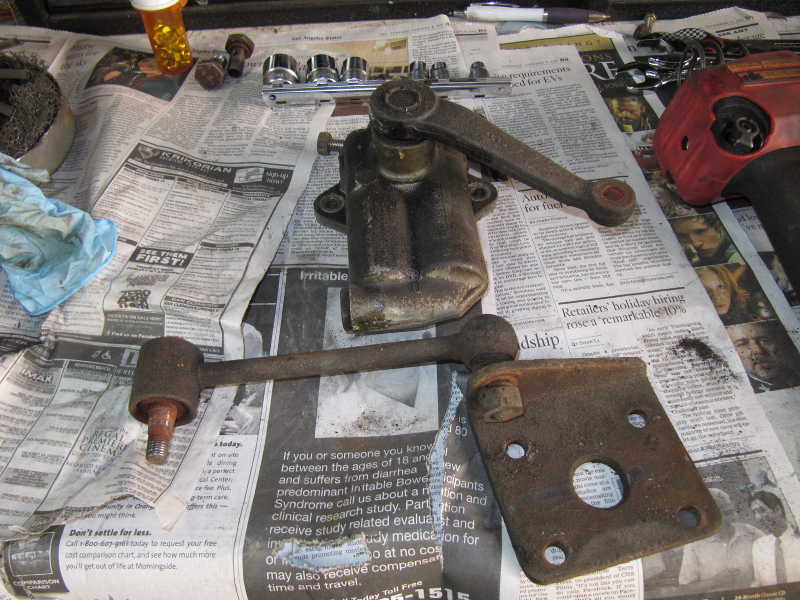
The pedal assembly was pretty grim--the box was full of old, dirty grease and the joints were loose. It needed a full cleaning and restoration. That new master cylinder boot, however, visible inside the pedal box, tells a more optimistic story.
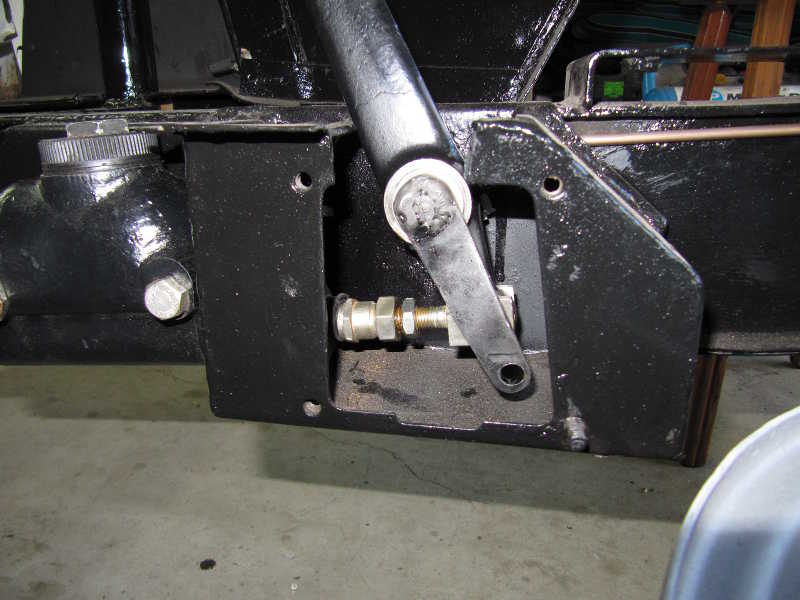
I was pleased to see that the master cylinder recently had been rebuilt. The bore was smooth and the internal parts were pristine, so I just gave the bore a light honing and repainted the body with caliper paint, which is resistant to brake fluid. The pedal pivot and pedal box were another story, however; the pieces were so frozen that I had to cut the pedal box to get the pedals out. The grease passages in the pivot were plugged with old grease; I cleaned those with solvent and a pipe cleaner. Finally, I made a new bushing for the brake arm, cleaned and painted the arms, and nickel plated the remaining parts.

When the frame, pedals, and all the master-cylinder parts were restored, the pedal box and master cylinder could be reassembled. I made a new cover for the side of the box. I also bought new pedal pads and a pedal-arm boot, but those don't get installed until the interior is nearly finished.
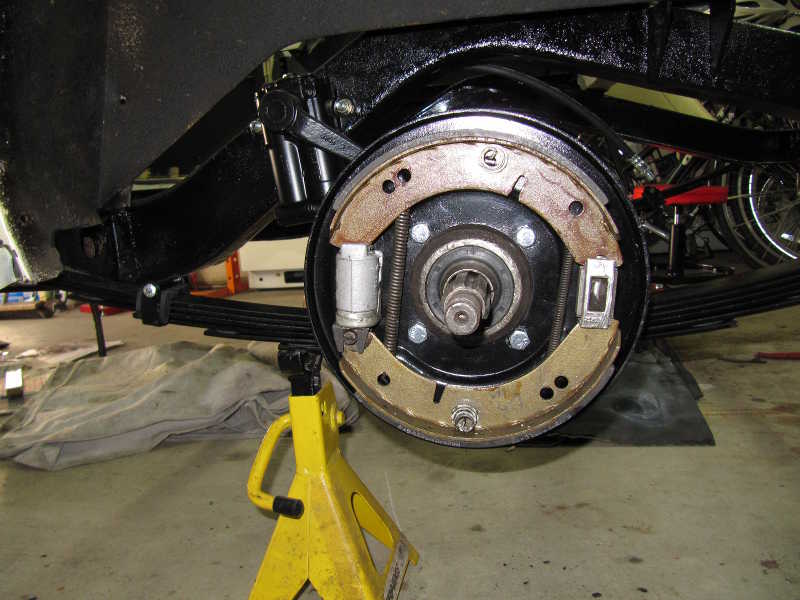
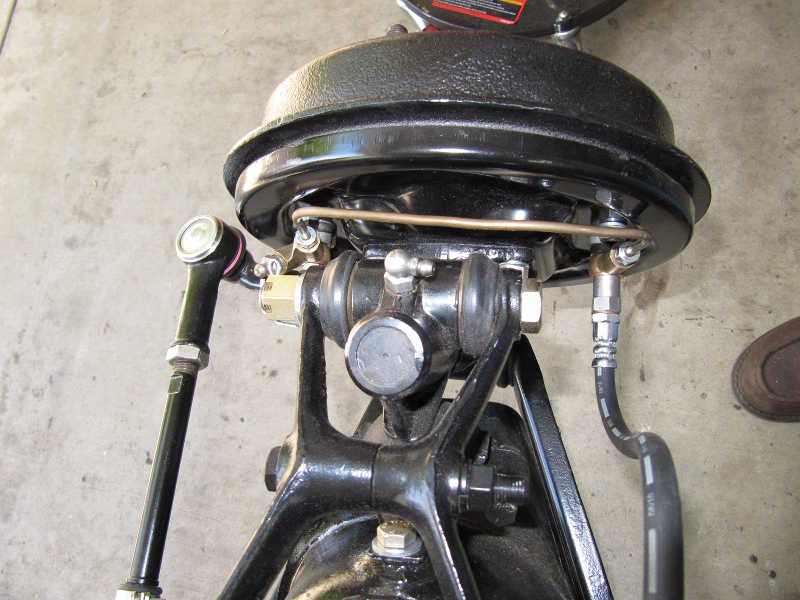
The car obviously had a recent, complete brake job. The brakes were nearly new; it was hard to see any wear at all in the linings. The cylinders also were new, as the outsides were clean and the internals pristine. Fortunately, I didn't have to replace or rebuild them. The flexible brake lines were still functioning but were ready for replacement. I also replaced the hard brake lines, as they were really due for it. The tubing wasn't bad, as much of it was embalmed in greasy dirt, but the fittings were starting to rust. Amazingly, I was able to get new BSF-threaded fittings from Fedhill, and, fortunately, the car uses standard, 45-degree double flares and 3/16-inch tubing.
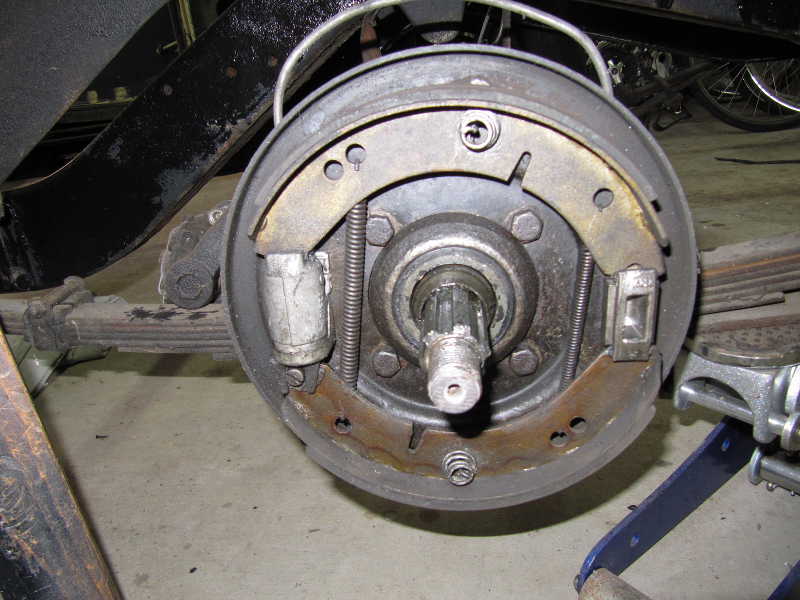
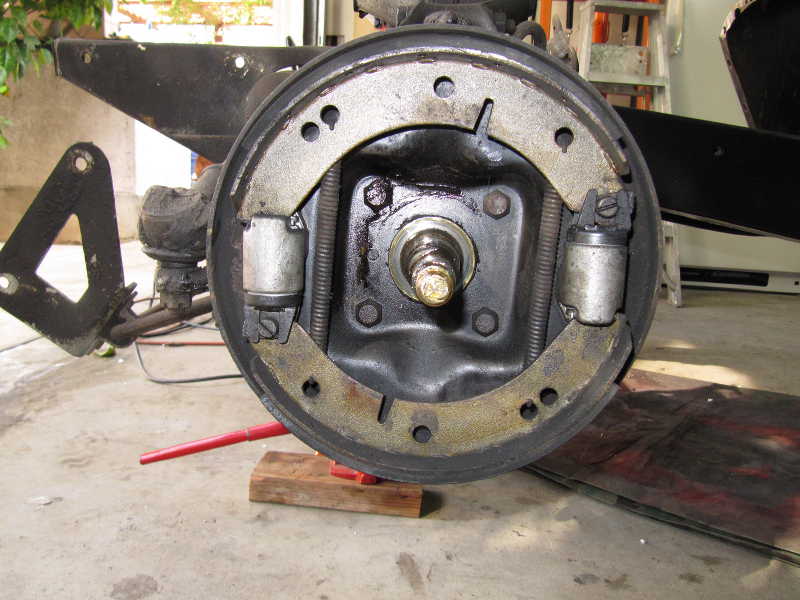
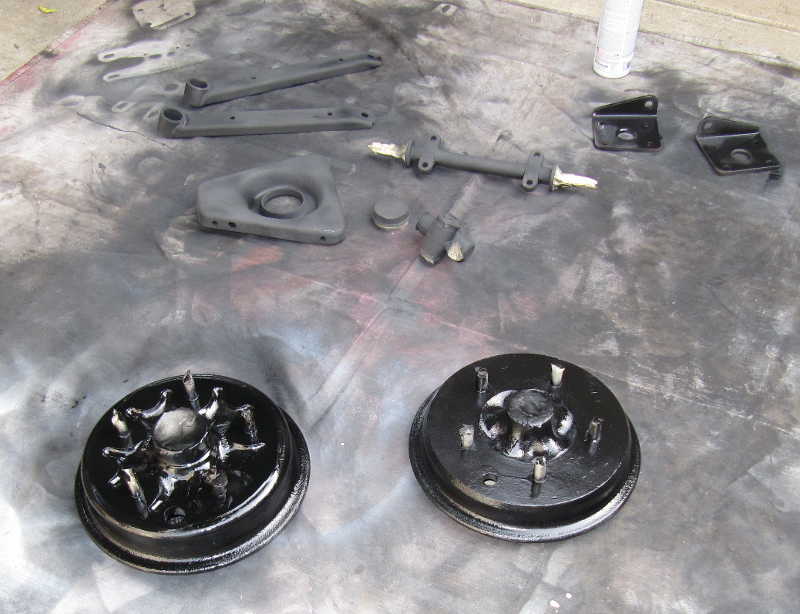
I repainted, replated, or cleaned all the brake parts, as appropriate. For the brake drums, I used high-temperature, brake-caliper primer and paint.
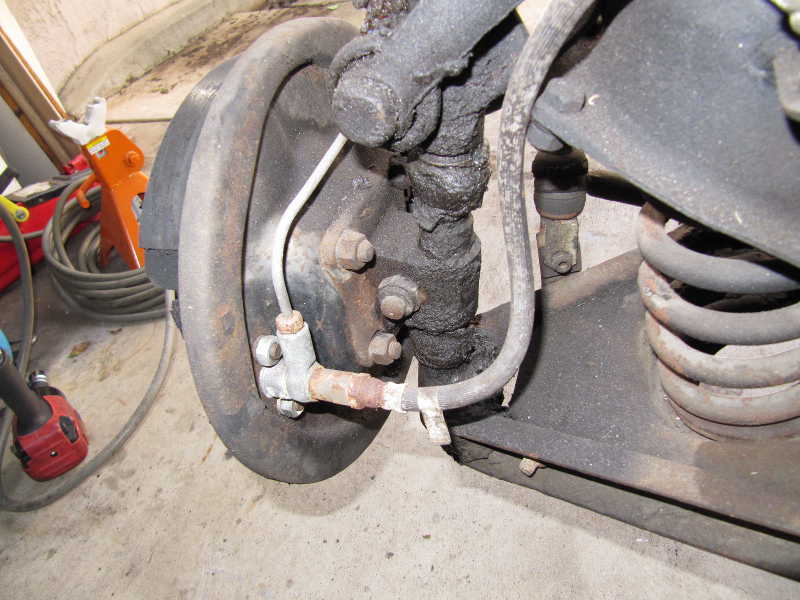
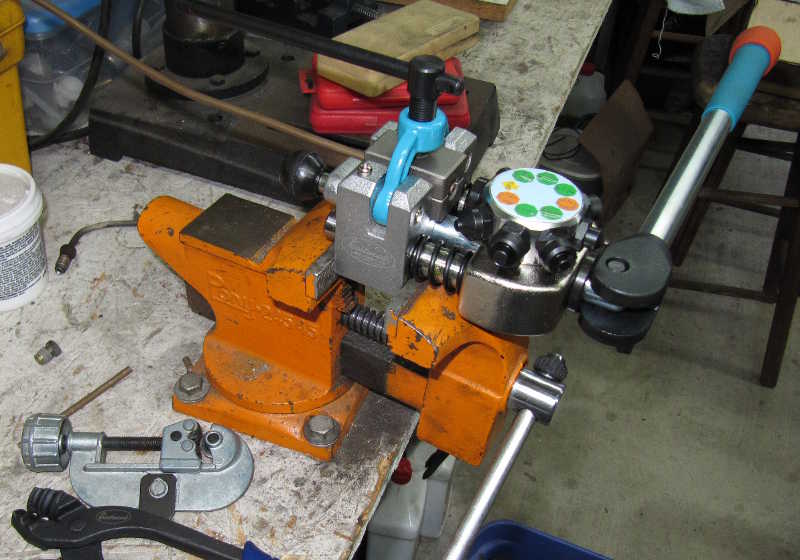
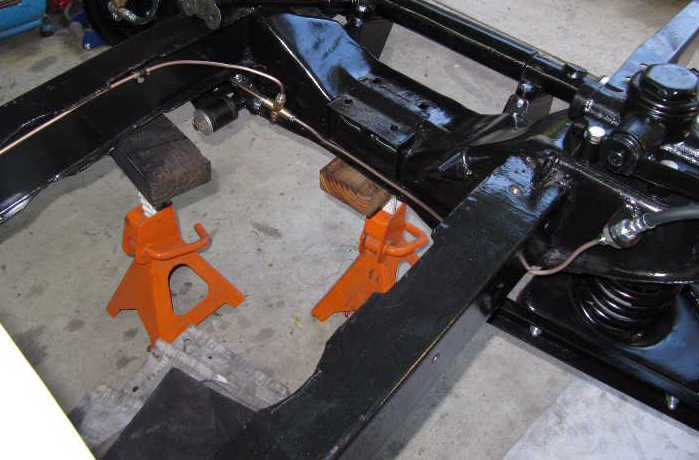
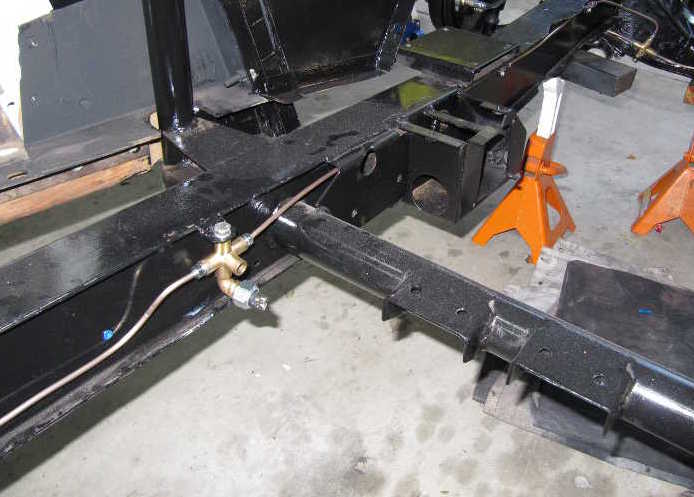
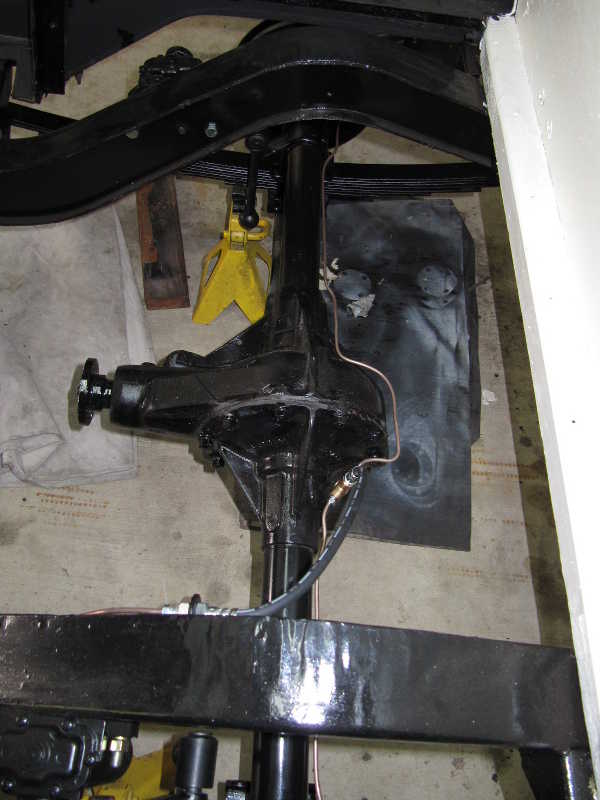
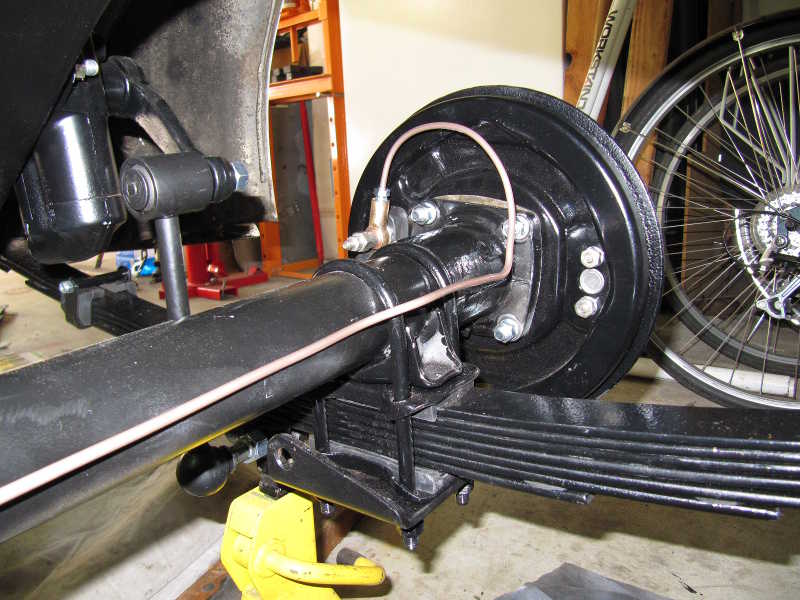
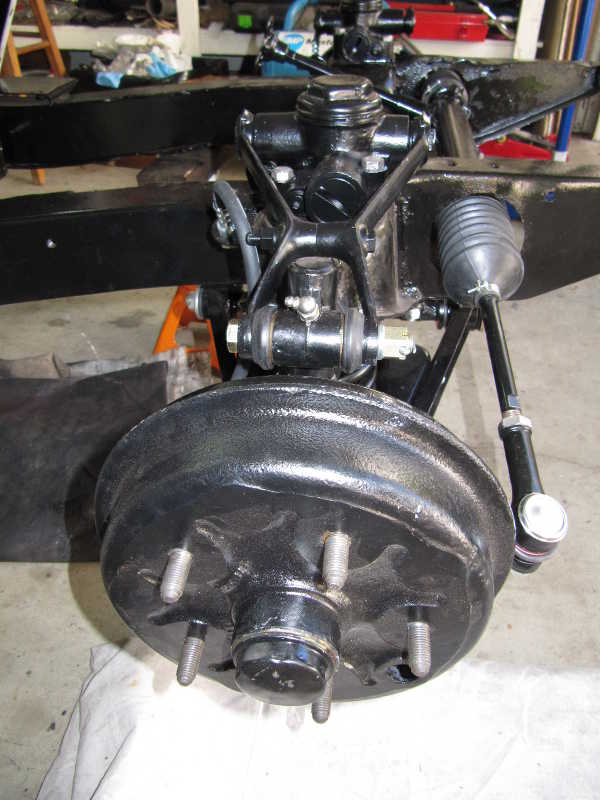
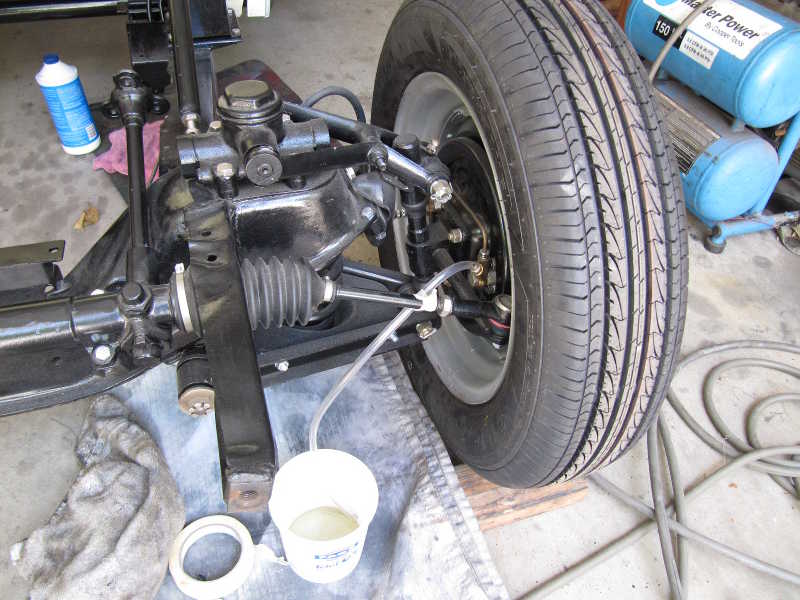
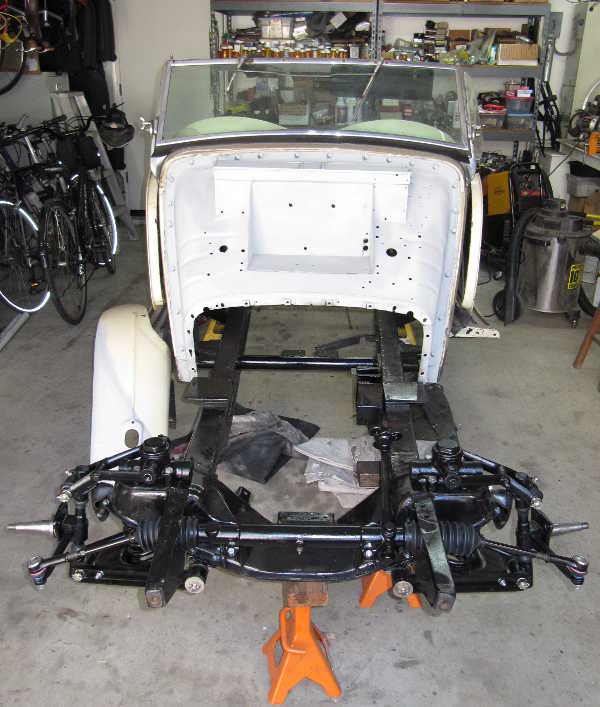
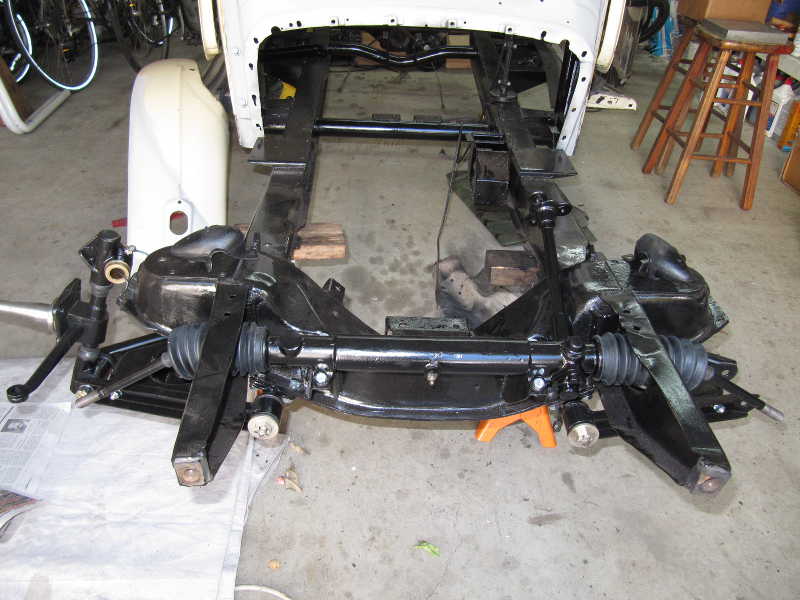
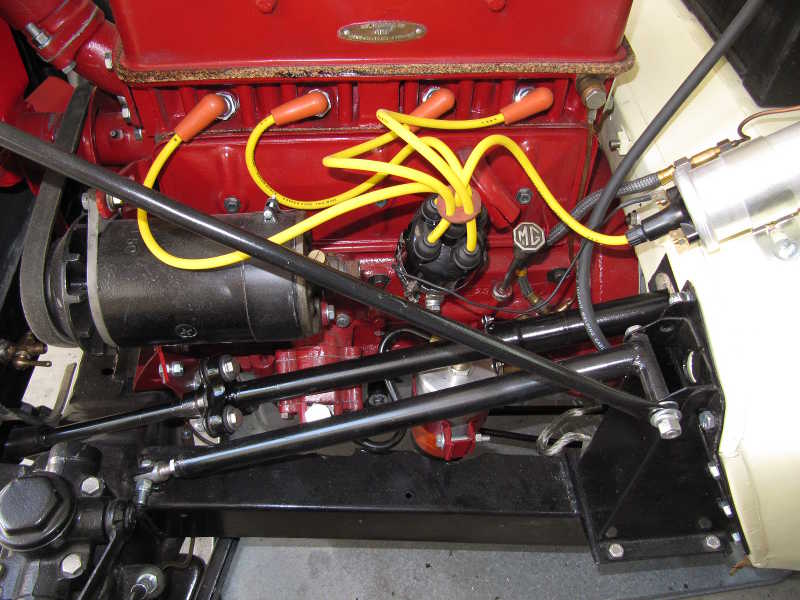
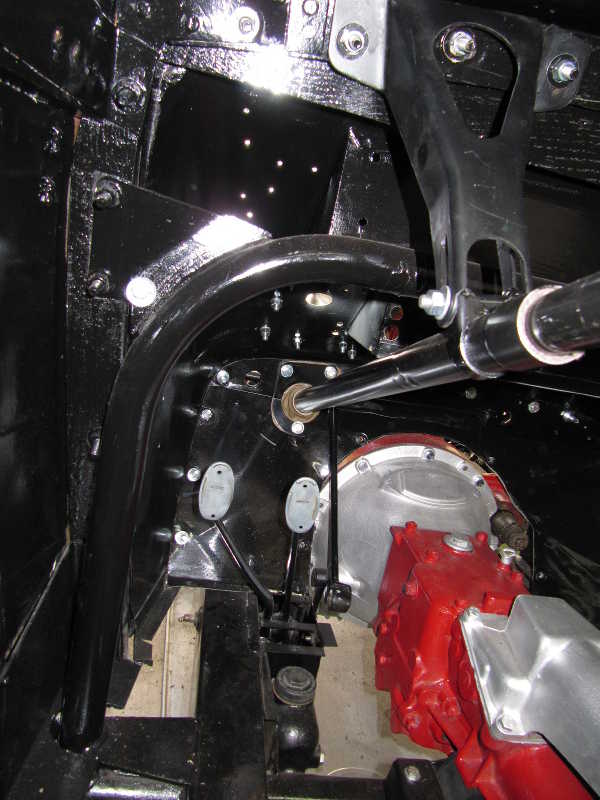
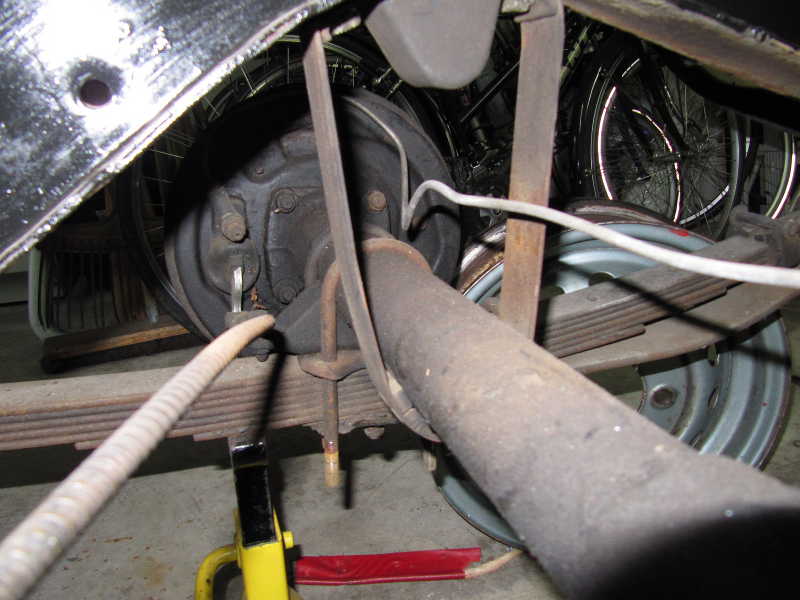
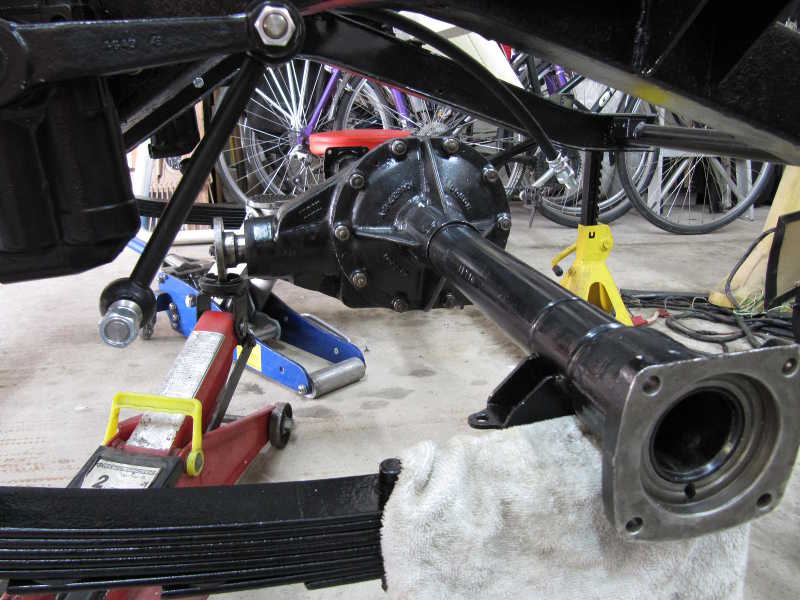
I replaced the hydraulic lines on the brake backplates and ran new brake lines along the frame. The brake lines are Cunifer, a copper-nickel-steel alloy that is US DOT approved. It's more expensive than ordinary steel line but much more flexible and easier to work with. I used the Eastwood flaring tool, which was easy to use and made really nice flares. At this point, the suspension, steering, frame, brake backplates, and so on have been restored. See the Front Suspension section below for more about that.
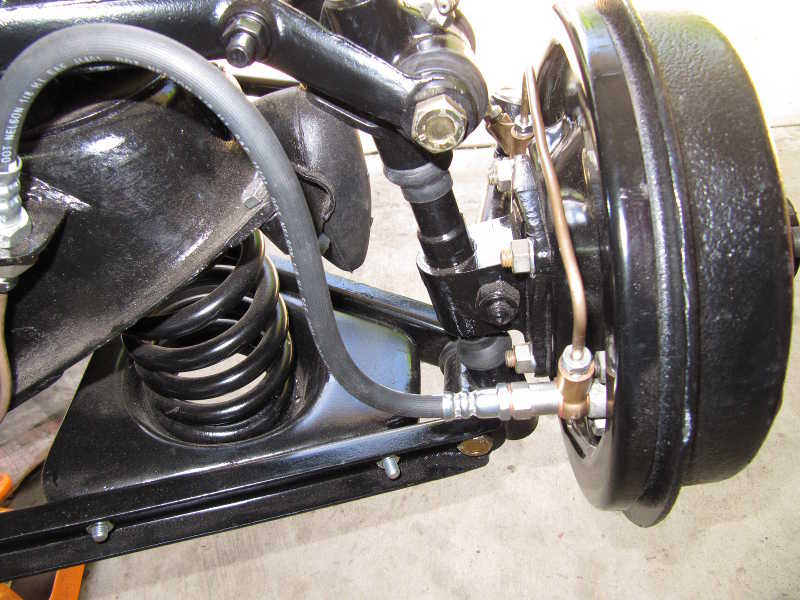
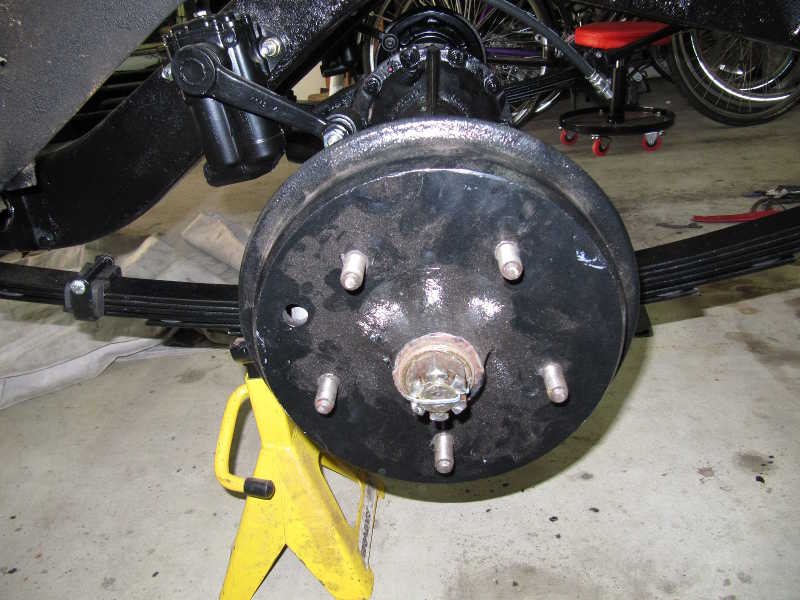
Reinstalling the front and rear brakes was straightforward. The hard work is the cleaning and restoration; reassembly usually goes smoothly and is much more enjoyable.

The drums sat on the shelf awhile, so they were a little dusty.
I think this was the first time I'd ever filled and bled a completely dry brake system. Getting all the air out required going through the process twice, tapping the wheel cylinders with a large wrench and waiting 15 minutes between each effort so the bubbles would rise to the top. I didn't find a single leak--a good testimonial for the Eastwood flaring tool. Of course, bleeding the brakes is much easier before the engine and interior are installed; this was the first time I'd ever been able to reach the rear brake bleeders and the brake pedal simultaneously!
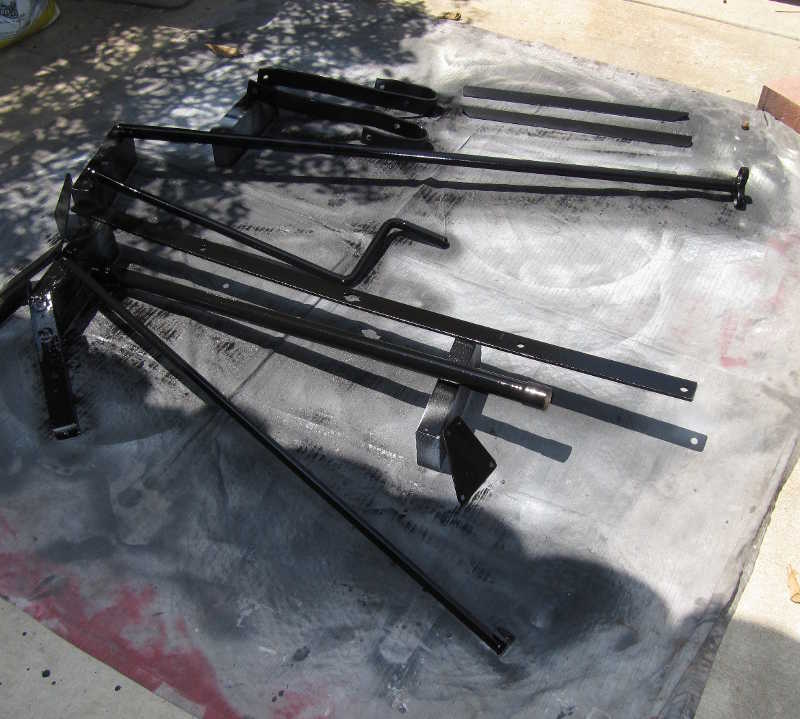
I completely rebuilt the suspension, front and rear. Perhaps not all the parts needed to be replaced, but by time you buy a bunch of them, you might as well get the rebuild kit and do the entire job.
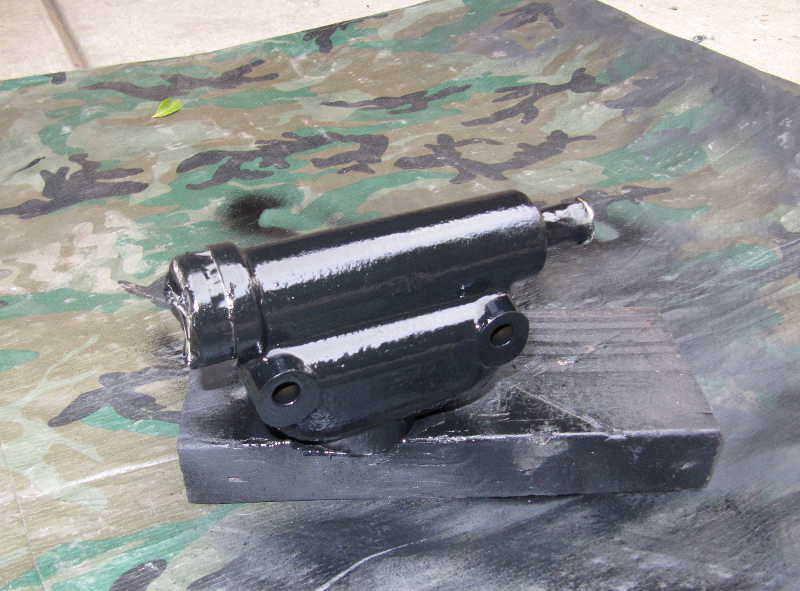
As it happened, the front shocks were defective. Although the rears seemed OK, it's good to renew all of them together and have uniform performance. I sent the whole lot, front and rear, to World Wide Auto Parts for restoration. After driving the car, I'm impressed by the job they did.
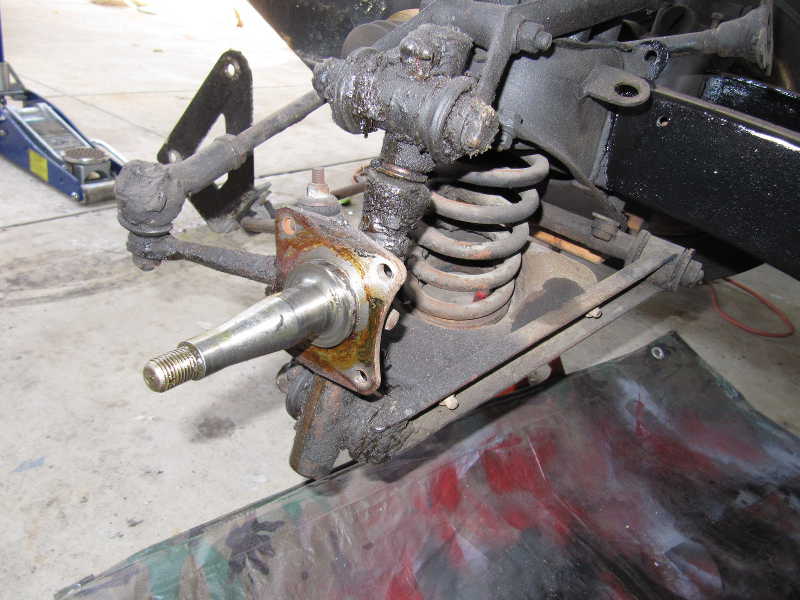
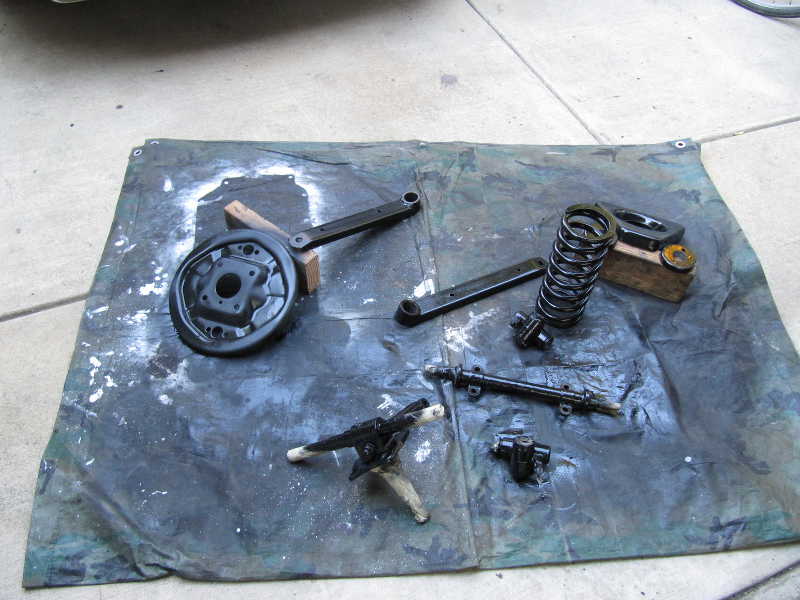
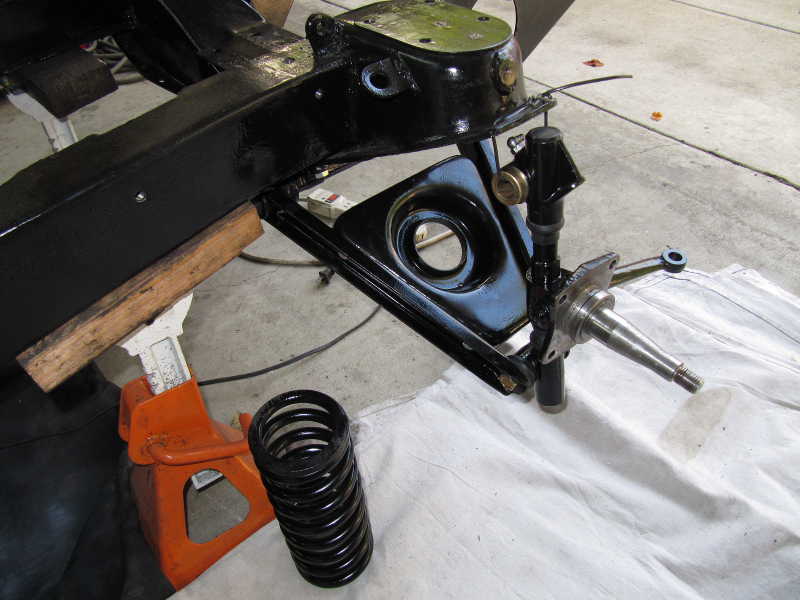
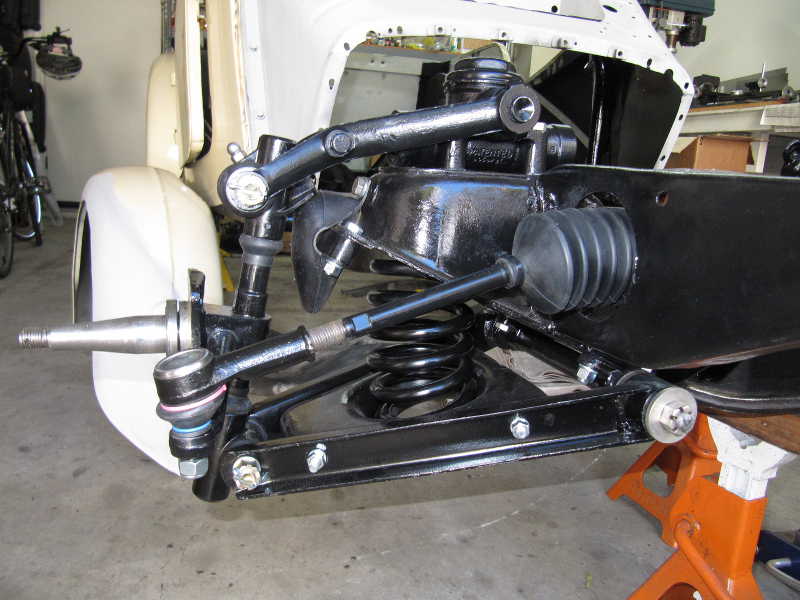
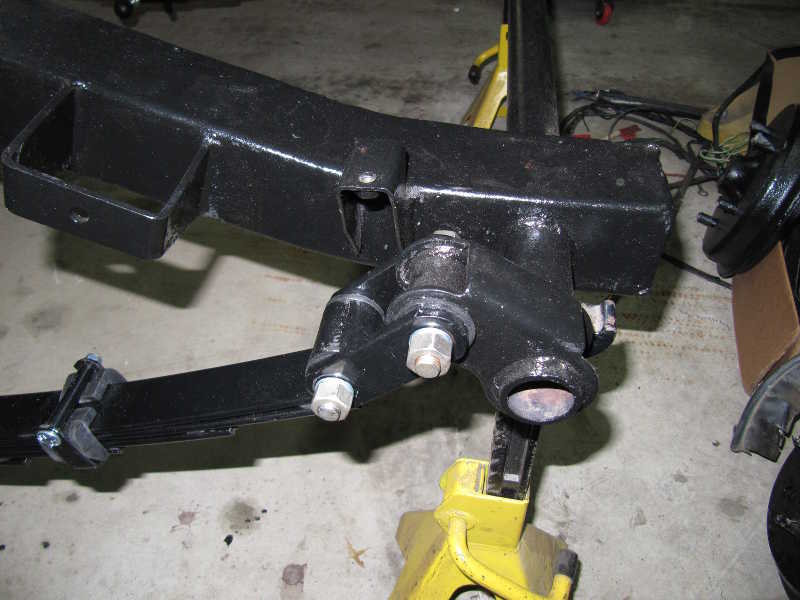
The front suspension was covered with crud; disassembling and cleaning it was a messy job. With the front suspension removed, I was able to repaint the front yoke. Pictures of the repainted front yoke are in the frame section.
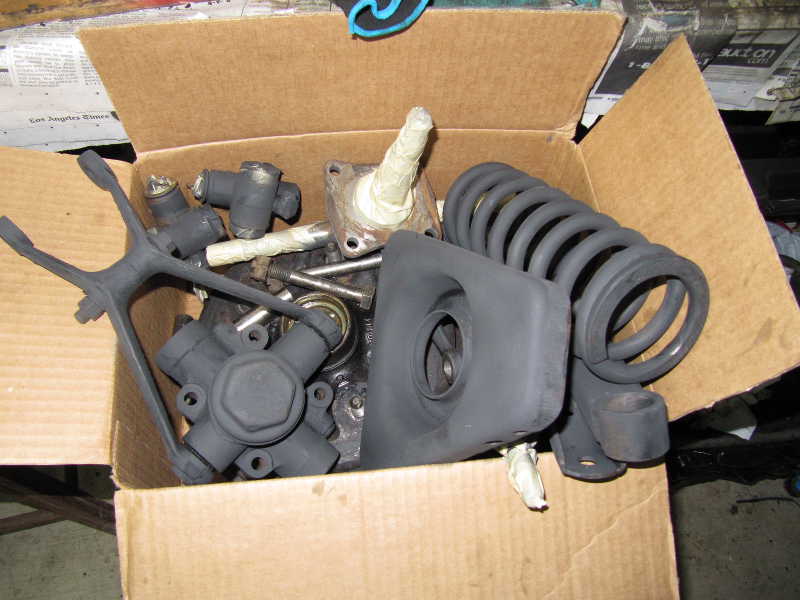
The pieces, as you can see above, were pretty dirty. It took quite a lot of tedious work to get them clean; the spring alone nearly drove me nuts! I primed the parts with dark gray primer, then painted a few days later with gloss black paint. The pieces of the left front suspension filled a good-sized box. (In the picture below, they were only primed, not painted.)
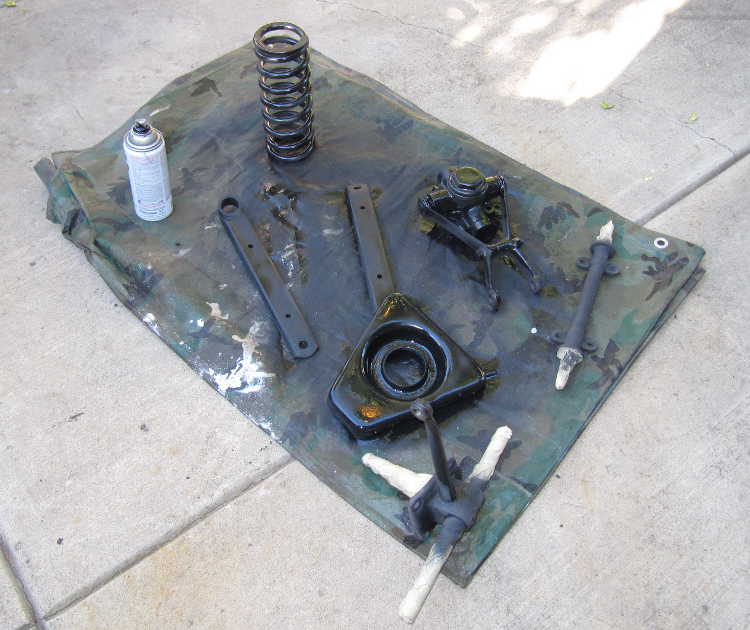
With everything painted, I started putting the front suspension back together. The suspension rebuild kit, a product of Moss Motors, was not satisfactory. The hardware was UNF, not BSF; I didn't have a problem with that, since I planned to replace a lot of BSF hardware with UNF anyway. But, incredibly, the castle nuts for the fulcrum pin were UNF threaded, while the mating threads on the original pin were BSF. For no apparent (or good) reason, the kit did not include new fulcrum-pin washers. The pressed-in journals for the pivots were also 8-9 mils too small in diameter. Perhaps it was expected that the installer would ream these out, but if so, there was no information or instructions about this with the kit. If that's the intention, it really should be stated; most people do not have the tooling, and, in any case, it should not be necessary. Fortunately, most of the old parts were in good condition; only one journal was a little loose, having about 5 mils of slop, so I replaced it and reamed it successfully. I replated the old BSF castle nuts and reused them.
Wire supported the upper king-pin pivots until my shocks were returned.
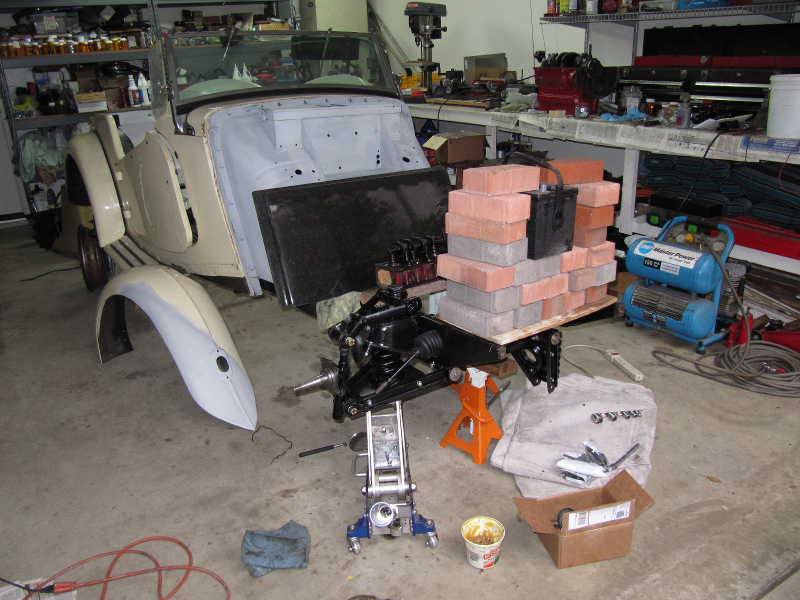
The shocks came back a couple weeks later, so I set to work installing them and putting the front suspension back together. I thought I might have a problem installing the springs, and I did. Without the engine, the front of the car was so light that it wouldn't compress the springs enough to assemble the parts. There's no simple way to use a spring compressor, so I had to add weight to the car. It's a little funny--I used a large pile of bricks, the battery, the cylinder head, and two marble slabs that were taking up space in the garage. That was enough, though, for me to get the right front suspension together. I just hope that we don't have an earthquake before I get to the left front.
The rest of the front suspension went in without any great difficulty. The only things missing, in these pictures, are the locknuts for the tie-rod ends. On disassembly, I told myself sternly that I'd better not lose them, then promptly misplaced them. (I found them later.) Tightening the nuts for the A-arm bushings had to wait until full weight was on the suspension.
Sometime after finishing the front suspension, I noticed that one of the king-pin grease seals had split. To replace it, I had to buy an entire set of suspension seals; a single seal was not available. I then had to disassemble the front suspension much more than you might think. When I put it back together, I replaced the brake bleeders, which were old and beat up. Fortunately, I had a pair of new BSF bleeders in my parts stash.

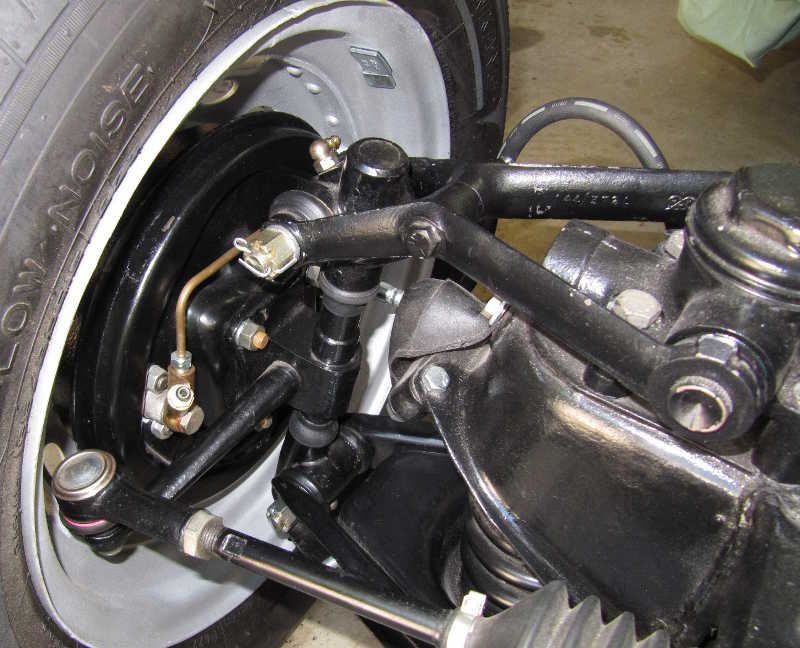
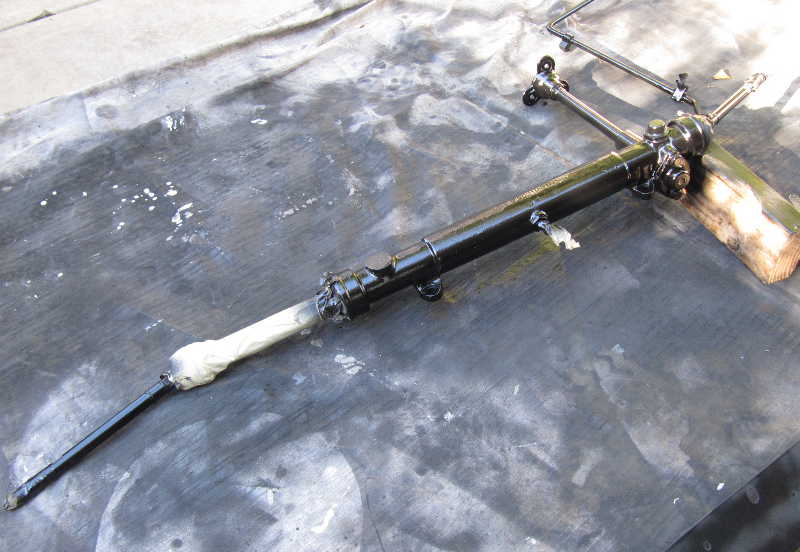
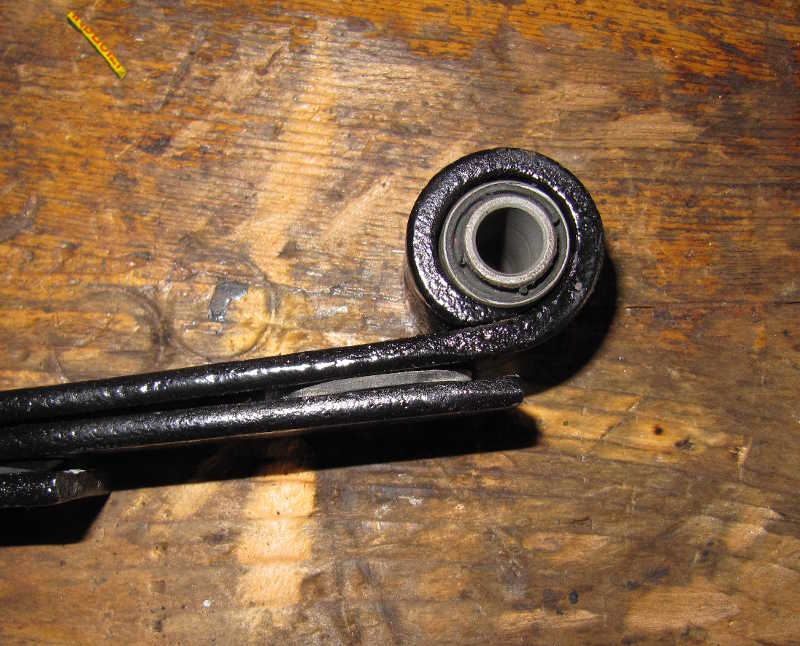
The steering rack was in good mechanical shape, but, like everything else, covered with greasy crud. The tie-rod joints were tight and the rack itself showed little wear, so I decided not to disassemble it and instead just refinished it. The usual procedure: clean in solvent, wire brush, paint with gloss black. I did buy new tie-rod ends, however, so the steering will be as tight as possible. I installed new boots, more for cosmetic than practical reasons, as the old ones were intact but dull looking. I then lubed it and installed it on the car, along with new tie-rod ends.
The rack is lubricated with gear oil, not grease. It's easy to lube it while the rack is off the car. Lubing it later is a problem, however, as it has a grease nipple, but most grease guns will not hold gear oil. It's possible to modify a gun to work, but I don't have to worry about that for now.
I finally found the bag with the tie-rod locknut and the boot clamps, which I had mislaid. I replated and installed them.
The steering column was in decent condition, but it needed clean-up and paint. I wire-brushed all the paint off the steering shaft and column and repainted them, along with some seat and bumper parts.
I installed the steering column along with new felt bushings and a leather "fume excluder" at the point where the column goes through the scuttle. The room in the footwell is getting smaller and smaller...
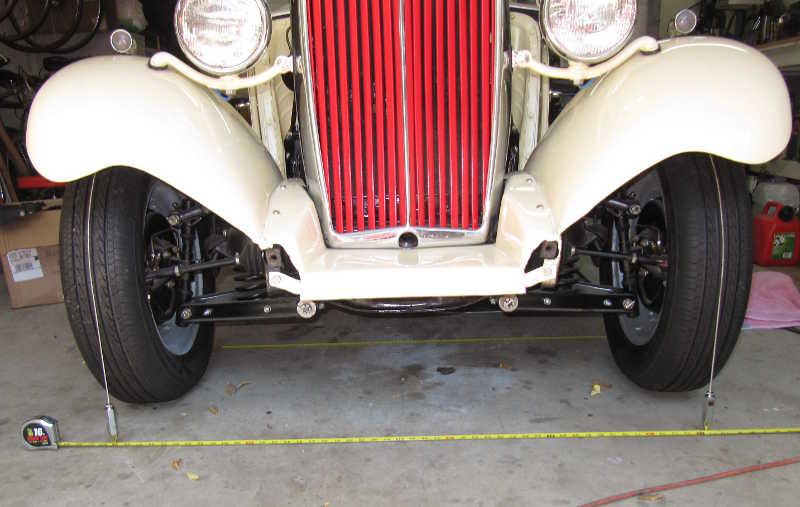
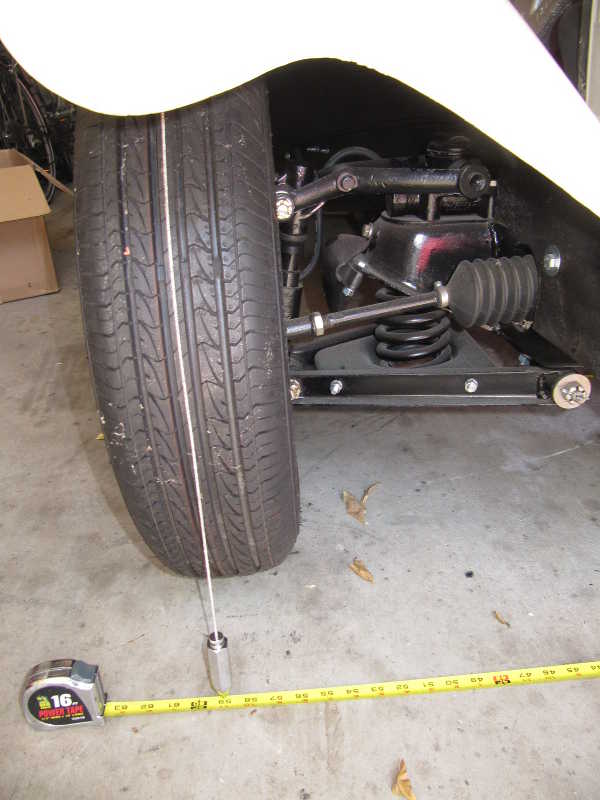
Wheel alignment had to wait until the engine and interior were in place. Correct alignment requires that the suspension be at its normal height, which, in turn, requires full weight on it. The TD's caster and camber are not adjustable, only the toe-in. I adjust the toe-in with plumb bobs and a pair of tape measures; I hang the plumb bobs over the tires and measure the distances between them with the tape measures. To do this accurately, the floor under the car must be flat. My garage floor is adequately flat, checked a number of ways. Tires with a thin, straight tread groove are also necessary; most tires have one.
This may seem like a redneck approach to alignment, but it does indeed work very nicely; I can adjust the toe-in easily within 1/32 inch. I've used this method with my Porsche, as well, with good results.
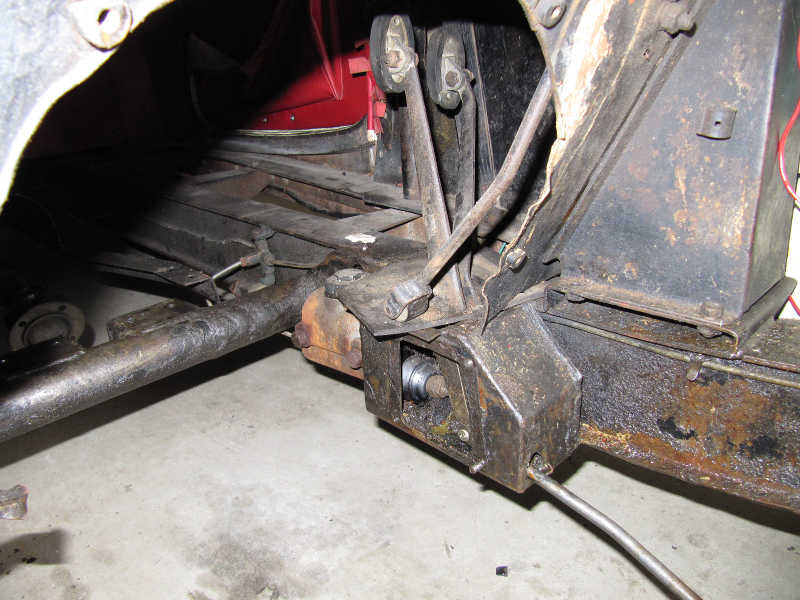
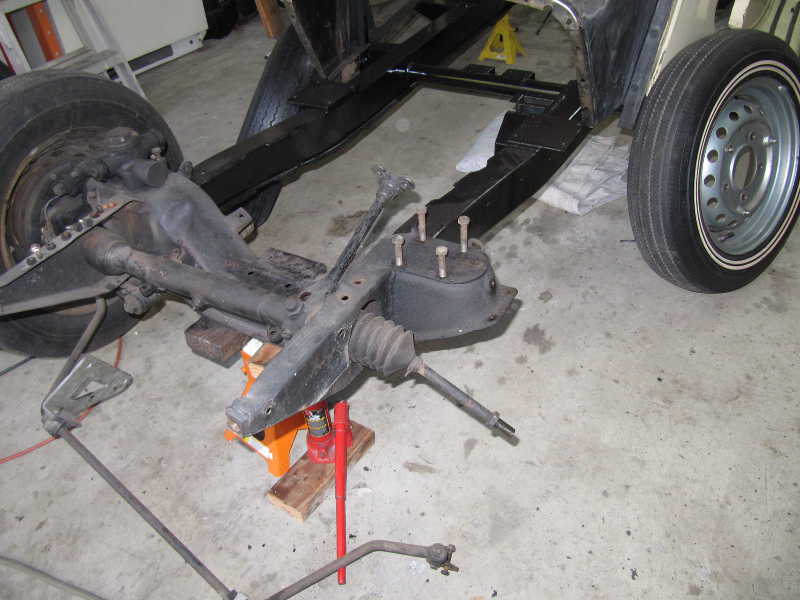
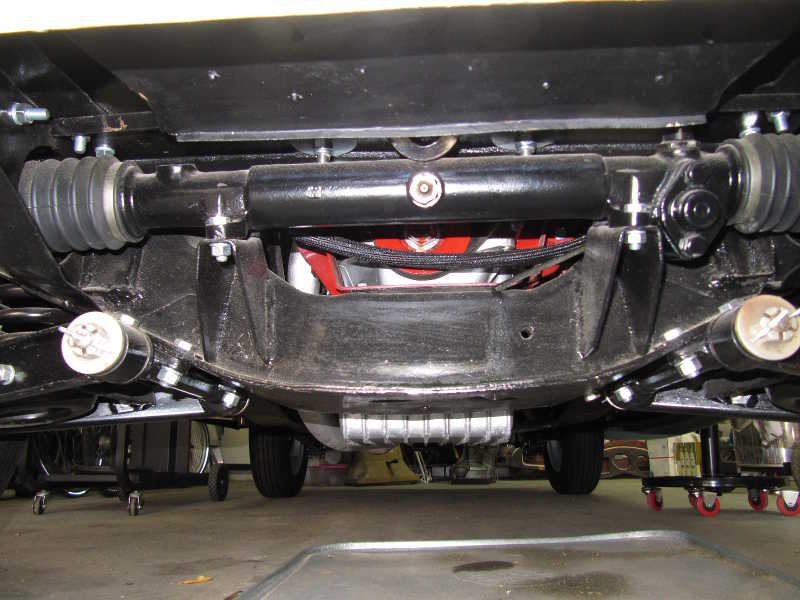
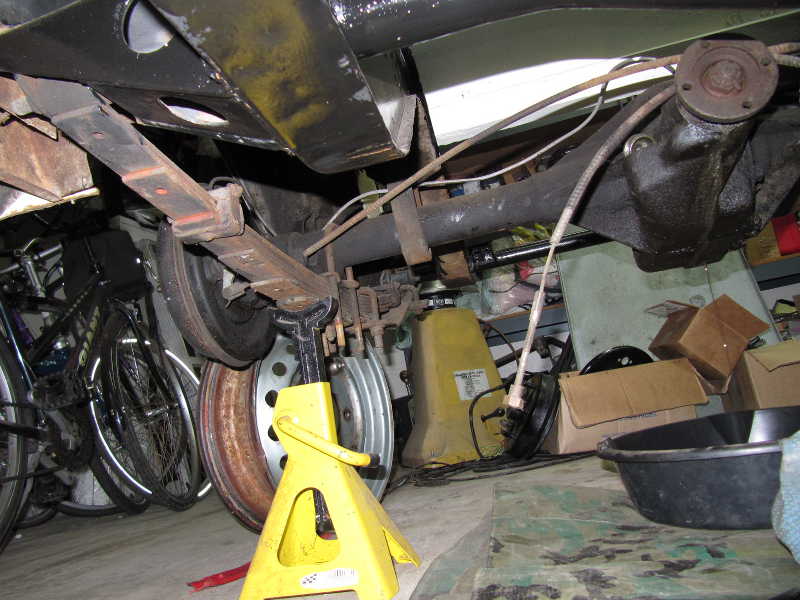
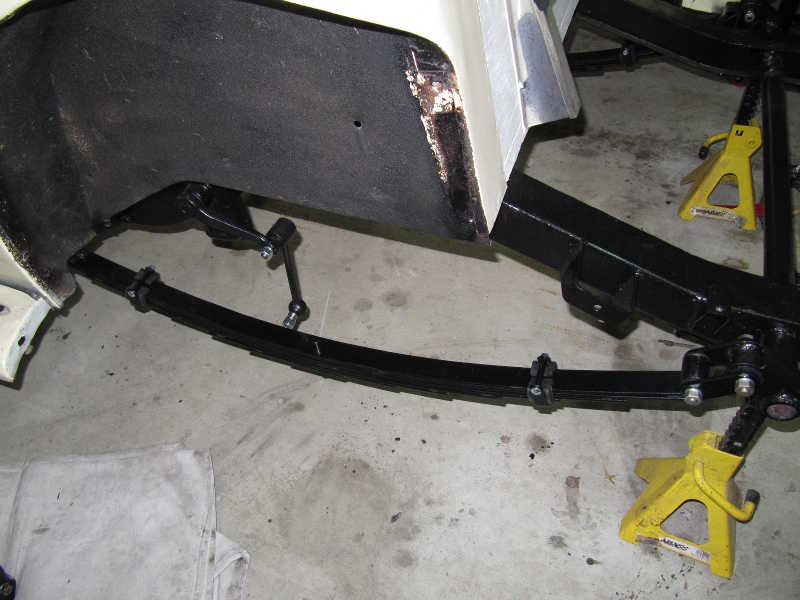
The rear suspension was not as ugly as the front, but it still needed help. I replaced the bushings and other rubber bits, and restored and painted the springs. Once the suspension was removed, I painted parts of the frame that were inaccessible with the springs in place.
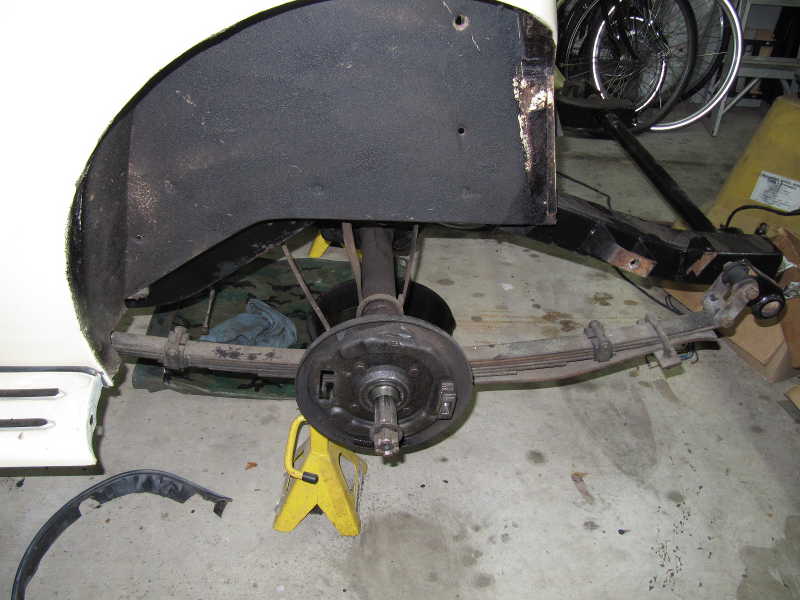
The rear Armstrong shocks were probably original. Although they seemed OK, I had them rebuilt, along with the front ones, so all four would be uniform and in perfect condition. The links were quite worn. I had to cut them free from the plate to which they were attached, so obviously I had to replace the links.
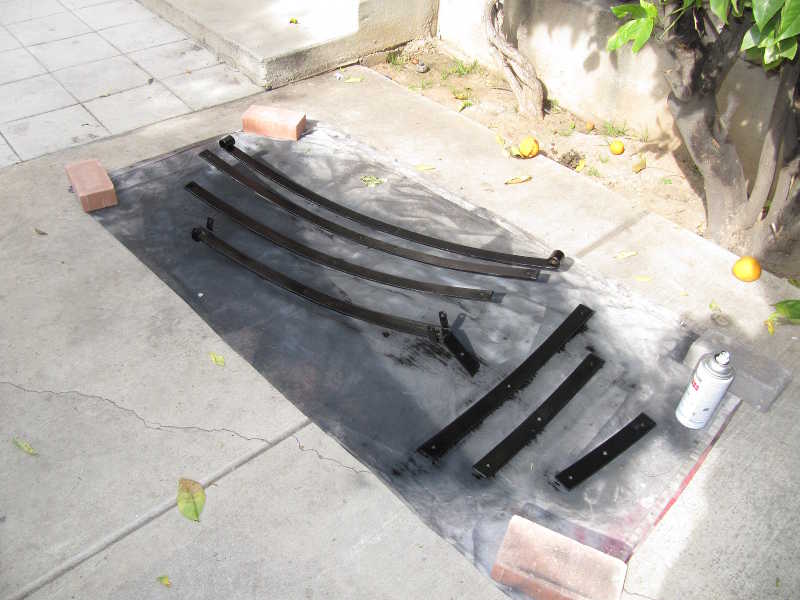
Removing and disassembling the springs was not difficult. They clearly needed restoration; all the bushings and other rubber pieces were shot, and they had a lot of superficial rust. At some point, someone added a stiffener, which I did not reinstall.
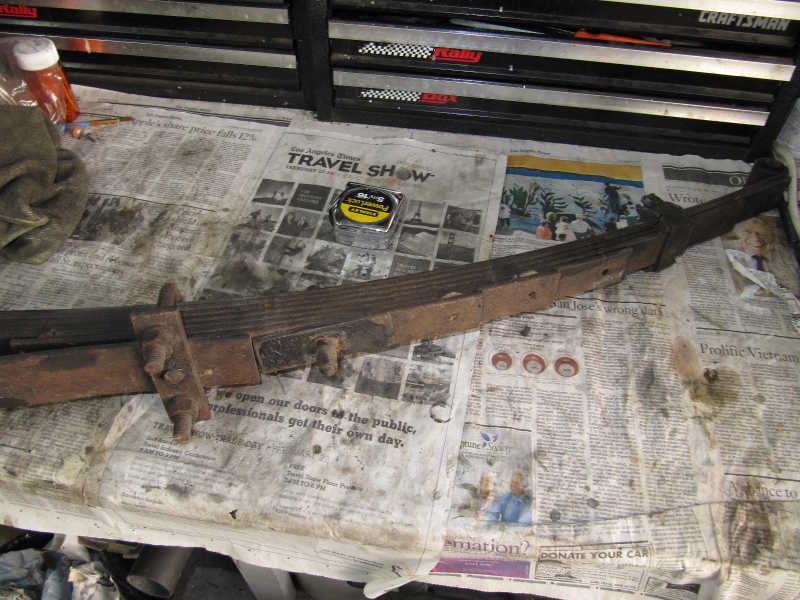
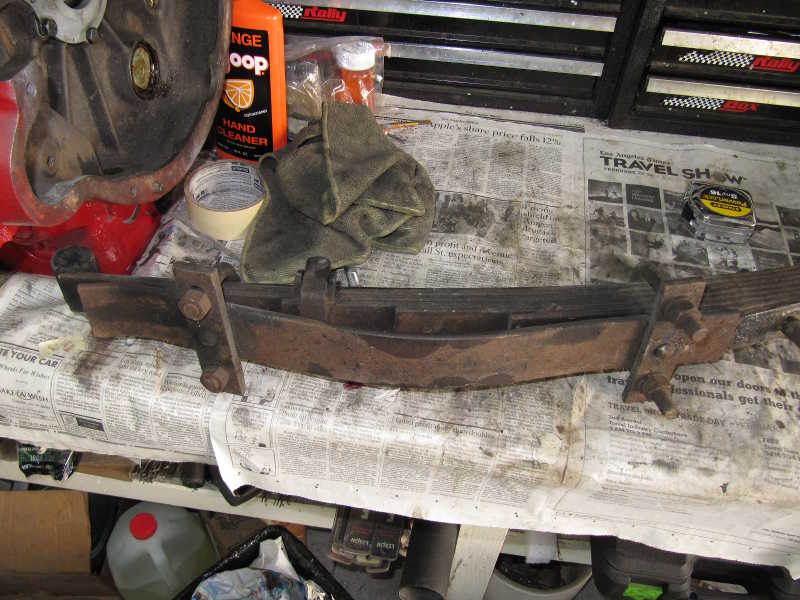
When the springs were completely disassembled, the usual procedure: wash in solvent to remove any oil or grease, rotary wire brush to remove rust and remaining bits of rubber pieces, prime, and paint. Since the leaves were flat, cleaning them with the wire brush went quickly. Once painted, they went back together with replated hardware and new rubber parts. It's important to note that the springs are not symmetrical; the part between the center bolt and the rear is a couple inches longer than the front. All the leaves except the shortest, bottom one are similarly asymmetrical, and this must be taken into account when the springs are reassembled.
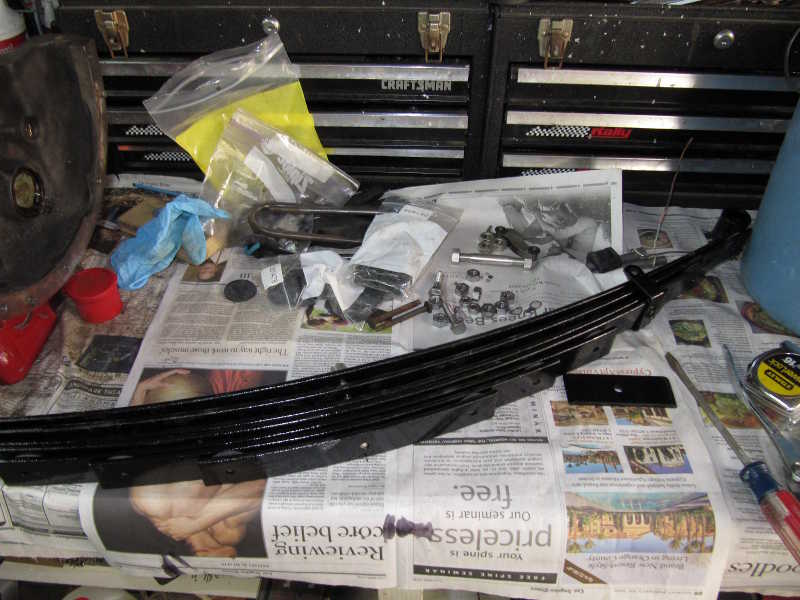
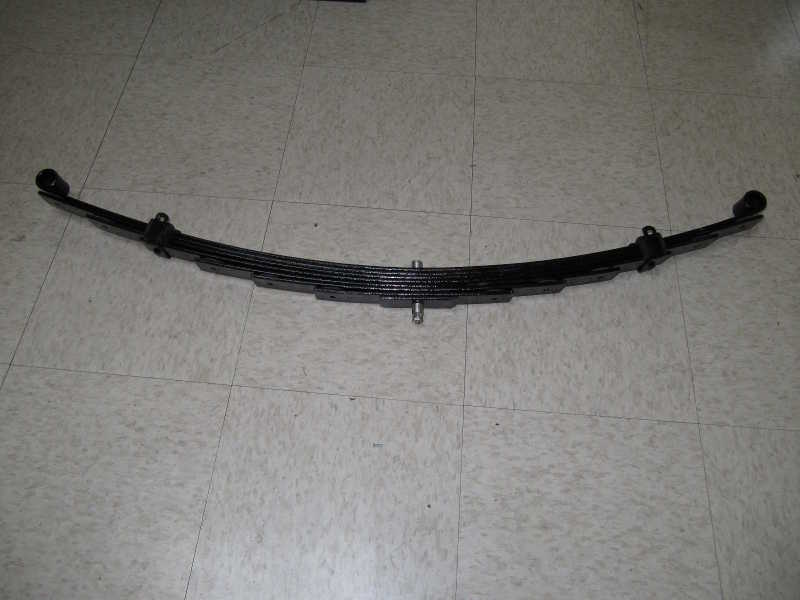
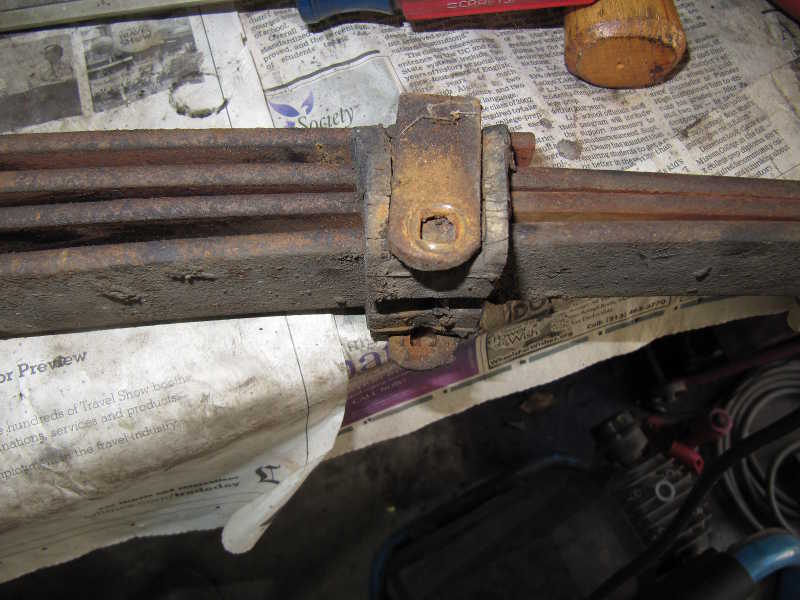
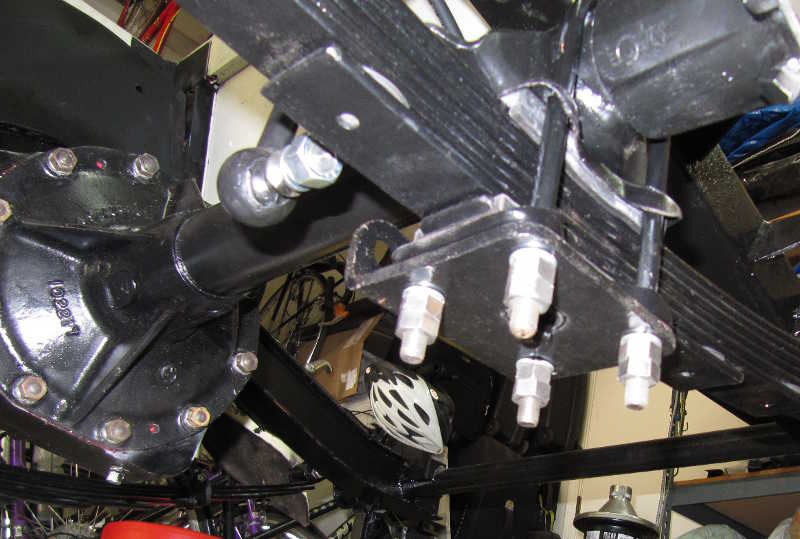
I installed new bushings and the springs. The one in the first picture below is the front bushing; it is pressed into the spring. The rear bushings are rubber pieces that are compressed and locked into place as the mounting bolts are tightened. The bolts for all the bushings can't be tightened until the bushings have full weight on them and are therefore in their permanent positions. This is a standard consideration in all types of cars using rubber bushings; there should be no stress on the rubber when the bushing is in its rest position.
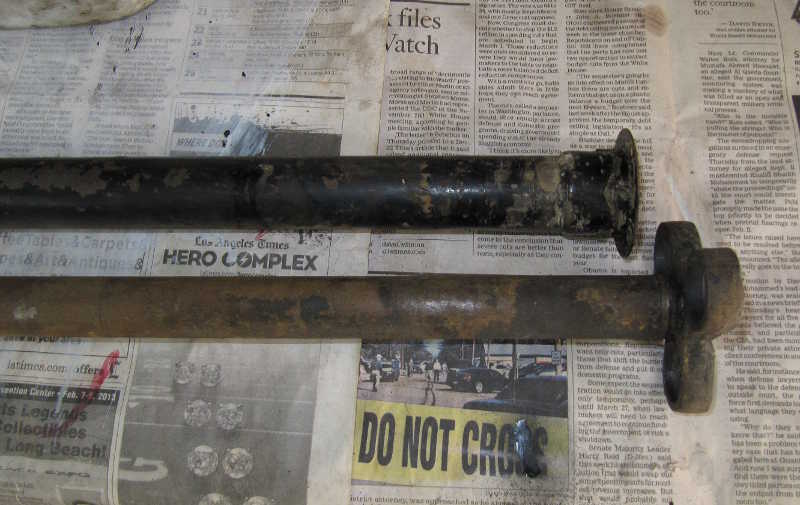
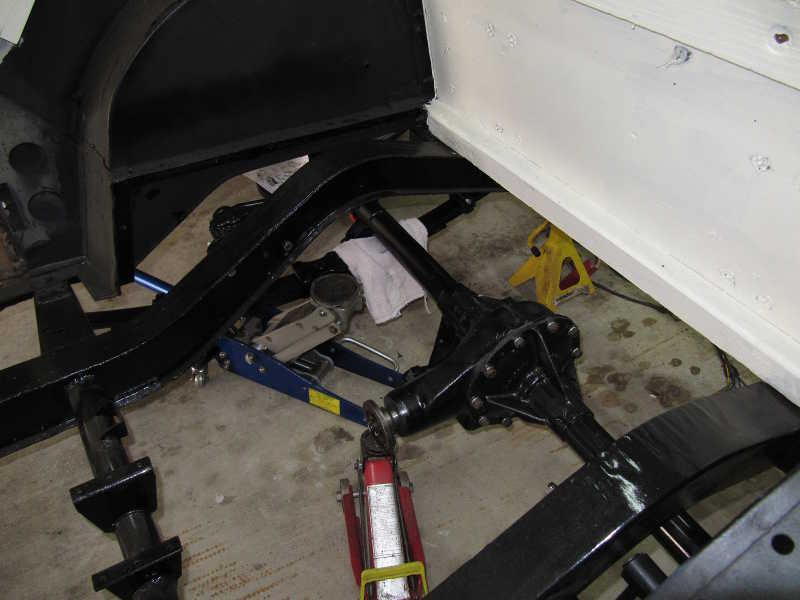
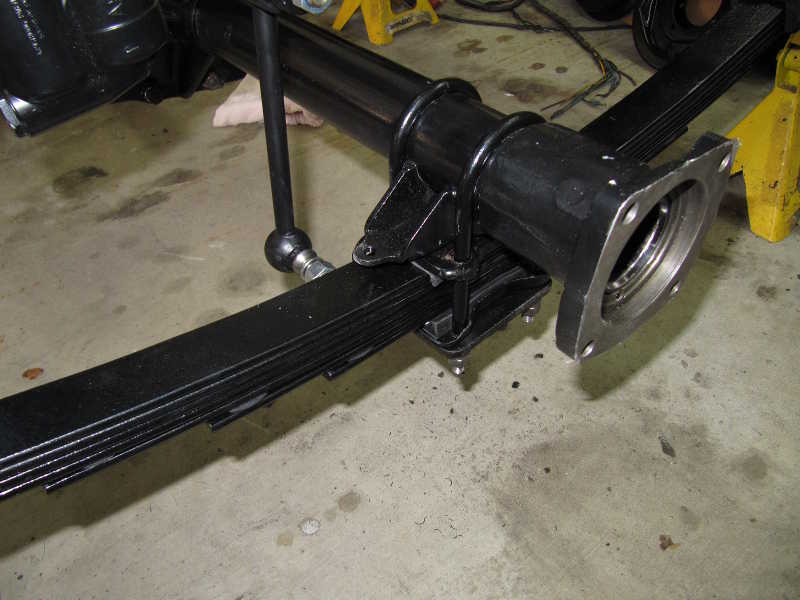
The rear axle was repaired and restored. (The description is in the Engine and Drive Train page.) Reinstalling the rear axle was a little tricky; it was heavy and I had difficulty getting enough leverage for lifting. I used two jacks to raise it into position. I set one end of the axle housing on a spring and slid it sideways to provide clearance for other end. I then raised that second end with a jack and slid it into position. I placed old towels between the axle housing and spring to prevent scratching. To keep the weight as low as possible, I left the axles out and installed them after the rear axle housing was bolted into place.
For the same reason as the spring bushings, I didn't attach the shock links until there was full (or almost full) weight on the suspension. Also, to prevent damage to the shocks, it's probably wise not to connect the links until the limit straps are in place.
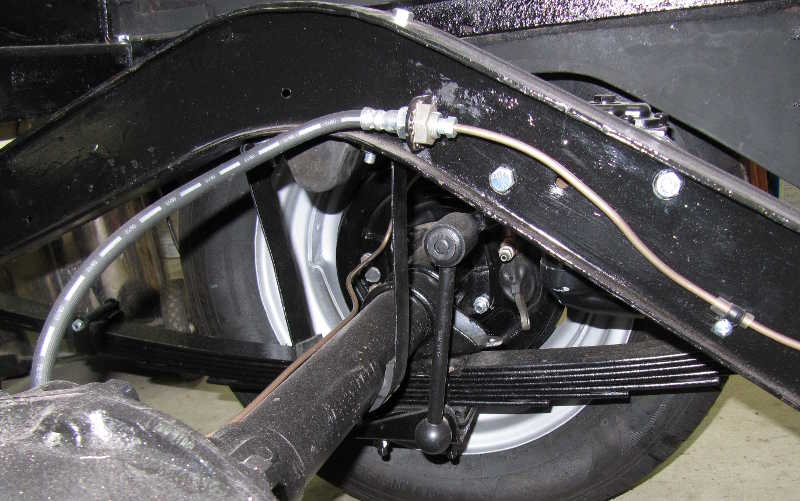
Here it is finished. The wheels and tires are on, the shocks and limit straps are hooked up, and the new brake lines are in place. This picture shows no gap between the limit strap and the rear axle; this is normal, for now. When there is more weight on the rear suspension, the frame will drop a bit and leave the expected gap. Then I'll give the bushings and shock links a final tightening.
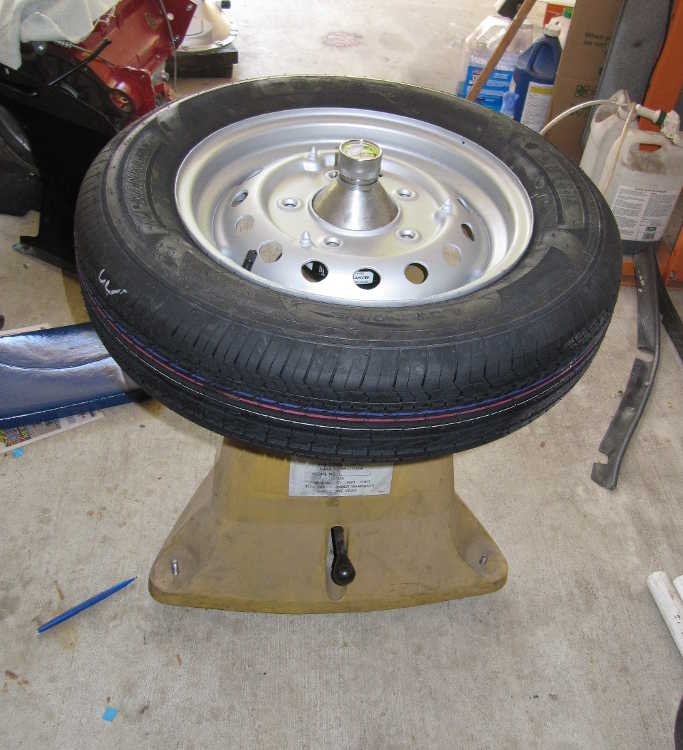
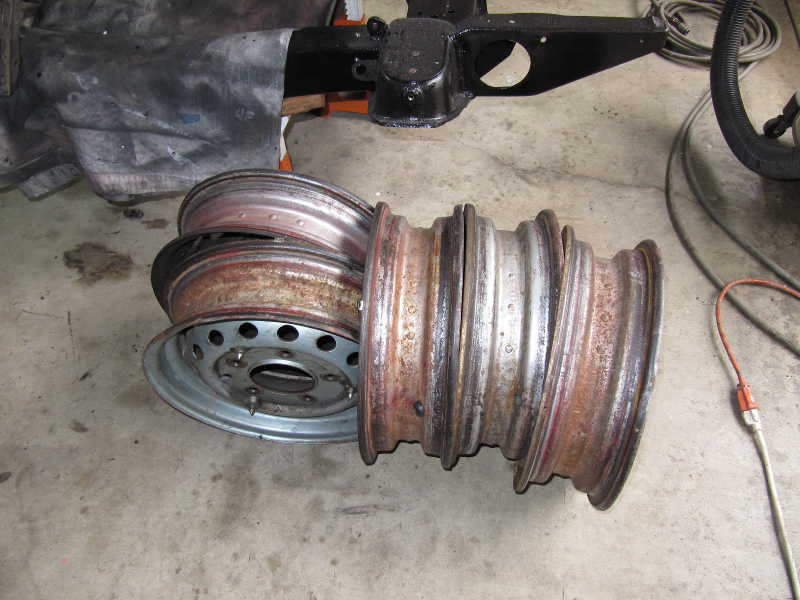
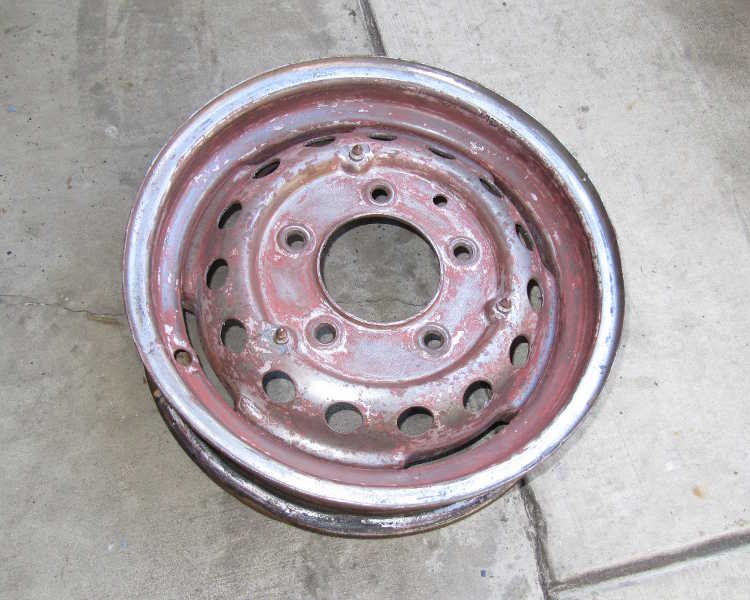
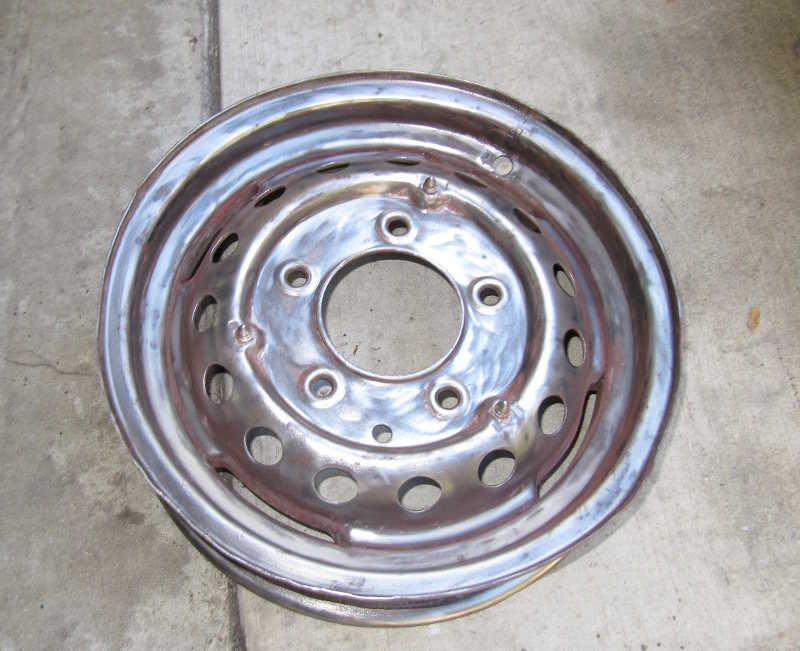
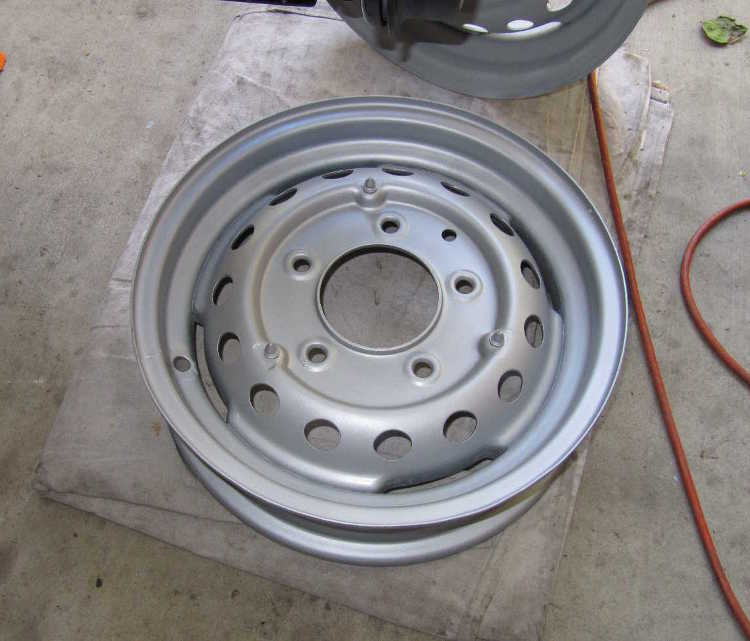
I removed the tires from the wheels. The wheels had surface rust and quite a few rim dings; they badly needed to be stripped and repainted. They had several layers of paint on them. I tried removing the paint with Jasco paint stripper; it removed the later coats of paint quickly but didn't remove most of the original silver paint and red-lead primer. It did soften those layers, however, so a rotary wire brush took them off easily.
Most of the rim dents were easy to fix; I just grabbed the rim with vise-grips and pulled.
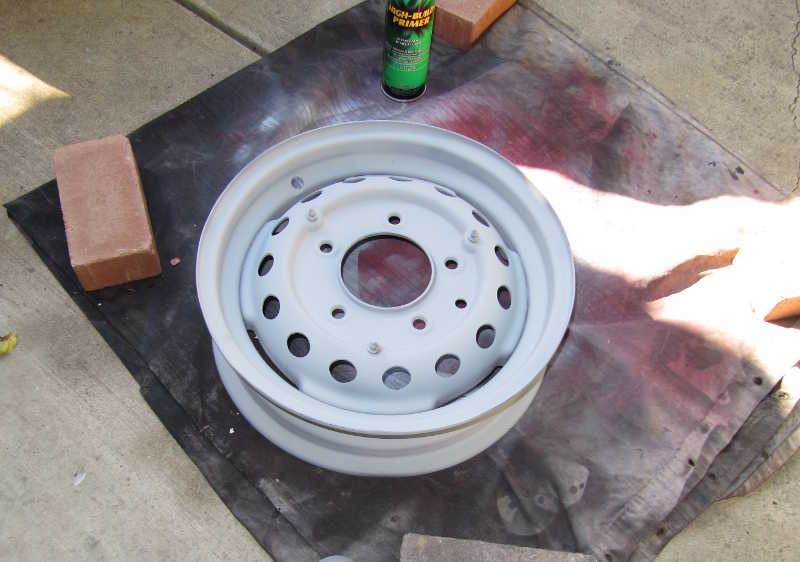
After a little clean-up with a scraper, I gave each wheel a coat of primer. I chose Eastwood "silver argent" wheel paint for the color coat. It's a nearly perfect match to the original color, which I found under the layers of old paint.
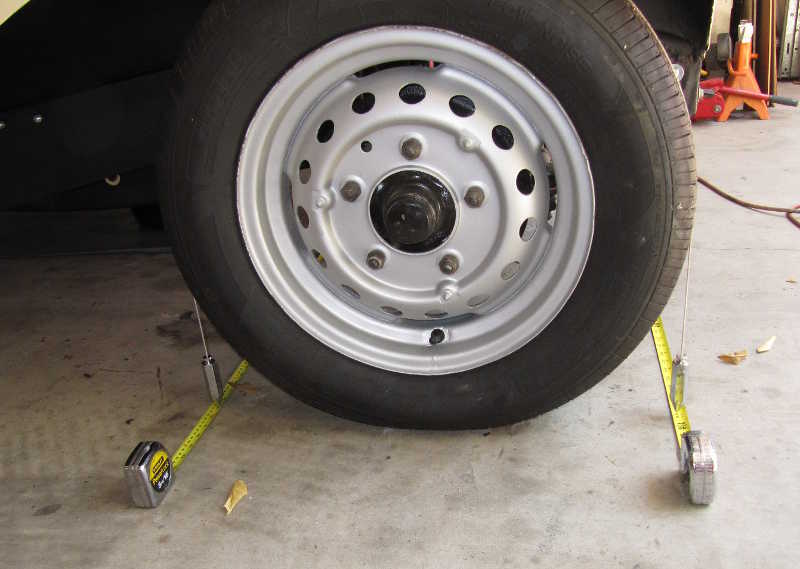
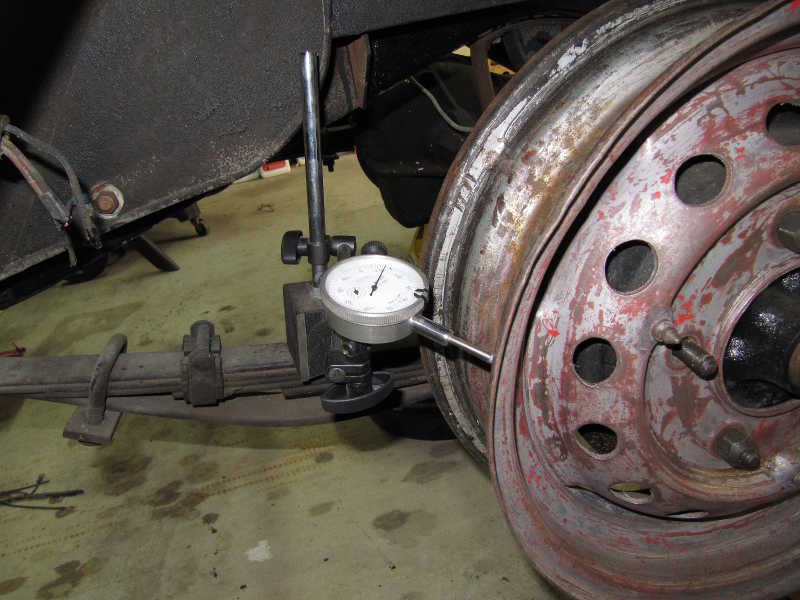
To check the straightness of the wheels, I mounted each one on the right rear hub and checked it with a micrometer. I measured both radial and lateral run-out on both the inner and outer edges. While the wheel was mounted on the hub, I could use my vise-grips and some force to persuade the high and low points of the rim to get back into line. This task was tedious, but it wasn't difficult.
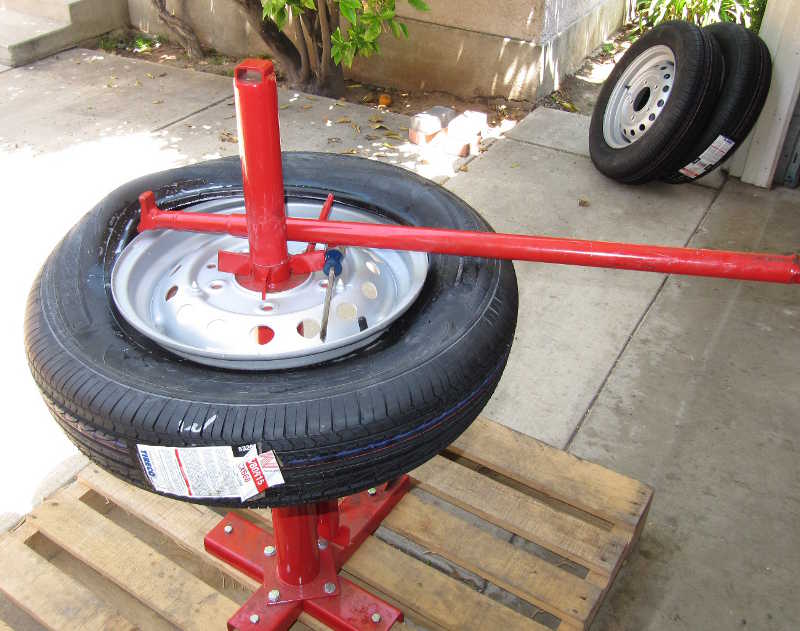
I agonized quite a bit over tires. Period, cross-bias tires are expensive and inferior, but they look much better than modern radial-ply tires. Modern radials, however, are simply superior tires. I eventually decided on a set of five Nankang radials in 165/80-15 size. These have been recommended strongly by many involved with both German and British cars. I used the Harbor Freight tool to install the tires onto the wheels and a professional-quality, Coats static wheel balancer to balance them. Of course, the front wheels needed to be aligned. I did a rough alignment, then the final alignment after the car was almost completely reassembled. The Steering section shows how I did this.